| | MY NEW PROJECT...or two. |  |
|
+6davidjt barriew Tug--Kenny TonyW phil winks Footski 10 posters |
|
| Author | Message |
|---|
Guest
Guest
 |  Subject: Re: MY NEW PROJECT...or two. Subject: Re: MY NEW PROJECT...or two.  Fri Oct 12, 2012 9:45 pm Fri Oct 12, 2012 9:45 pm | |
| it was too wet windy and cold to do anything outdoors today.........so the filler has had chance to cure even more, lol......i'll certainly be using it at some point Phill..........no worries.
neil. |
|
  | |
Guest
Guest
 |  Subject: Re: MY NEW PROJECT...or two. Subject: Re: MY NEW PROJECT...or two.  Tue Oct 16, 2012 1:02 pm Tue Oct 16, 2012 1:02 pm | |
| It seems at the moment that this project is not progressing as I would like it too......... weather has been against me getting the boat into the open air to sand it down, and on the few occassions that it has been mild, dare I say sunny and not windy, my good lady has put the washing out on the line to dry..........there's nothing worse than getting into a bed that's coated in a silver sheen of body filler dust............I CAN DEFINATELY RECOMMEND AGAINST IT!!!! and then the last few days the bug that I got early in September has come back with a vengence, making me tired and weary..........was even sent for a chest x ray a couple of weeks ago because of the coughing bouts.......it's clear, thank god.................but today after starting a second course of anti b's I decided thaat the damn boat wouldn't sand itself because I used so much filler to cover the irregular framework, I decided to attack the plug, firstly with my sonic power sander with a tungsten and diamond tipped "mouse". Using only the weight of the tool itself, it was suprising how easily it reduced the filler to a uniform height on the boat with the hollow spots showing well.. next step will be to sand with a "mouse" sander and 40 grade grit................... once this has been completed, I'll then fill the hollows and sand again with the 40 and then 120 grade grit. It's made me feel better just doing that this morning.lol  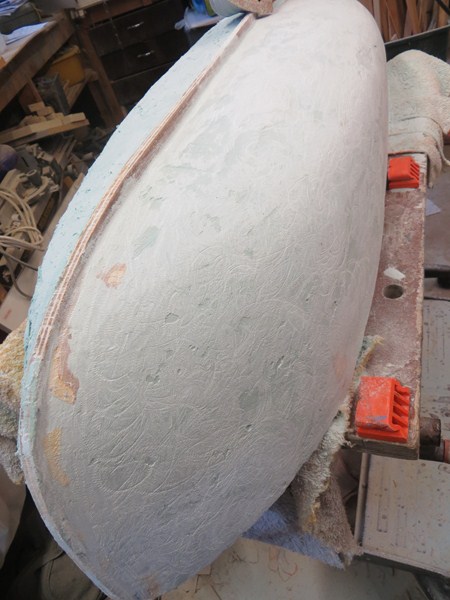 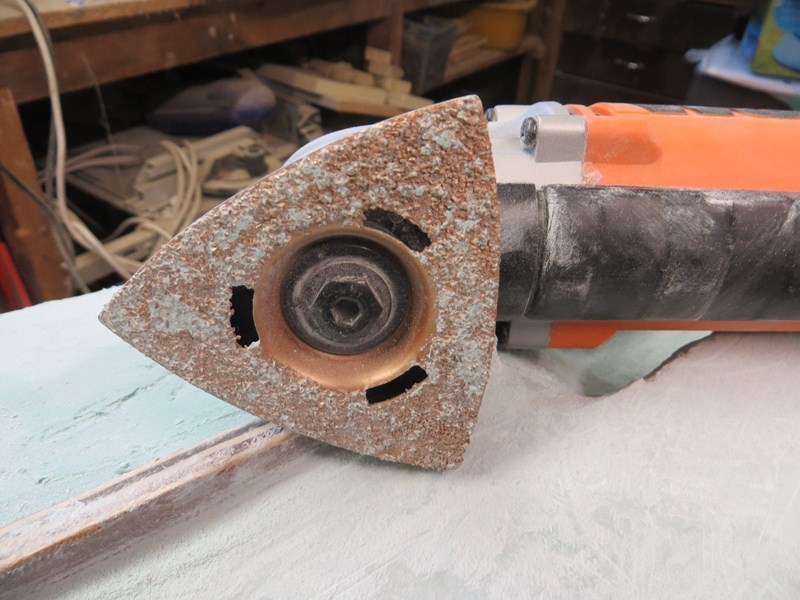  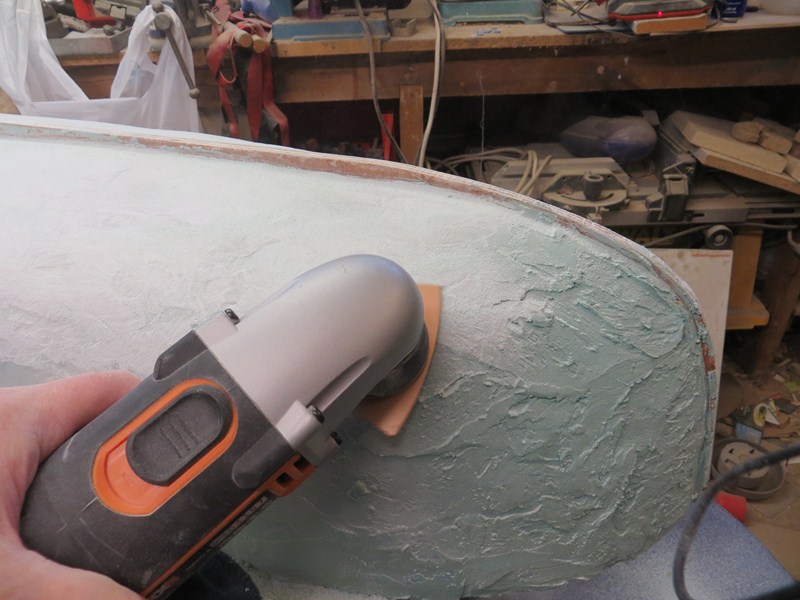  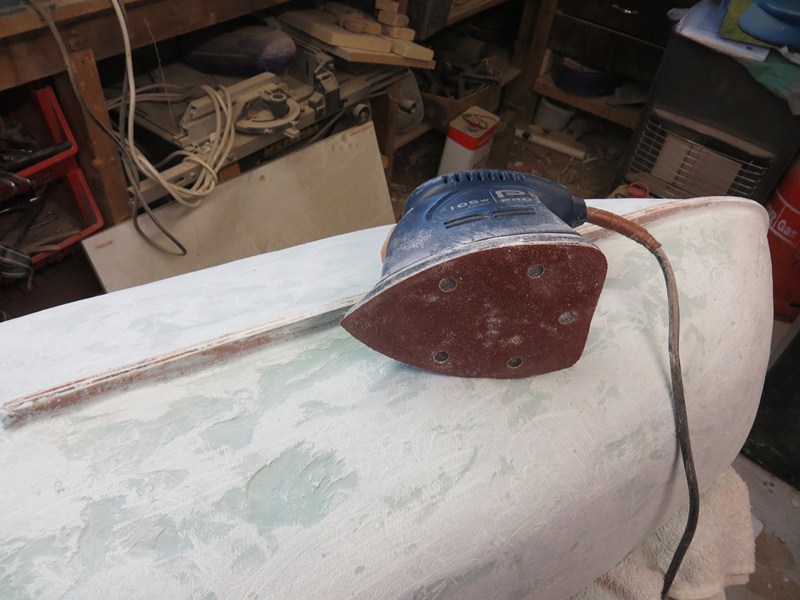 |
|
  | |
Guest
Guest
 |  Subject: Re: MY NEW PROJECT...or two. Subject: Re: MY NEW PROJECT...or two.  Wed Oct 17, 2012 1:41 pm Wed Oct 17, 2012 1:41 pm | |
| |
|
  | |
Footski
Master


Posts : 548
Join date : 2011-06-11
Age : 66
Location : Malaga, Spain
 | |
  | |
Guest
Guest
 |  Subject: Re: MY NEW PROJECT...or two. Subject: Re: MY NEW PROJECT...or two.  Wed Oct 17, 2012 9:08 pm Wed Oct 17, 2012 9:08 pm | |
| done both sides now,Barry, and some of the prop tunnel, so I don't feel as bad with the progress. |
|
  | |
phil winks
Master


Posts : 583
Join date : 2011-06-12
Age : 68
Location : Taunton
 |  Subject: Re: MY NEW PROJECT...or two. Subject: Re: MY NEW PROJECT...or two.  Wed Oct 17, 2012 9:24 pm Wed Oct 17, 2012 9:24 pm | |
| moving along nicely Neil  | |
|
  | |
Guest
Guest
 |  Subject: Re: MY NEW PROJECT...or two. Subject: Re: MY NEW PROJECT...or two.  Wed Oct 17, 2012 10:53 pm Wed Oct 17, 2012 10:53 pm | |
| it's been a struggle Phill........seem to have lost enthusiasm with this one.........but i ain't a quitter, that's for sure.
neil. |
|
  | |
Footski
Master


Posts : 548
Join date : 2011-06-11
Age : 66
Location : Malaga, Spain
 |  Subject: Re: MY NEW PROJECT...or two. Subject: Re: MY NEW PROJECT...or two.  Thu Oct 18, 2012 7:38 am Thu Oct 18, 2012 7:38 am | |
| Talking of losing enthusiasm, I have put a model back on the work bench that I started in 1990!!!!!! 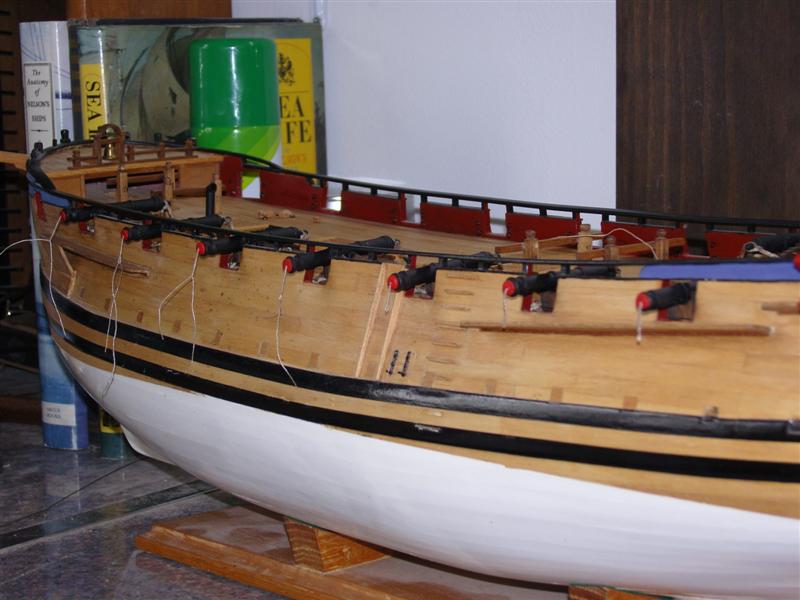 | |
|
  | |
Guest
Guest
 |  Subject: Re: MY NEW PROJECT...or two. Subject: Re: MY NEW PROJECT...or two.  Thu Oct 18, 2012 8:30 am Thu Oct 18, 2012 8:30 am | |
| that looks nice and interesting barry.....what ship is she?
neil. |
|
  | |
Footski
Master


Posts : 548
Join date : 2011-06-11
Age : 66
Location : Malaga, Spain
 |  Subject: Re: MY NEW PROJECT...or two. Subject: Re: MY NEW PROJECT...or two.  Thu Oct 18, 2012 12:42 pm Thu Oct 18, 2012 12:42 pm | |
| HMS Blandford. A 20 gunner from 1719. Lots of stops and starts as he whole thing is scratch built and has an illuminated captains cabin with all the furniture in it.... | |
|
  | |
Guest
Guest
 |  Subject: Re: MY NEW PROJECT...or two. Subject: Re: MY NEW PROJECT...or two.  Thu Oct 18, 2012 1:15 pm Thu Oct 18, 2012 1:15 pm | |
| sounds really lovely and looking at the planking of her.......way above my own building limitations.................I can't plank for nuts......hence the masses of filler.
I look on and admire models such as yours for the pure beauty of the timber hulls, and can only wish!! |
|
  | |
Footski
Master


Posts : 548
Join date : 2011-06-11
Age : 66
Location : Malaga, Spain
 | |
  | |
phil winks
Master


Posts : 583
Join date : 2011-06-12
Age : 68
Location : Taunton
 |  Subject: Re: MY NEW PROJECT...or two. Subject: Re: MY NEW PROJECT...or two.  Thu Oct 18, 2012 5:50 pm Thu Oct 18, 2012 5:50 pm | |
| Thats you told Neil  Barry that armed frigate or schooner or whatever HMS Blandford is really looks to have all the hallmarks of a work of art mate and totally worthy of a thread  hint hint  | |
|
  | |
Footski
Master


Posts : 548
Join date : 2011-06-11
Age : 66
Location : Malaga, Spain
 |  Subject: Re: MY NEW PROJECT...or two. Subject: Re: MY NEW PROJECT...or two.  Thu Oct 18, 2012 7:37 pm Thu Oct 18, 2012 7:37 pm | |
| Phil, I will happily do one, but the boss may not be too happy as it is not radio controlled!!  | |
|
  | |
phil winks
Master


Posts : 583
Join date : 2011-06-12
Age : 68
Location : Taunton
 |  Subject: Re: MY NEW PROJECT...or two. Subject: Re: MY NEW PROJECT...or two.  Thu Oct 18, 2012 8:37 pm Thu Oct 18, 2012 8:37 pm | |
| | |
|
  | |
phil winks
Master


Posts : 583
Join date : 2011-06-12
Age : 68
Location : Taunton
 |  Subject: Re: MY NEW PROJECT...or two. Subject: Re: MY NEW PROJECT...or two.  Thu Oct 18, 2012 8:39 pm Thu Oct 18, 2012 8:39 pm | |
| | |
|
  | |
Footski
Master


Posts : 548
Join date : 2011-06-11
Age : 66
Location : Malaga, Spain
 |  Subject: Re: MY NEW PROJECT...or two. Subject: Re: MY NEW PROJECT...or two.  Thu Oct 18, 2012 9:38 pm Thu Oct 18, 2012 9:38 pm | |
| | |
|
  | |
Guest
Guest
 |  Subject: Re: MY NEW PROJECT...or two. Subject: Re: MY NEW PROJECT...or two.  Thu Oct 18, 2012 10:10 pm Thu Oct 18, 2012 10:10 pm | |
| well that's odd.......I took Barry at his word and posted 4 pics of progress today..........I must have pressed preview instead of send............must be going ga ga.........so here it is again............. the sanding of the hull and tunnel is almost complete, but there are some minor areas that need doing. to facilitate this I have had to add the "false" keel.....when I cut the original keel( centre plate for the sections, I measured it 3mm shy all round, and then with two strips of 1.5mm ply I make up the correct size.....this also incorporates the "bow plate" onto which a fairlead roller is fixed later. the strips were nailed on to the keel and stem and stern posts......they will be filled later, but not before I fix the "pig iron" ballast keel which will be made from obeche block and fixed to the keel sides before filling, sanding and making ready for moulding. 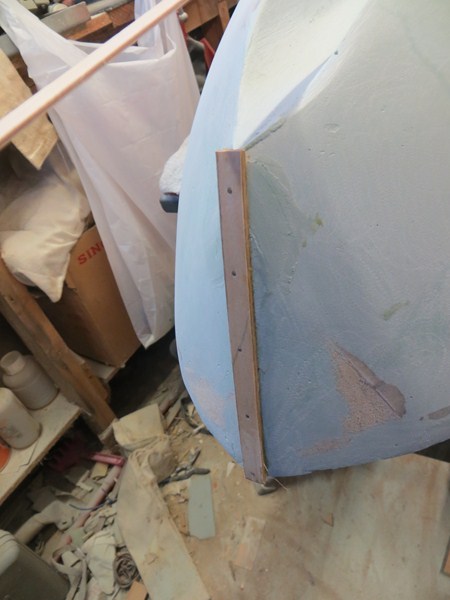  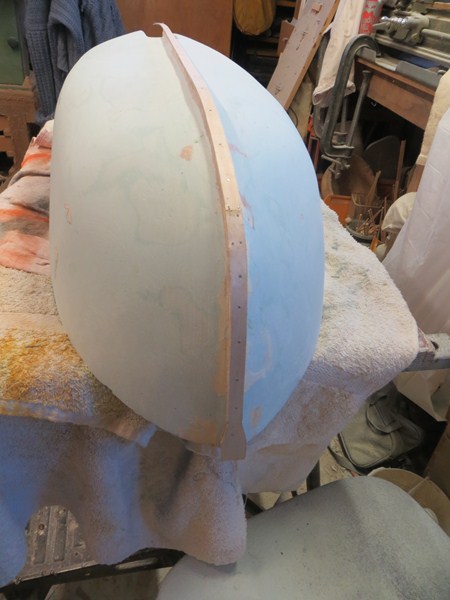 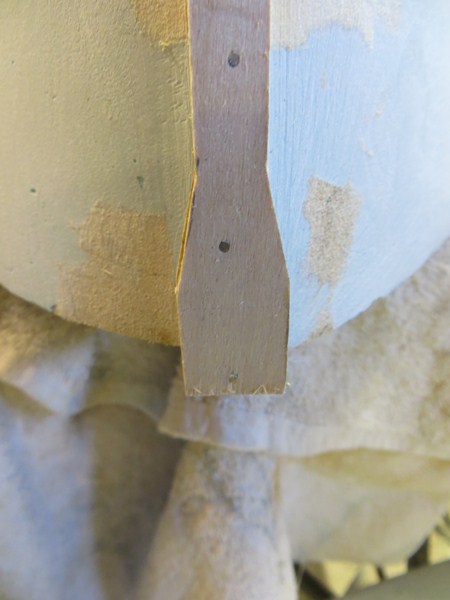 |
|
  | |
phil winks
Master


Posts : 583
Join date : 2011-06-12
Age : 68
Location : Taunton
 |  Subject: Re: MY NEW PROJECT...or two. Subject: Re: MY NEW PROJECT...or two.  Thu Oct 18, 2012 10:33 pm Thu Oct 18, 2012 10:33 pm | |
| love it when you get to this point Neil really start to get a proper picture of the lines of the hull and as usual I just know what a truly inspiring job you'll make of it. Regarding the lost post/senior moment, it happens to us all unfortunately  | |
|
  | |
Guest
Guest
 |  Subject: Re: MY NEW PROJECT...or two. Subject: Re: MY NEW PROJECT...or two.  Tue Oct 23, 2012 11:59 am Tue Oct 23, 2012 11:59 am | |
| Well!....the Blackpool show's over now, the aches and pains subsiding just a little , and so it's back to a near normal sense of normality, and down to work. I haven't filled in to the keel and stem/stern posts yet as it is time to put the protective belting, which is a very important and also noticable part of any lifeboat and on the older classic boats always stood out as being painted red. It is a bit of a sod to put on, and I always follow the method I am going to show here. the width of the belting is taken and a base strip of obeche is cut, onto which other layers can be glued Because you are trying to bend in two directions........following both the "sheer" line and the curvature of the hull plan, it would normally have been steamed on the actual boat and in sections.........however this is only a plug and so the two strips cut, have been saw cut in two "planes" to allow the easier bending of dry timber and setting in to place using aliphatic resin ( quick grab AND waterproof.) the belting was then glued on to the hull fixing with both pins and spring clamps.   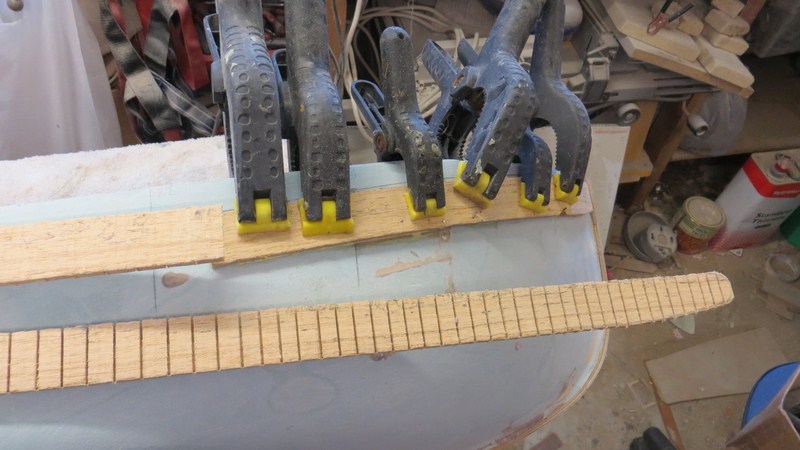 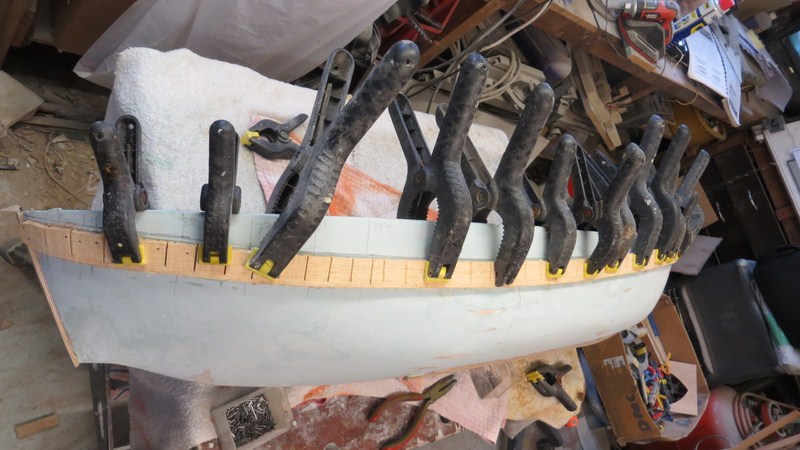 |
|
  | |
phil winks
Master


Posts : 583
Join date : 2011-06-12
Age : 68
Location : Taunton
 |  Subject: Re: MY NEW PROJECT...or two. Subject: Re: MY NEW PROJECT...or two.  Tue Oct 23, 2012 5:34 pm Tue Oct 23, 2012 5:34 pm | |
| Nice work Neil just as an interesting aside here that method of curving wood with cuts is know as a coffin cut typically these days used on the back of skirting bords when following a curved wall. It takes its name from the method used by Coffin makers to get the sides of a coffin to curve at the point where the unlucky occupants shoulders would be, this way no external joint is visible. just another of the odd facts stored in my head  | |
|
  | |
Guest
Guest
 |  Subject: Re: MY NEW PROJECT...or two. Subject: Re: MY NEW PROJECT...or two.  Tue Oct 23, 2012 6:46 pm Tue Oct 23, 2012 6:46 pm | |
| I didn't know that phil...............you learn something new every day.........cheers, Matey.
neil |
|
  | |
phil winks
Master


Posts : 583
Join date : 2011-06-12
Age : 68
Location : Taunton
 |  Subject: Re: MY NEW PROJECT...or two. Subject: Re: MY NEW PROJECT...or two.  Tue Oct 23, 2012 7:35 pm Tue Oct 23, 2012 7:35 pm | |
| Every day a school day eh Neil I always reckon the day I don't learn something new is when I'll know its time to shuffle of so to speak  | |
|
  | |
Guest
Guest
 |  Subject: Re: MY NEW PROJECT...or two. Subject: Re: MY NEW PROJECT...or two.  Thu Oct 25, 2012 12:13 pm Thu Oct 25, 2012 12:13 pm | |
| |
|
  | |
Guest
Guest
 |  Subject: Re: MY NEW PROJECT...or two. Subject: Re: MY NEW PROJECT...or two.  Sat Oct 27, 2012 5:51 pm Sat Oct 27, 2012 5:51 pm | |
| |
|
  | |
Guest
Guest
 |  Subject: Re: MY NEW PROJECT...or two. Subject: Re: MY NEW PROJECT...or two.  Tue Oct 30, 2012 8:17 pm Tue Oct 30, 2012 8:17 pm | |
| |
|
  | |
Guest
Guest
 |  Subject: Re: MY NEW PROJECT...or two. Subject: Re: MY NEW PROJECT...or two.  Fri Nov 02, 2012 10:27 pm Fri Nov 02, 2012 10:27 pm | |
| |
|
  | |
phil winks
Master


Posts : 583
Join date : 2011-06-12
Age : 68
Location : Taunton
 |  Subject: Re: MY NEW PROJECT...or two. Subject: Re: MY NEW PROJECT...or two.  Fri Nov 02, 2012 11:20 pm Fri Nov 02, 2012 11:20 pm | |
| As you say Neil trotting on nicely. good to see some pics of the real thing in a similar state gives a really good idea of just how amazingly accurately you've recreated the hull. well done so far Matey | |
|
  | |
Guest
Guest
 |  Subject: Re: MY NEW PROJECT...or two. Subject: Re: MY NEW PROJECT...or two.  Sat Nov 03, 2012 4:39 pm Sat Nov 03, 2012 4:39 pm | |
| thanks phil...............i do try, but this time I had lousy deformed lines from a very small pic to work with, so to say it's accurate might be stretching it a little, but I'm pleased with the outcome.
neil. |
|
  | |
Guest
Guest
 | |
  | |
Footski
Master


Posts : 548
Join date : 2011-06-11
Age : 66
Location : Malaga, Spain
 | |
  | |
Guest
Guest
 |  Subject: Re: MY NEW PROJECT...or two. Subject: Re: MY NEW PROJECT...or two.  Sun Nov 18, 2012 10:39 pm Sun Nov 18, 2012 10:39 pm | |
| I put it off long enough but have had to bite the bullet, and today I made the template for the central flange for the mould making process........made it from card in sections and will transfer this onto a piece of Hardboard with the shiney side to the first half of the mould. Whilst I was waiting for this I started making the small masters for the Blake 40 BHP petrol motor, as used in the RNLB William and Laura. I started on the crank case for this, and it will be made from wood and then put into moulds for casting in resin. As the motor can be seen on the boat if the "dog kennel" covers are lifted I feel that it will be an added attraction to the boat and so decided to build a 1:12 scale model of it. However, I am finding pictures of such a motor very hard to find ( in fact not found any yet), so if anyone has any photos of this type of engine I would really appreciate some help. Cheers, neil. 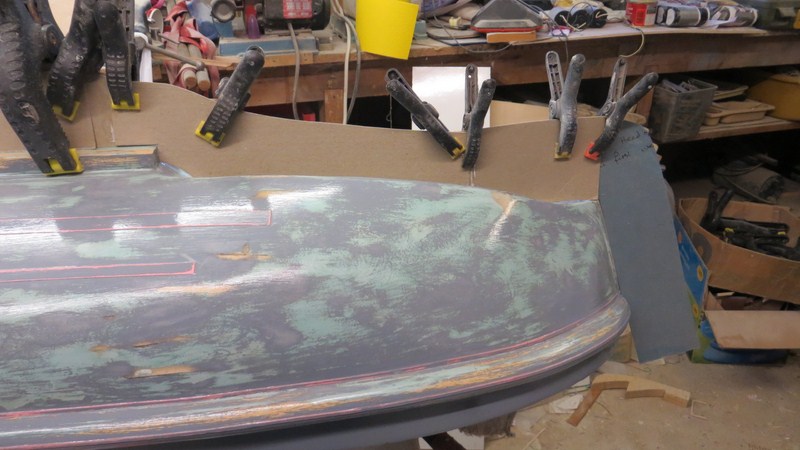 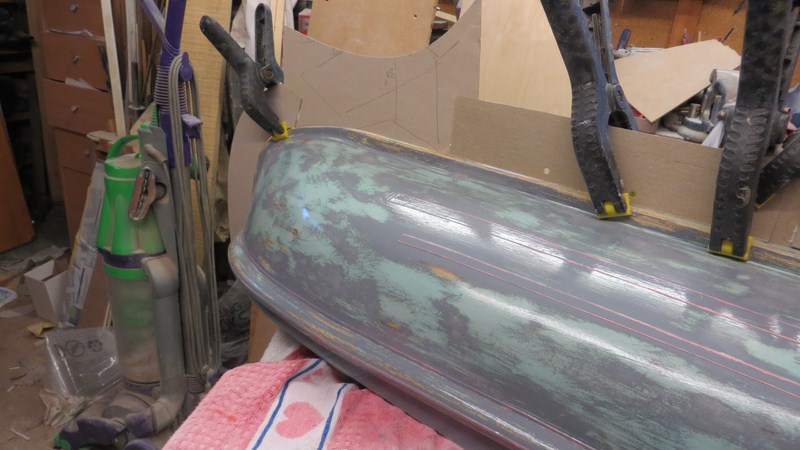   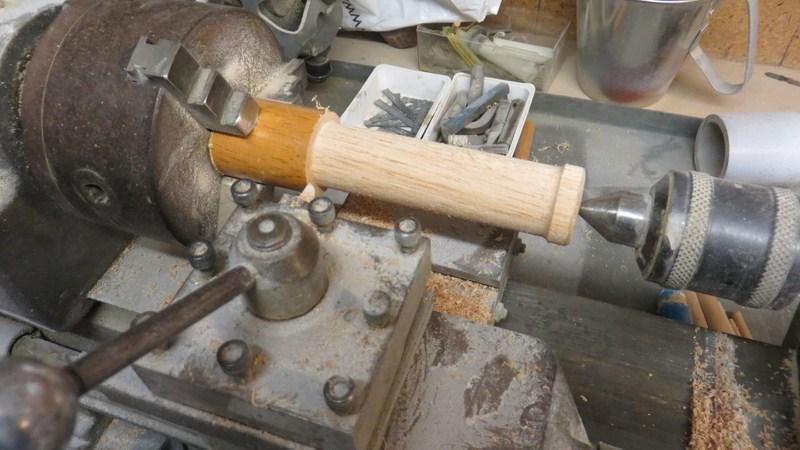  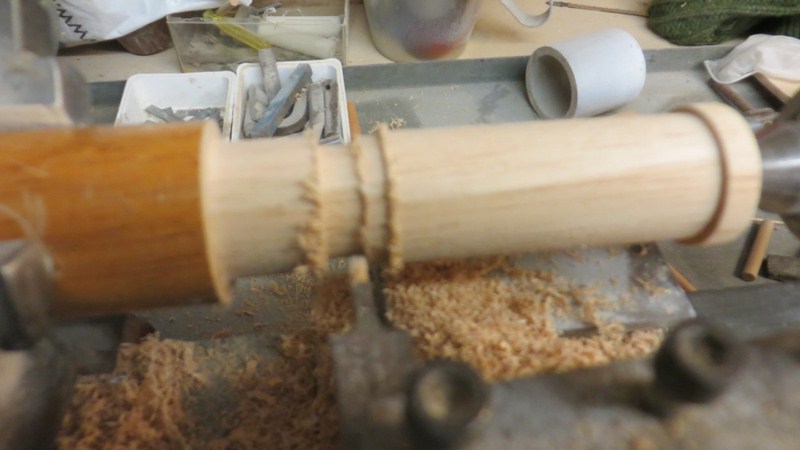 |
|
  | |
Guest
Guest
 |  Subject: Re: MY NEW PROJECT...or two. Subject: Re: MY NEW PROJECT...or two.  Wed Nov 21, 2012 11:30 pm Wed Nov 21, 2012 11:30 pm | |
| Have been tied up the last few days making my daughter a small nicknack set of draws for on top of her dressing table, and knew I'd over ordered the mdf that I was making it from so that I could used some of it for the flange for my moulding of the hull............ anyway got the drawers ready for sanding today and so got back to the preperation oof the moulding process.........cut the flange from the template I made the other day and set it up onto the hull plug........... I cut it out with a jig saw, and then added supporting bars of pine at bow and stern with the flange was screwed to to hold in place along the centre line of the keel ( or there abouts......not too critical.................. tomorrow I'll back fill from the rear side with plastecine to elliminate any gaps between flange and hull, and then wax it all up ready for the gell coat layer, early next week. neil.  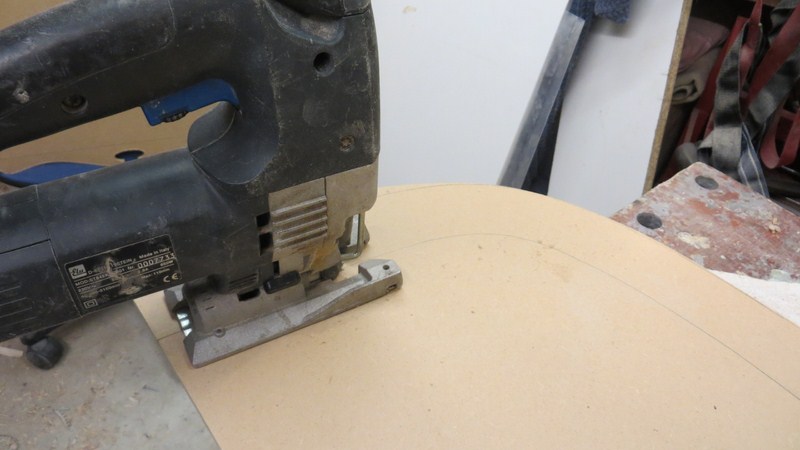  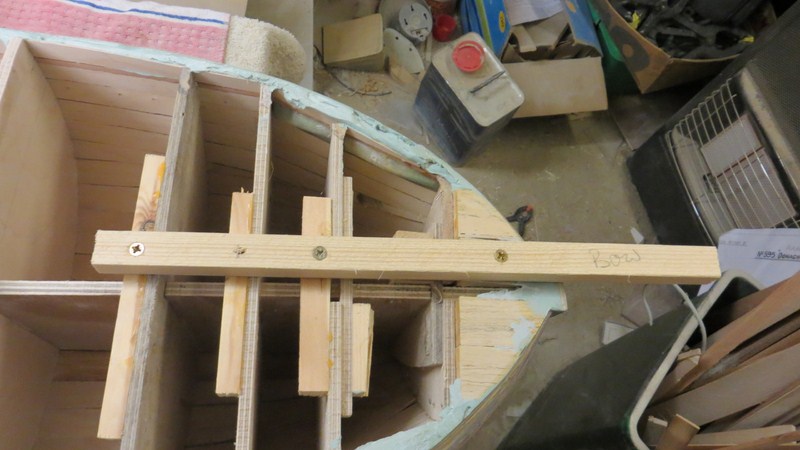 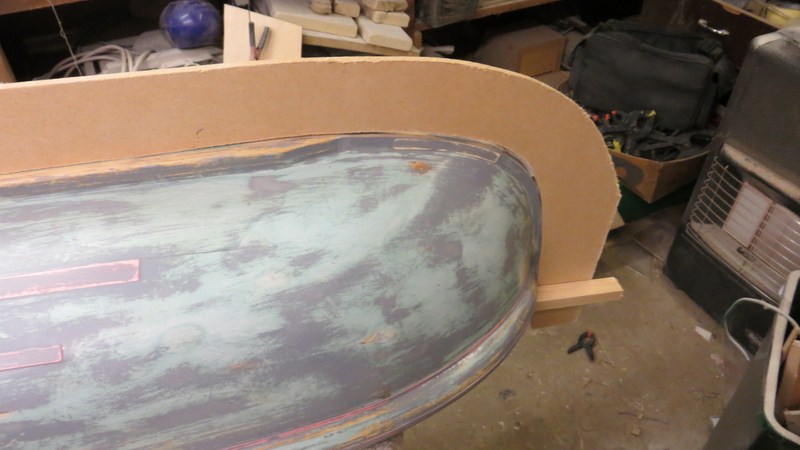 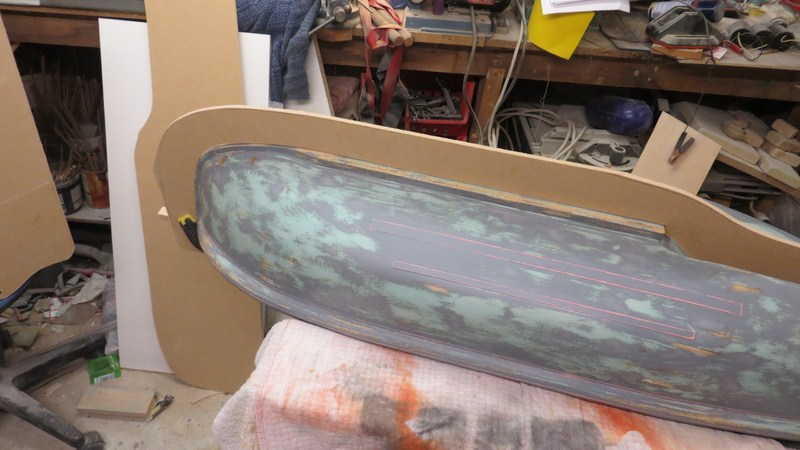 |
|
  | |
Guest
Guest
 |  Subject: Re: MY NEW PROJECT...or two. Subject: Re: MY NEW PROJECT...or two.  Thu Nov 22, 2012 9:59 pm Thu Nov 22, 2012 9:59 pm | |
| |
|
  | |
Guest
Guest
 |  Subject: Re: MY NEW PROJECT...or two. Subject: Re: MY NEW PROJECT...or two.  Fri Nov 23, 2012 9:49 am Fri Nov 23, 2012 9:49 am | |
| Looking really good Neil May I ask why after building a 1st class hull you slather it with resin an glass and copy it? then build the copy into a 1st class boat. seems major extra work.  |
|
  | |
Guest
Guest
 |  Subject: Re: MY NEW PROJECT...or two. Subject: Re: MY NEW PROJECT...or two.  Fri Nov 23, 2012 9:50 pm Fri Nov 23, 2012 9:50 pm | |
| simply because I'm crap at plank on frame boats, and GRP doesn't leak.......... I made a POF model of HMS Kent, the 1914 County Class cruiser 35 years ago from odd bits of timber I would have left over in the woodwork room after a day's teaching of kids........be it oak, mahogany, lime, pine, you name it I used it........and sadly once wet the salt water of Fleetwood lake would penetrate the hull with ease, no matter what I did, and no matter how I lined the inside with resin and such............so after I laid that boat up for the last time I vowed I'd never sail a pof boat again.........so I build them planked, fill them with filler, get the best finish I can and then make a good mould from the "plug" I've made.........and then usually skip the plug after putting a few hammer holes into it so they can't be plagerised and sold from some unscrupulous sod. lol. and for today's dose of lifeboats......... Been doing some waxing to the plug today...sparingly as I am running out until new stocks come from Glasplies.......ordered it this morning along with my resin, gelcoat and matting...............but don't know how long it'll take to be delivered.......so cracked on with my little motor , using the quite extensive drawings I have of it ( although still no photos)........and the results of the main parts I've been able to fathom out so far can be seen. The sump pan, main engine crank case, cylinders and head blocks, the Exhaust box and the flywheel have all been made separately so I can cast them in parts and then stick together......keeps me happy while the wax dries, lol 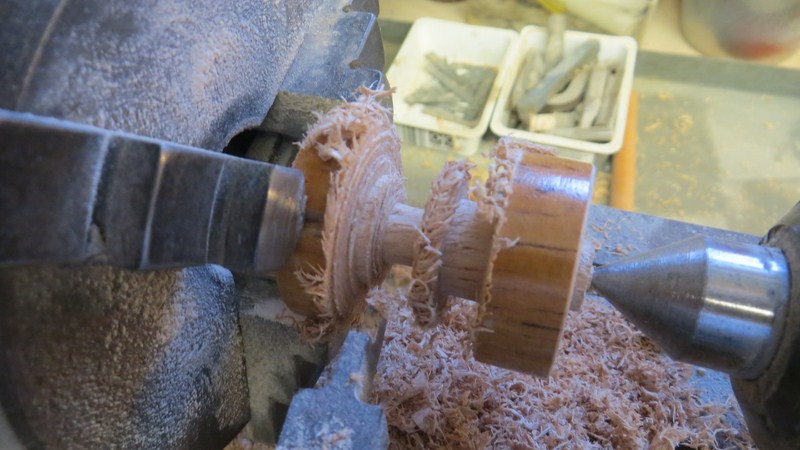  |
|
  | |
Guest
Guest
 |  Subject: Re: MY NEW PROJECT...or two. Subject: Re: MY NEW PROJECT...or two.  Fri Nov 23, 2012 9:54 pm Fri Nov 23, 2012 9:54 pm | |
| |
|
  | |
Guest
Guest
 |  Subject: Re: MY NEW PROJECT...or two. Subject: Re: MY NEW PROJECT...or two.  Sat Nov 24, 2012 6:38 am Sat Nov 24, 2012 6:38 am | |
| As those across to pond would say Smashing old chum.
|
|
  | |
Guest
Guest
 |  Subject: Re: MY NEW PROJECT...or two. Subject: Re: MY NEW PROJECT...or two.  Sat Nov 24, 2012 1:27 pm Sat Nov 24, 2012 1:27 pm | |
| thanks Damien......have found a chap who is restoring a real lifeboat of what I am building the model........and he has pictures of the Blake engine as he's after a real one to fit into his lifeboat.........he's in the west indies at the moment, but is going to send me some phots when he gets back........so will stop work on this little thing until I get them.......then not to many mistakes to rectify, lol |
|
  | |
Guest
Guest
 |  Subject: Re: MY NEW PROJECT...or two. Subject: Re: MY NEW PROJECT...or two.  Sat Nov 24, 2012 10:47 pm Sat Nov 24, 2012 10:47 pm | |
| Can you bore out your wooden engine block to fit an electric motor? |
|
  | |
Guest
Guest
 |  Subject: Re: MY NEW PROJECT...or two. Subject: Re: MY NEW PROJECT...or two.  Sun Nov 25, 2012 10:20 am Sun Nov 25, 2012 10:20 am | |
| Unfortunately, Damien the bore would be so small even if bored out to maximum, the motor inserted into it wouldn't be big enough to drive the boat.
neil. |
|
  | |
Guest
Guest
 |  Subject: Re: MY NEW PROJECT...or two. Subject: Re: MY NEW PROJECT...or two.  Sun Nov 25, 2012 10:28 am Sun Nov 25, 2012 10:28 am | |
| Aww well perhaps put the shaft through the middle of it and hide the motor behind a bulkhead? |
|
  | |
Guest
Guest
 |  Subject: Re: MY NEW PROJECT...or two. Subject: Re: MY NEW PROJECT...or two.  Sun Nov 25, 2012 11:43 am Sun Nov 25, 2012 11:43 am | |
| that's probably going to be the scenario at the moment Damien as there isn't enough space flywheel end of the motor to mount a big enough motor to drive it.
don't think I'll be able to get the valve pushrods going up and down though, lol
neil. |
|
  | |
phil winks
Master


Posts : 583
Join date : 2011-06-12
Age : 68
Location : Taunton
 |  Subject: Re: MY NEW PROJECT...or two. Subject: Re: MY NEW PROJECT...or two.  Sun Nov 25, 2012 5:46 pm Sun Nov 25, 2012 5:46 pm | |
| thats certainly taking the shape of a marine diesel old boy, As we're supposed to say over here lol, nice work mate and I think the idea of running the prop shaft through it is a cracker. | |
|
  | |
Guest
Guest
 |  Subject: Re: MY NEW PROJECT...or two. Subject: Re: MY NEW PROJECT...or two.  Mon Nov 26, 2012 9:08 am Mon Nov 26, 2012 9:08 am | |
| |
|
  | |
phil winks
Master


Posts : 583
Join date : 2011-06-12
Age : 68
Location : Taunton
 |  Subject: Re: MY NEW PROJECT...or two. Subject: Re: MY NEW PROJECT...or two.  Mon Nov 26, 2012 6:38 pm Mon Nov 26, 2012 6:38 pm | |
| Tut Tut Neil concentration old boy no substitute for it  bet we've all done something similar and on the bright side too big is far less costly than too small | |
|
  | |
Guest
Guest
 |  Subject: Re: MY NEW PROJECT...or two. Subject: Re: MY NEW PROJECT...or two.  Tue Nov 27, 2012 9:05 am Tue Nov 27, 2012 9:05 am | |
| back to 1000% concentration now phil.......better had or I'll forget to put the hardener in my mix, lol time scale of a mould: 08.30 hours...... the PVA blue release agent has been painted onto the hull........it blooms when added because of the wax that has already been added to the plug.........this is just surplus agent and although it shows slightly on the mould, it is easily wet and drie'd out when cleaning up the new mould before taking mouldings from it. This PVA release agent is NOT the same as PVA glue, and the latter should not be tried at home, lol......I have never done it, and for the sake of getting the right stuff, wouldn't want to for feer of kerknanckering the plug or mould.  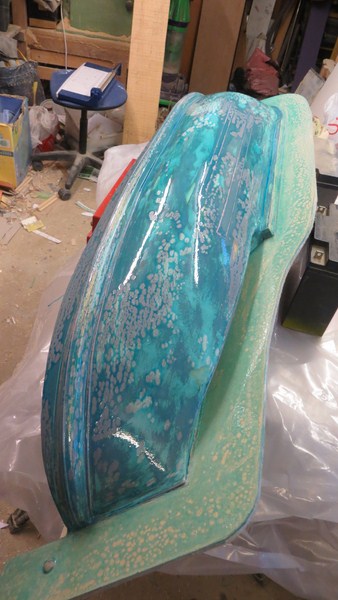 |
|
  | |
Footski
Master


Posts : 548
Join date : 2011-06-11
Age : 66
Location : Malaga, Spain
 |  Subject: Re: MY NEW PROJECT...or two. Subject: Re: MY NEW PROJECT...or two.  Tue Nov 27, 2012 4:25 pm Tue Nov 27, 2012 4:25 pm | |
| I just love that colour!  | |
|
  | |
Guest
Guest
 |  Subject: Re: MY NEW PROJECT...or two. Subject: Re: MY NEW PROJECT...or two.  Tue Nov 27, 2012 6:58 pm Tue Nov 27, 2012 6:58 pm | |
| save me painting it, lol 10.00 hours. The first layer of precoloured gelcoat has been added to the plug, and is now beginning to go "off" It is important to get the first layers of matting onto the gelcoat within 24 hours of laying the GC or it could delaminate under certain circumstances............cold weather layup for inst. Preparation is the most important part of any GRP moulding process, as it is the filthiest, stickiest most horrid process that you can perform (except for RTV rubber moulding) and that's why I like it, lol. To be prepared is the escense of the job as there is nothing worse than finding that you need to cut more matting half way through a layup with a tub of resin going off. Like wise it is no good finding that once you have split the mould, you find that you have forgotten to put the catylist hardener into the mix.......been there , done that and got the duff mould...see the last 3 pics.......... so get your mix ready, get the matting ( easier to put matting back in the bag once finished rather to try cutting more matting with sticky gloves and scissers) and if you find the matting a little to thick to bend round sharp corners split the smaller cut sheets into two..........the pic shown shows that even 1oz chopped strand will split and easier to form and impregnate around such areas as the belting and the tunnel area of my mould. the scales are for weighing the gelcoat and resin for adding the catylist at correct proportions and the ratios are on the small note that I have next to the scales....the other sign is self explanatory, lol 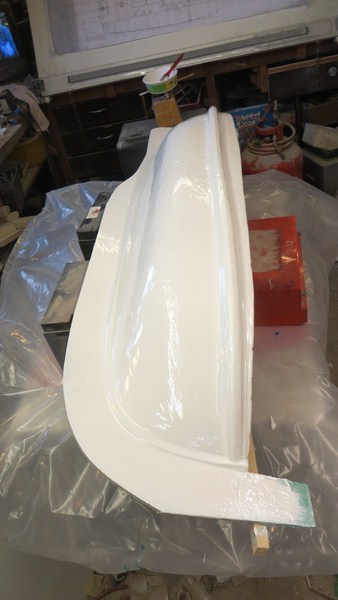 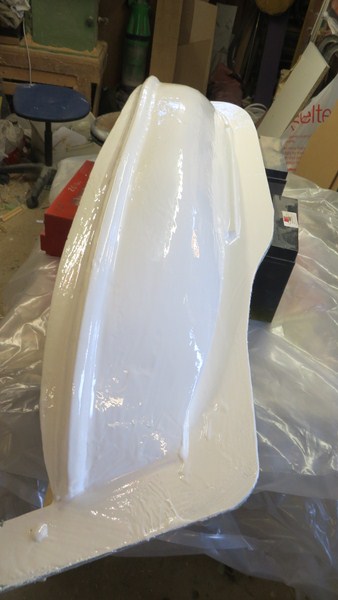 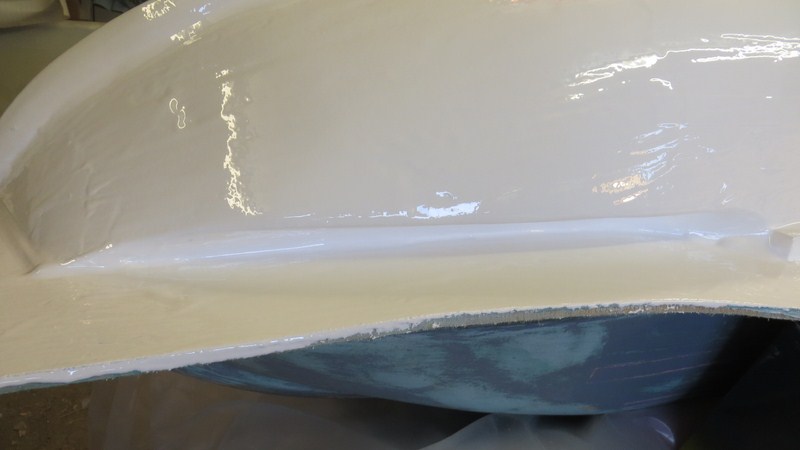  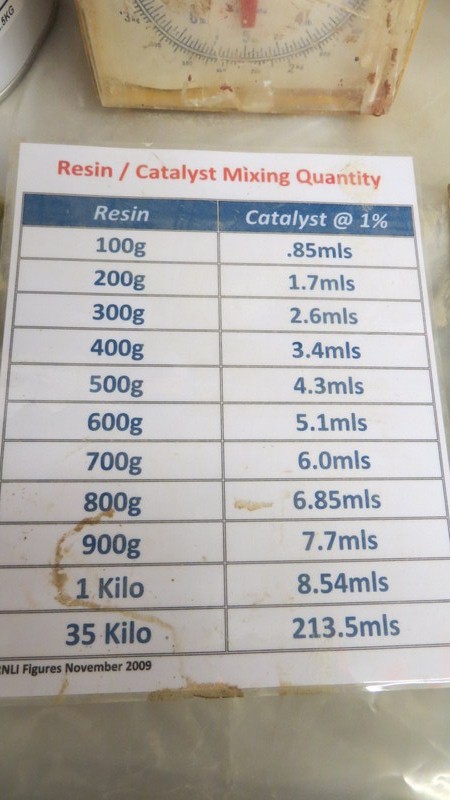 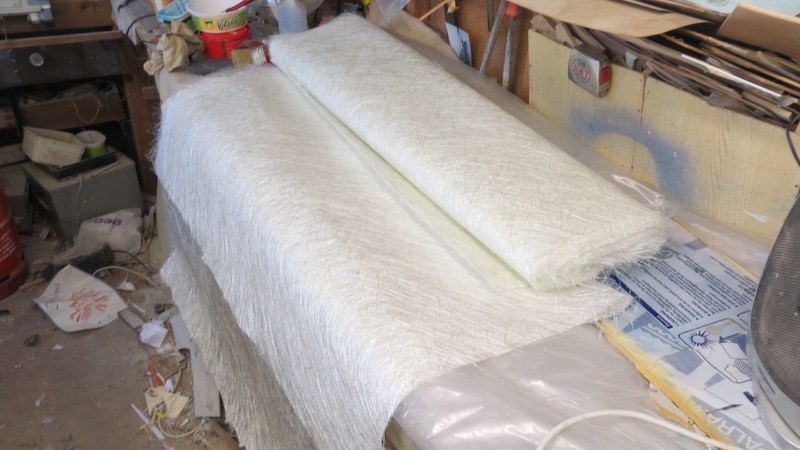 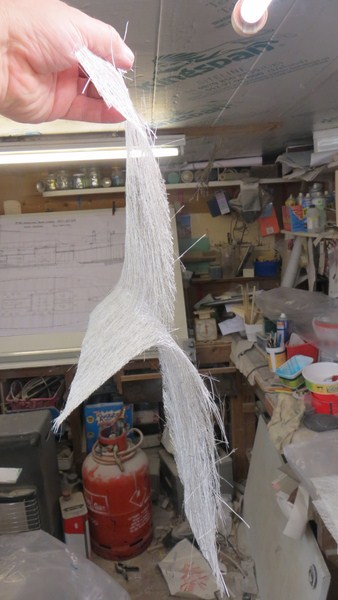 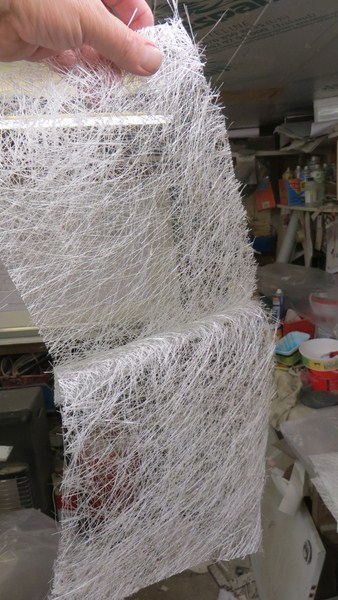 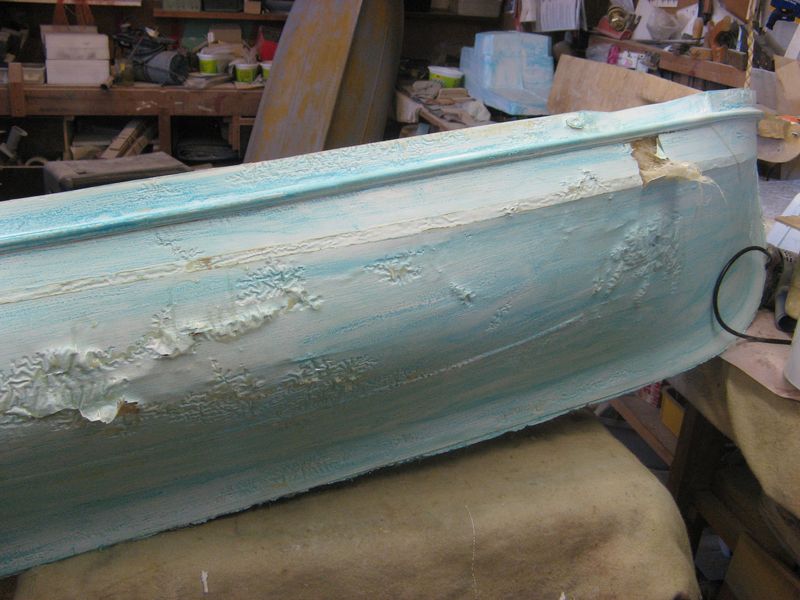 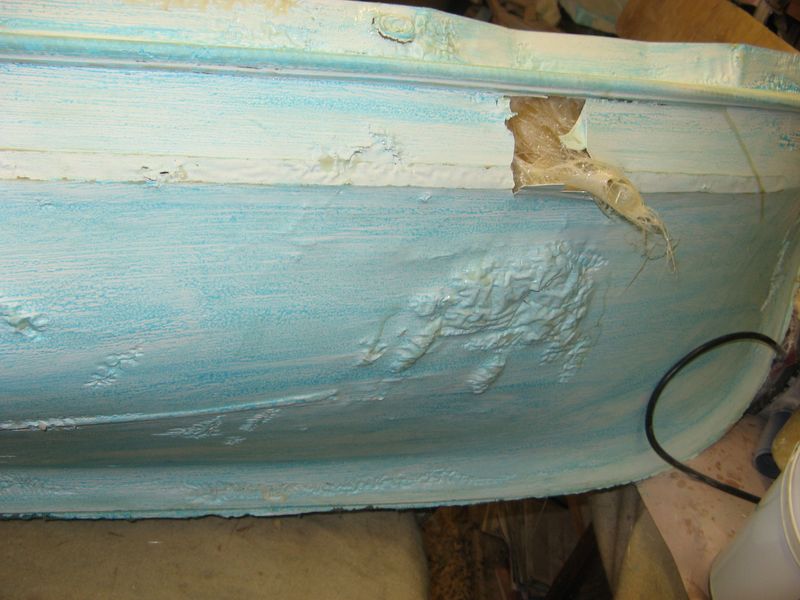 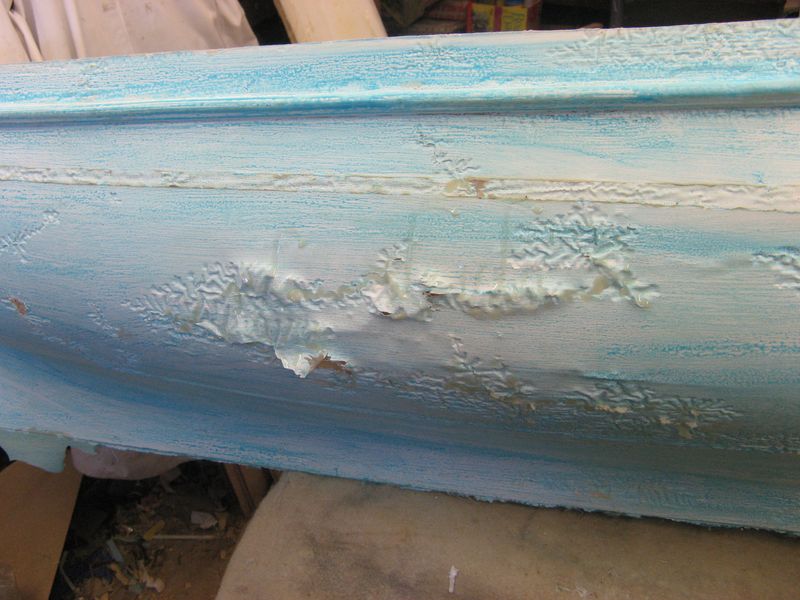 |
|
  | |
Guest
Guest
 | |
  | |
Sponsored content
 |  Subject: Re: MY NEW PROJECT...or two. Subject: Re: MY NEW PROJECT...or two.  | |
| |
|
  | |
| | MY NEW PROJECT...or two. |  |
|
