| | MY NEW PROJECT...or two. |  |
|
+6davidjt barriew Tug--Kenny TonyW phil winks Footski 10 posters |
|
| Author | Message |
|---|
Guest
Guest
 |  Subject: Re: MY NEW PROJECT...or two. Subject: Re: MY NEW PROJECT...or two.  Fri Mar 29, 2013 4:07 pm Fri Mar 29, 2013 4:07 pm | |
| yes damien.....in white powder form. and barrie.........gawd yer right about that........bought a 3.9 kilo bottle that cost me more than the 13 kilo bottle I bought all those years ago. WELL!!!!!.......that was a struggle...........got some gas easily enough this morning from Morrisons supermarket..........but boy oh boy did I have a struggle. I've never had a struggle with getting enough heat on my brass bits before, but I think that the size and thickness of the brass on the two larger tabernacles was just that little too much for my set up...........so don't ask..............boiler makings out for me, lol........I was just getting too much heat disipation to the parts I didn't need them to go to, and no matter what blocks I tried the heat still wouldn't stay where I wanted it, so in the end, I got my trusty Proxxon torch to give that little boost, and at last I got the run from the silver solder that I needed...............but a job that would normally have taken about 30 minutes to jig up and solder with thinner guage.............took about 2 hours including failures.............good job I needed them or they'd have gone out the window on the end of a boot, lol. anyway, they finally soldered up and very strong. They nweed cleaning up and de greasing before painting, and then they will be fixed to the decks, using 4 dummy nuts and bolts but with a central screw countersunk into the base below where the mast sits and screwed down into the previously strengthened under deck support.    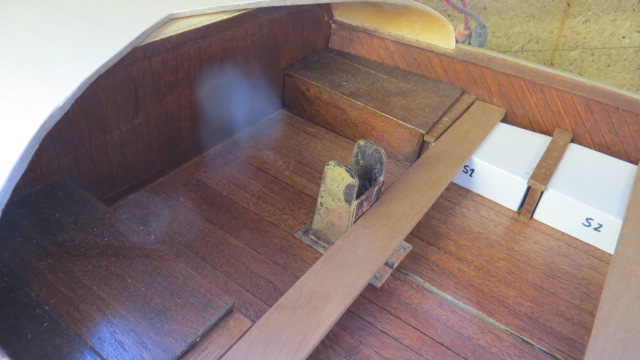 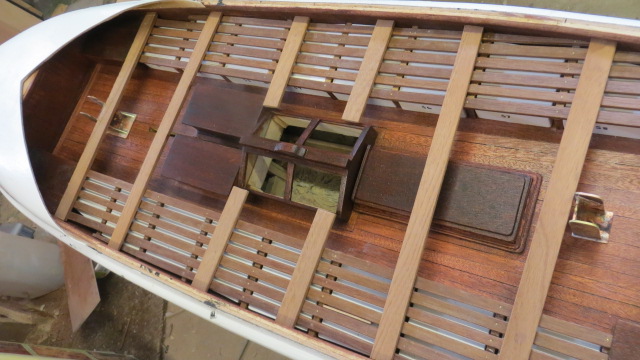 |
|
  | |
Guest
Guest
 |  Subject: Re: MY NEW PROJECT...or two. Subject: Re: MY NEW PROJECT...or two.  Sat Mar 30, 2013 10:23 pm Sat Mar 30, 2013 10:23 pm | |
| The more I study these official plans from RNLI archives, the more I come to the conclusion that they were drawn as a "basis" for a build, and NOT a bible to be taken strickly and 100%. There is so much detail left off plan, and so many items drawn but not named that for further purposes I'll make my own names up purely to idendify what I'm fabricating. The first thing which shows only a side elevation and a plan view for measurement is the "Drop keel roller casing" which is nothing like the pics of cast iron ones I have seen........... on the plan it shows a totally different shape and made from timber..............so if any ex crew man from one of these boats can give me exact shape and dims and prove it with a photo, I'll change them within the next 72 hours..............otherwise, they going on as made. I made them in 3mm ply and a brass roller I conjoured up on the laithe, plus 3mm copper screw objects that have a flat head and come from gawd knows where, with washers and 3mm nuts. they'll be fixed in place shortly. Also whilst on the detailing I started on the fixing brackets for the thwartes to the bulkheads.............bou oh boy, did they take ages to make just a single one....................errrr, well NO! actually........I had some fine moulding timber from somewhere in the same teak ( Iroko ) that the thwartes are made from and it was a simple job of cutting slices of these off with my Vibro saw with extra fine blade..........made about 50 brakets in around 10 minutes........might not be an exact match for the miriad of different brackets that I have seen on different lifeboats..........but they look fine and will look the job when all are fitted. I aldo found a similar one with a rebate cut into it which when sliced will do for the foot rests of the rowers. And the final thing is, and this is a deviation from the plan on the Maud Pickup which i have had to do is to raise the height of the thwartes on the boat................they should have gone under the side bench slats, but because my crewmen have been cast and the distance between bum and bottom of the feet is fixed, the seets are/were too low for the crew men to sit properly on the thwartes, and so modellers licence has taken over and the seats raised...........if anyone complains about that at the lake side.....then my standard reply will be barked out, and it ends in f  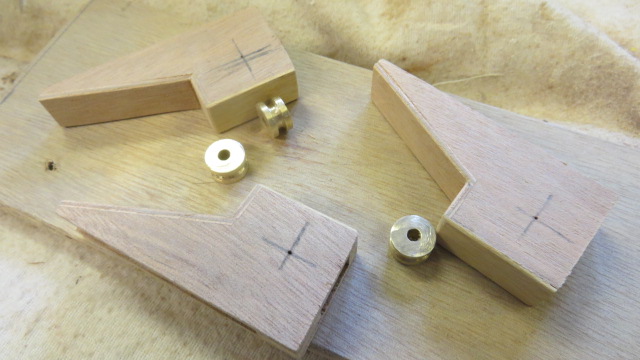  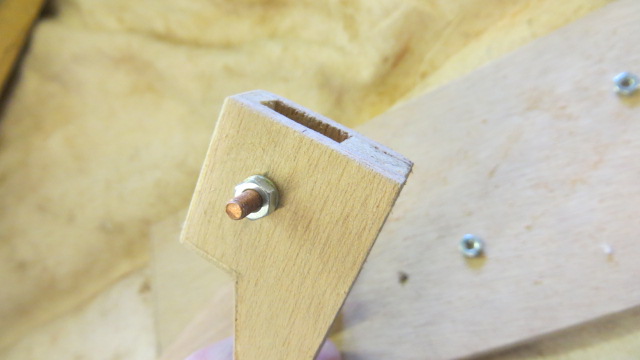  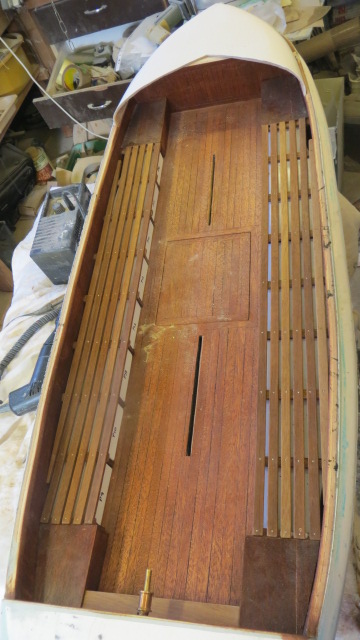 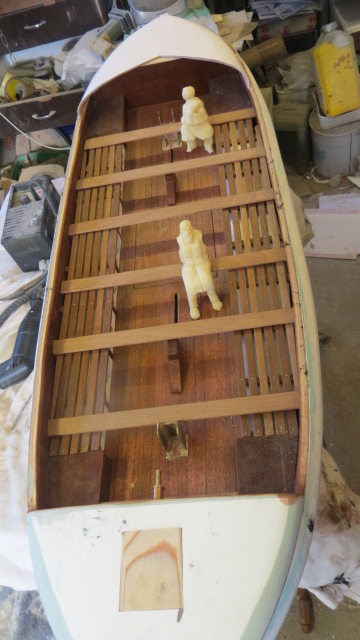   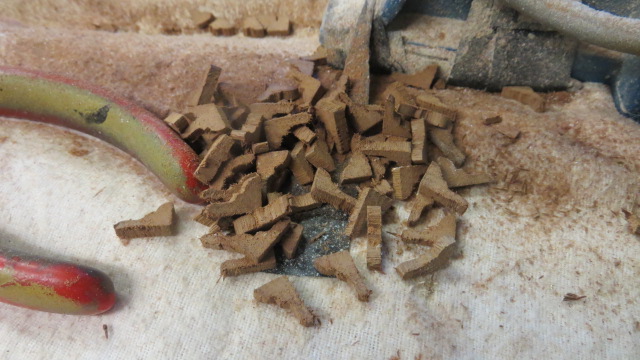 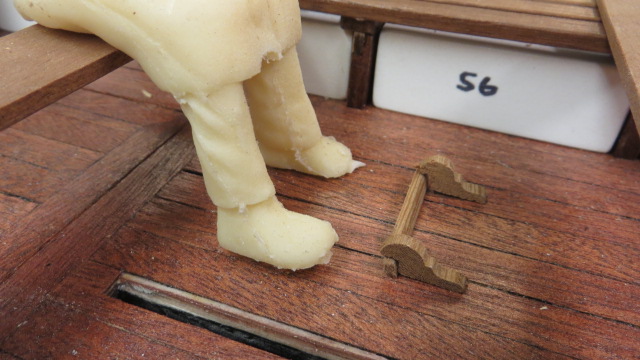 |
|
  | |
Footski
Master


Posts : 548
Join date : 2011-06-11
Age : 66
Location : Malaga, Spain
 |  Subject: Re: MY NEW PROJECT...or two. Subject: Re: MY NEW PROJECT...or two.  Sun Mar 31, 2013 9:49 am Sun Mar 31, 2013 9:49 am | |
| I love your modelling licence bits.......but as for the language, well the use of the word fluff, really should be avoided!  | |
|
  | |
Guest
Guest
 |  Subject: Re: MY NEW PROJECT...or two. Subject: Re: MY NEW PROJECT...or two.  Sun Mar 31, 2013 10:50 am Sun Mar 31, 2013 10:50 am | |
| |
|
  | |
Footski
Master


Posts : 548
Join date : 2011-06-11
Age : 66
Location : Malaga, Spain
 |  Subject: Re: MY NEW PROJECT...or two. Subject: Re: MY NEW PROJECT...or two.  Sun Mar 31, 2013 5:37 pm Sun Mar 31, 2013 5:37 pm | |
| Anyway Neil, just to show you how busy I have been in my workroom...... 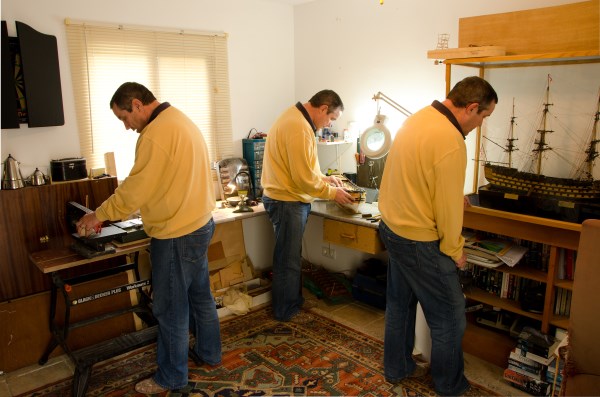 | |
|
  | |
Guest
Guest
 |  Subject: Re: MY NEW PROJECT...or two. Subject: Re: MY NEW PROJECT...or two.  Sun Mar 31, 2013 6:40 pm Sun Mar 31, 2013 6:40 pm | |
| blimey........think how much mayhem I could cause if there were three of me, lol... is the three master ship o' the line the Agamemnon?...........looks beautiful. I have done a little more work on the deck fittings today.......used some of the brackets I sliced up yesterday to make the toe rails for the rowers to rest their feet against, rounded the edges of the drop keel pulley boxes to make them look more like castings, and gave liberal coats of sanding sealer and fitted the cover box for the steering mechanism, plus the odd bracket or two to some storage boxes..........gawd, my finger and thumb are sore........too much sanding of 120 brackets, lol 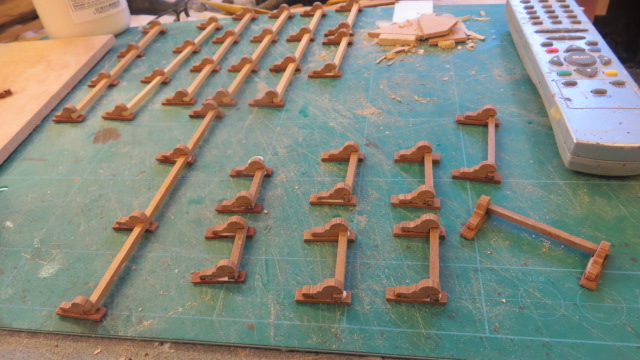  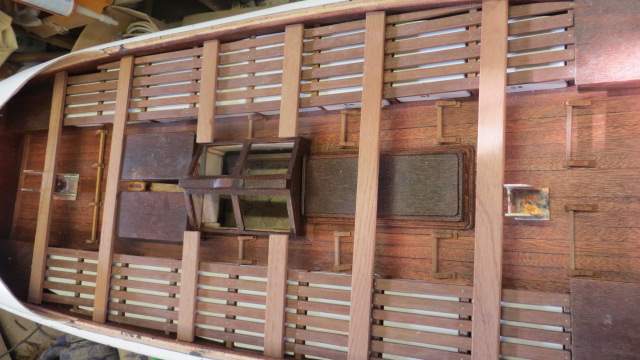 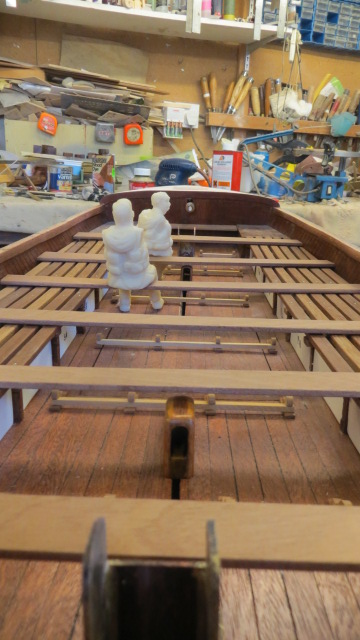 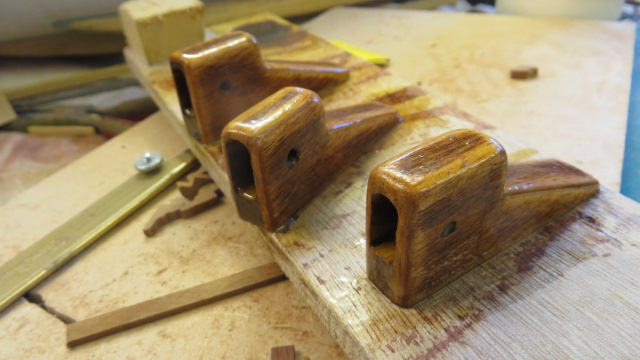 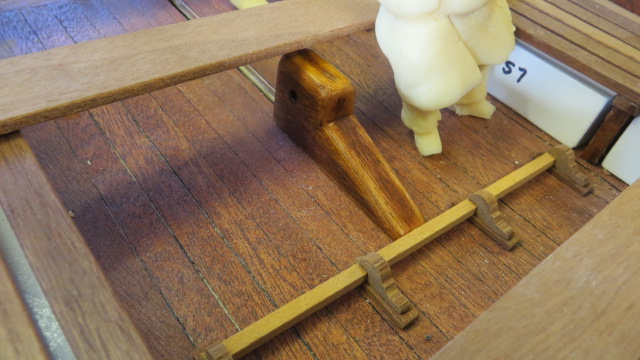  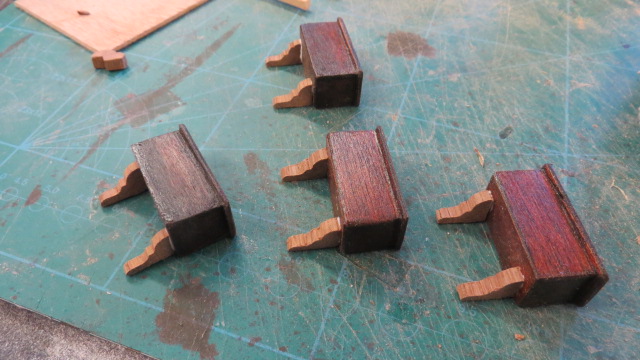 |
|
  | |
Footski
Master


Posts : 548
Join date : 2011-06-11
Age : 66
Location : Malaga, Spain
 |  Subject: Re: MY NEW PROJECT...or two. Subject: Re: MY NEW PROJECT...or two.  Sun Mar 31, 2013 7:13 pm Sun Mar 31, 2013 7:13 pm | |
| So much repetitive work, but so rewarding too. The square rigger is of HMS Victory as she appears at Portsmouth. The one in the middle is also a square rigger, HMS Blandford from 1719. A twenty gunner, I started in 1992!!!! | |
|
  | |
Guest
Guest
 |  Subject: Re: MY NEW PROJECT...or two. Subject: Re: MY NEW PROJECT...or two.  Sun Mar 31, 2013 10:14 pm Sun Mar 31, 2013 10:14 pm | |
| it was the Victory I meant but didn't look like her for some reason.
neil |
|
  | |
Guest
Guest
 |  Subject: Re: MY NEW PROJECT...or two. Subject: Re: MY NEW PROJECT...or two.  Mon Apr 01, 2013 10:48 pm Mon Apr 01, 2013 10:48 pm | |
| Doing a little flitting around on the boats at the moment and getting all the construction done before concentrating on the smaller fittings................so!!, seeing as I have now fabricated the tabernacles, thought I'd attempt to make the masts, and so set about cutting some lengths from the piece of Douglas Fir I bought some weeks ago. Using a tool I haven't used in years........but it's there when I need it.....a marking guage I scribed the thickness of the piece I needed, and cut it on the band saw. after all pieces were cut for main and mizzen mast x 2 plus spars and booms also x 2, I set about using another long since almost redundant tool, my old Try plane to square up the blanks for the main and mizzen mast on one boat. After plaining these with a taper towards one end of each blank I then set about plaining the corners off towards the taper, with a block plane and spokeshave, to a (almost) nicely rounded mast...........finally finishing the mast on the laithe.............two down, two more to go, and then just 4 spars and two booms, 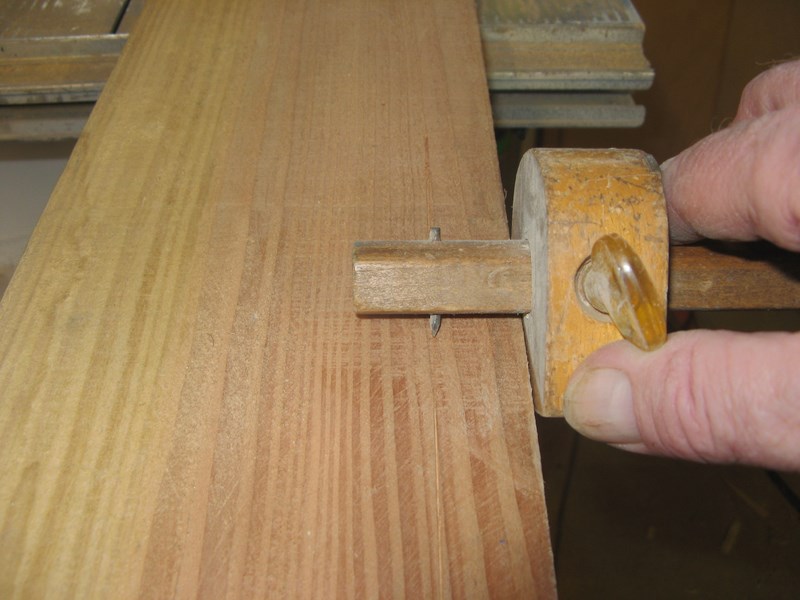 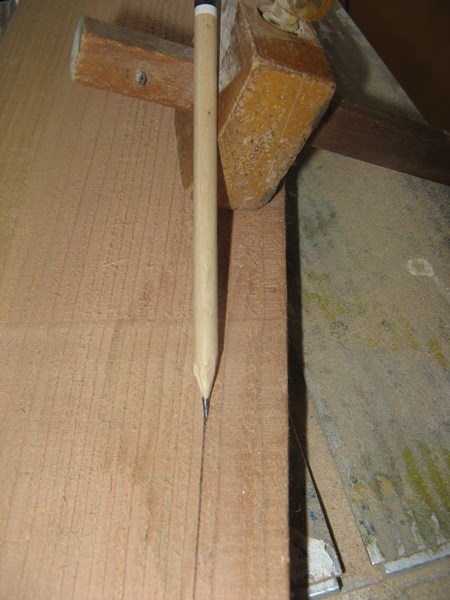   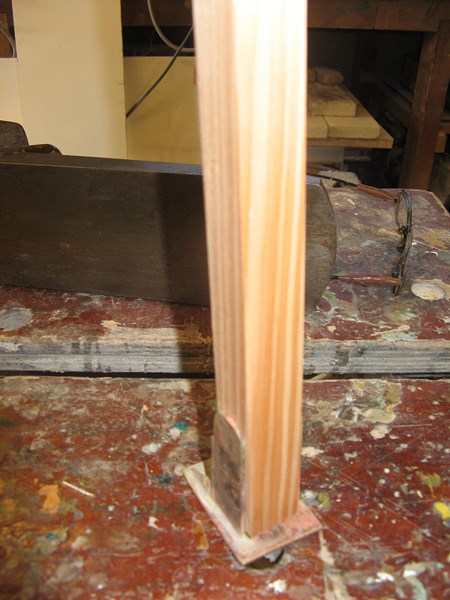  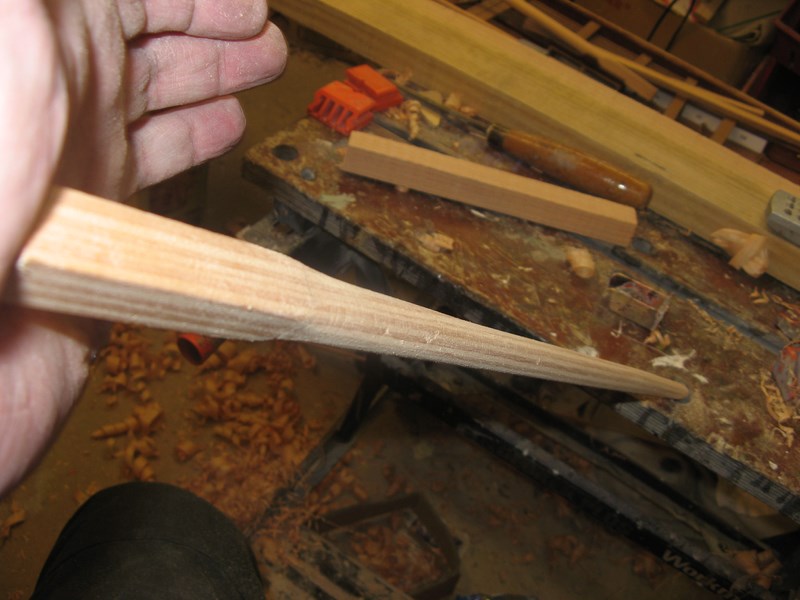  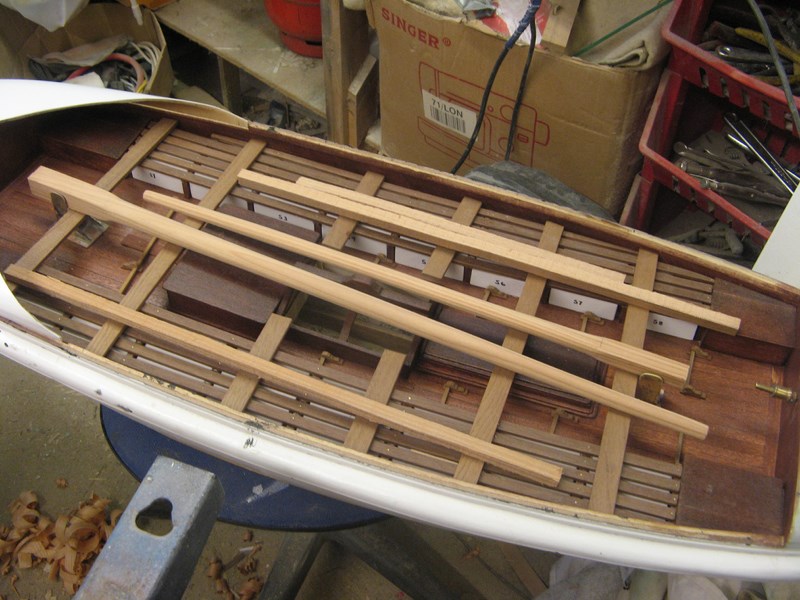 |
|
  | |
Guest
Guest
 |  Subject: Re: MY NEW PROJECT...or two. Subject: Re: MY NEW PROJECT...or two.  Tue Apr 02, 2013 6:47 pm Tue Apr 02, 2013 6:47 pm | |
| |
|
  | |
Guest
Guest
 |  Subject: Re: MY NEW PROJECT...or two. Subject: Re: MY NEW PROJECT...or two.  Wed Apr 03, 2013 10:07 pm Wed Apr 03, 2013 10:07 pm | |
| the work goes on slowly and relentlessly............all the mast rigging bands for the four masts have been turned and cut on my laithe, and the first of the upper mast rollers turned and grooved........I will be buying all those for the rigging blocks from someone ( when I find a supplier on the net) but these four needed are easy enough to turn in the mean time. the masts and spars have also been stained to colour with the first coat of red mahogany.    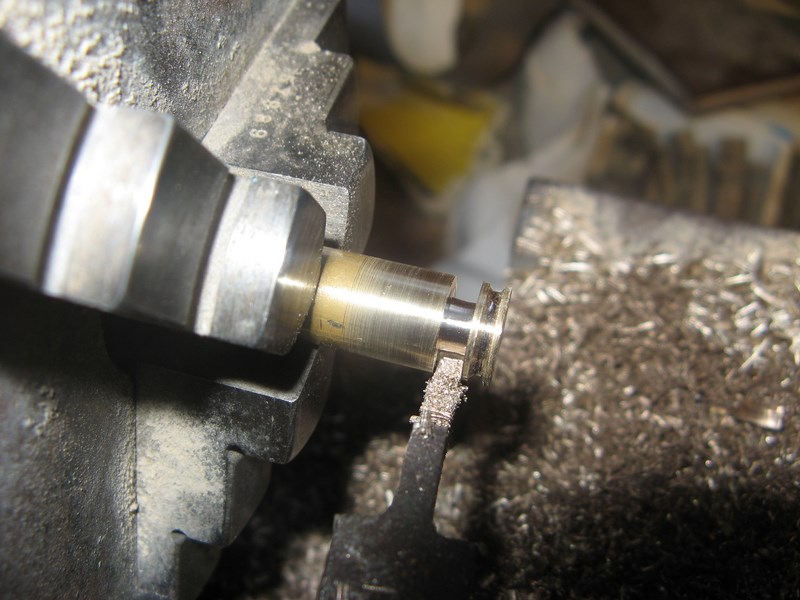  |
|
  | |
Guest
Guest
 |  Subject: Re: MY NEW PROJECT...or two. Subject: Re: MY NEW PROJECT...or two.  Thu Apr 04, 2013 10:57 pm Thu Apr 04, 2013 10:57 pm | |
| |
|
  | |
pugwash
Midshipman

Posts : 60
Join date : 2011-06-19
Age : 78
Location : amble Northumberland coast
 |  Subject: Re: MY NEW PROJECT...or two. Subject: Re: MY NEW PROJECT...or two.  Fri Apr 05, 2013 6:22 am Fri Apr 05, 2013 6:22 am | |
| Pretty darned good Neil
Geoff | |
|
  | |
Guest
Guest
 |  Subject: Re: MY NEW PROJECT...or two. Subject: Re: MY NEW PROJECT...or two.  Sat Apr 06, 2013 9:52 pm Sat Apr 06, 2013 9:52 pm | |
| |
|
  | |
Guest
Guest
 |  Subject: Re: MY NEW PROJECT...or two. Subject: Re: MY NEW PROJECT...or two.  Sat Apr 13, 2013 10:16 pm Sat Apr 13, 2013 10:16 pm | |
| have been doing a little detailing the last few days, but having a brain storm as well.. The other day I counted up the number of screw eyes that I needed to rig the masts and spars and after first making them from brass wire and soldering them decided that for running such a heavy boat under sail they wouldn't be strong enough and so ordered them from the link supplied by a member on another forum. http://www.modelshop.co.uk/brass-scr...-dia-595-p.asp their service was fantastic..........ordered one day and they were here the next day..............only problem was..............I only ordered enough eyes for one set of masts.......derrrhhhhhh. so had to order again....and same service.....superb. so finally got round to ringing the masts and spars today. I also started detailing little areas in order for me to glue the pieces in place before the fore end boxes go on. such things as the boxes have been fitted with their hasps/hinges etc using fine pins supplied with the hinges ( obtained from a shop selling Dolls house fittings)...the project goes on with more detailing than I had at first imagined. 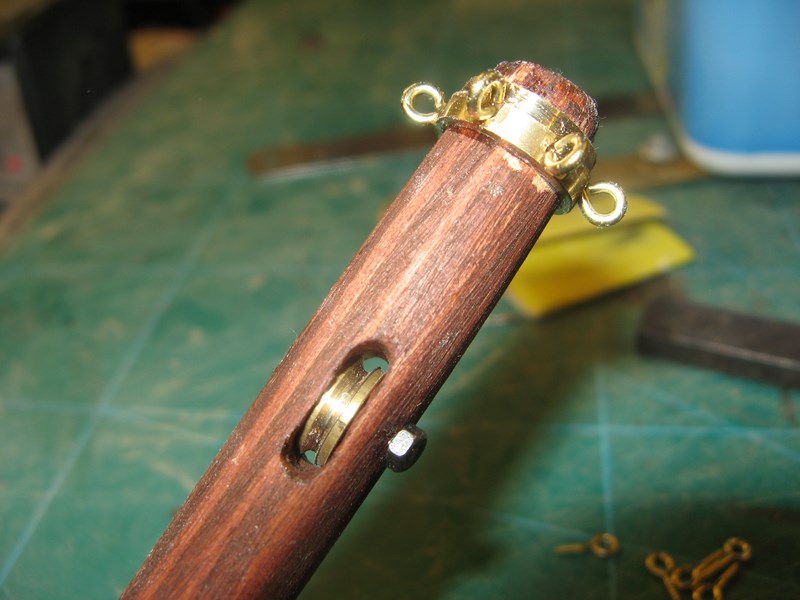  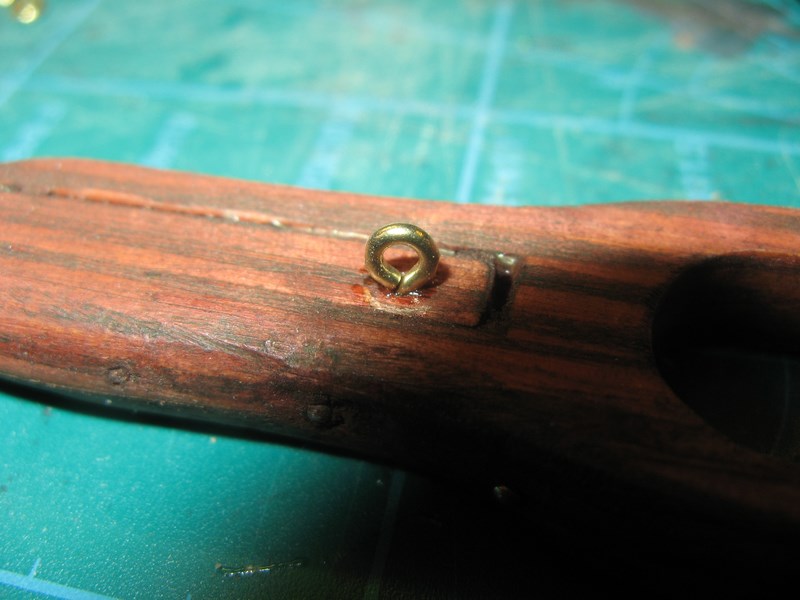 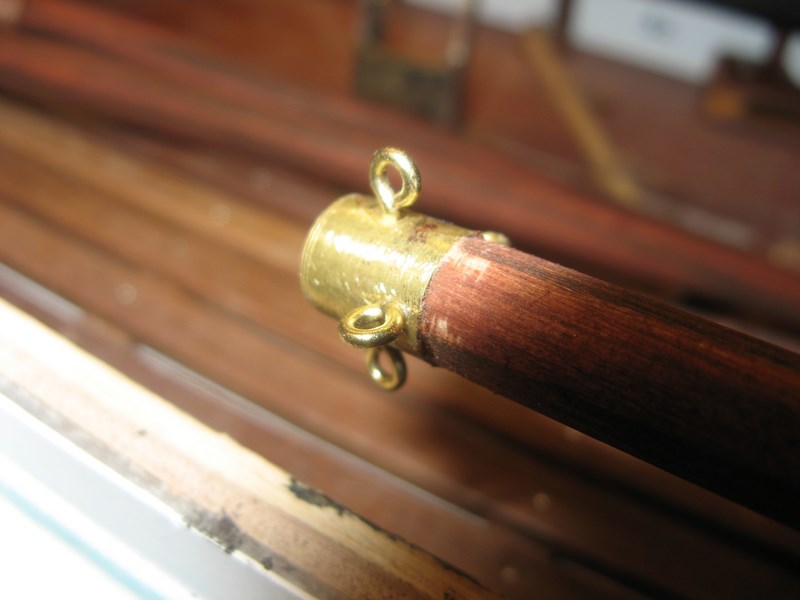  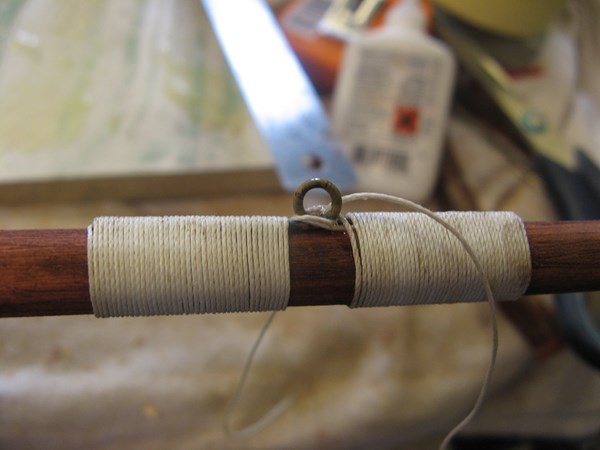 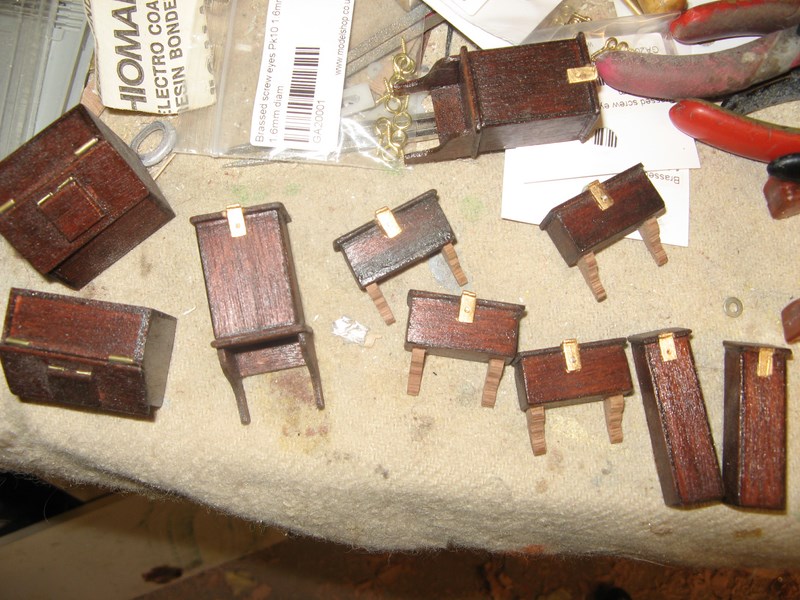 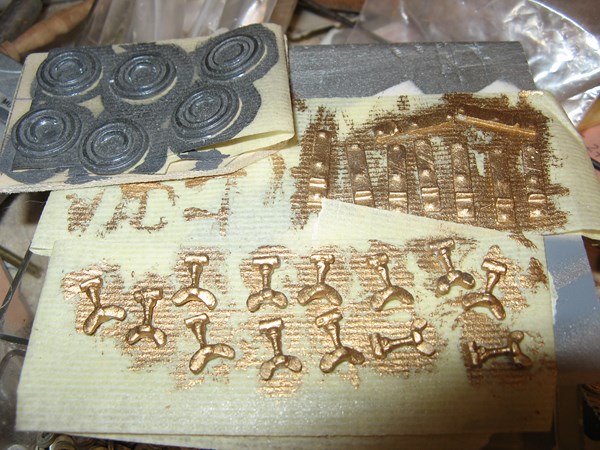  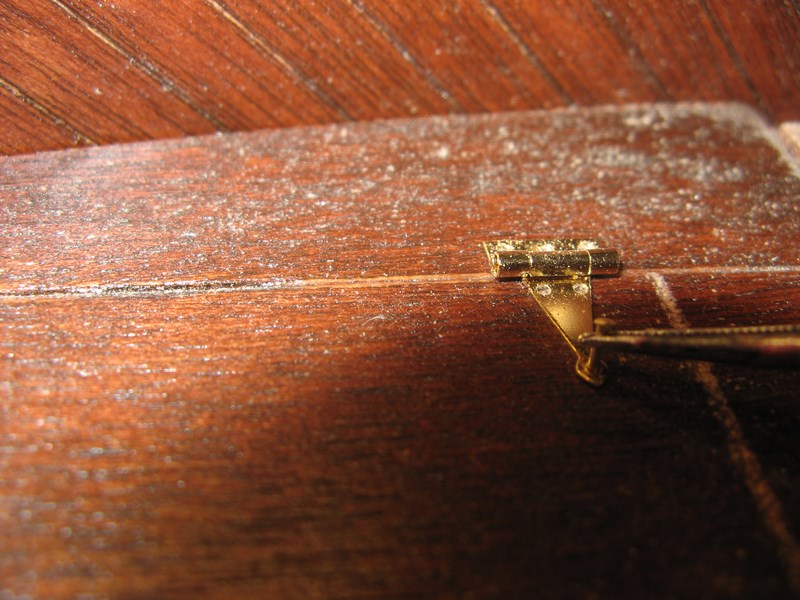 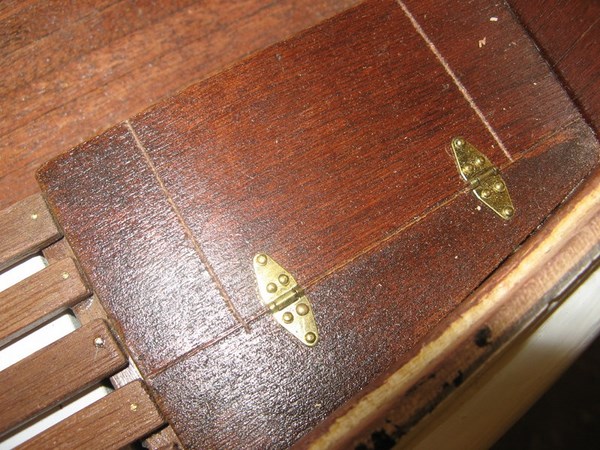  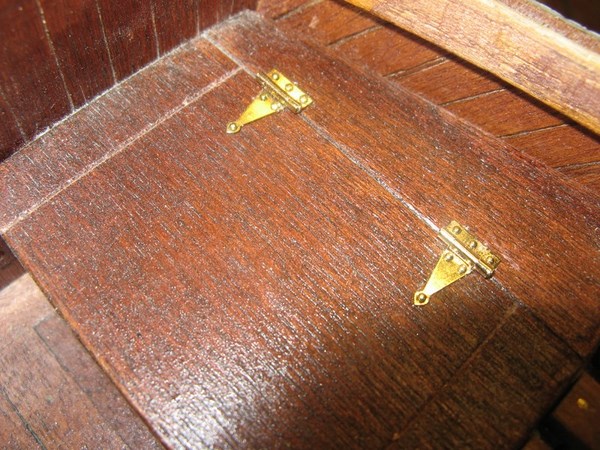 |
|
  | |
Guest
Guest
 |  Subject: Re: MY NEW PROJECT...or two. Subject: Re: MY NEW PROJECT...or two.  Sat Apr 13, 2013 11:47 pm Sat Apr 13, 2013 11:47 pm | |
| |
|
  | |
Guest
Guest
 |  Subject: Re: MY NEW PROJECT...or two. Subject: Re: MY NEW PROJECT...or two.  Sun Apr 14, 2013 9:57 am Sun Apr 14, 2013 9:57 am | |
| cheers matey..............it's slowly coming together.
neil. |
|
  | |
Guest
Guest
 |  Subject: Re: MY NEW PROJECT...or two. Subject: Re: MY NEW PROJECT...or two.  Sun Apr 14, 2013 11:31 pm Sun Apr 14, 2013 11:31 pm | |
| I had forgotten to make and possition the stern quarter Towing posts which should have run through to the deck, but because I have made the stowage boxes I'll have to fudge them and fit a little bracket as a masquerade......bit of modelling licence. Having said that making them at that length was bad enough with 7 different shapes and angles to get right on each post......and a little cutting away of the bulwark belting as well.........they'll blend it when finished with a little skuldugery. and again it was back to the old days........a coping saw is always handy to have around. last shot shows an alteration to the lids and hinges of the stern storage boxes.................all good fun  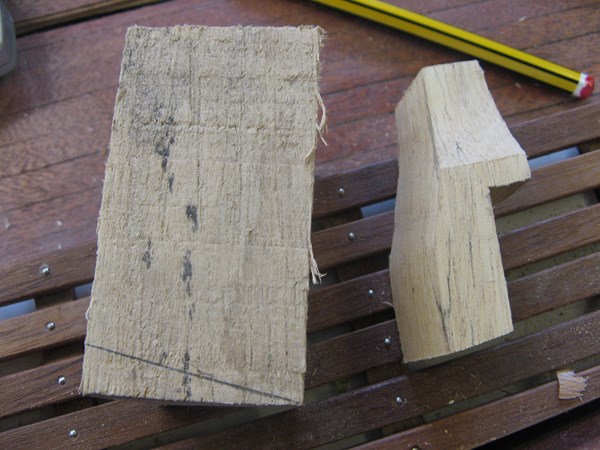  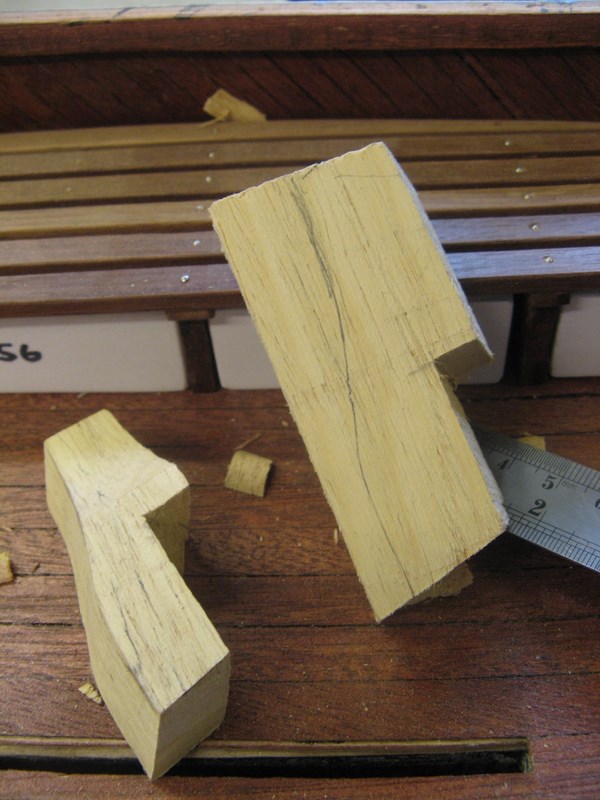 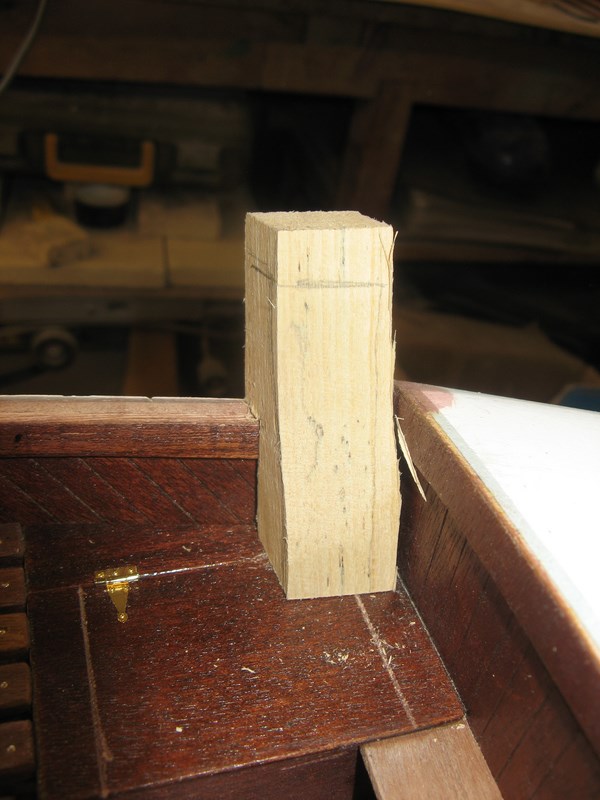 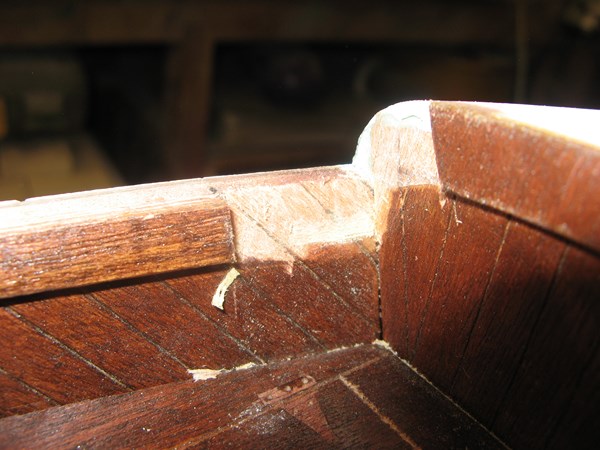 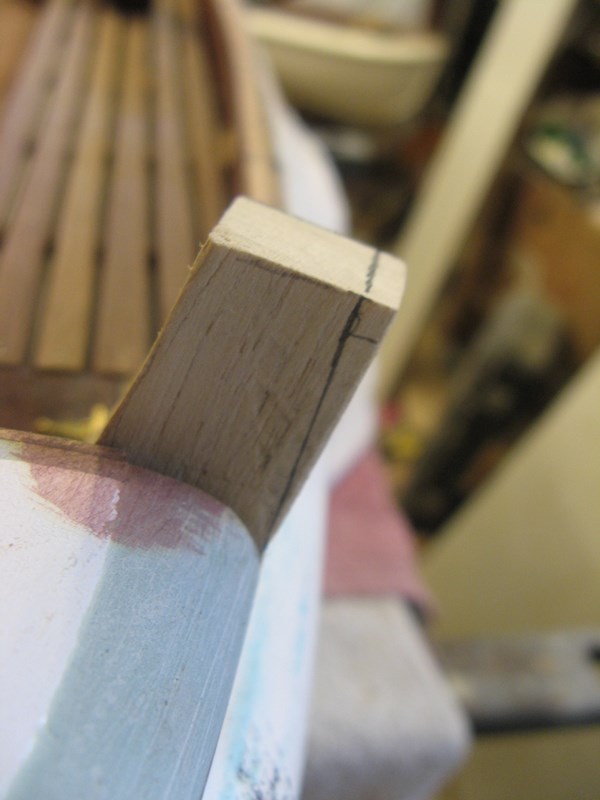  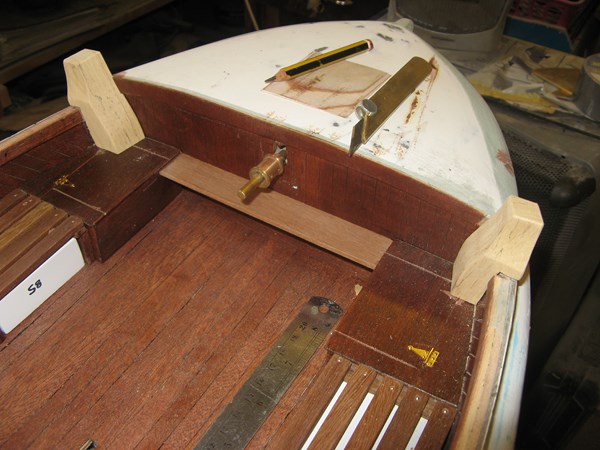 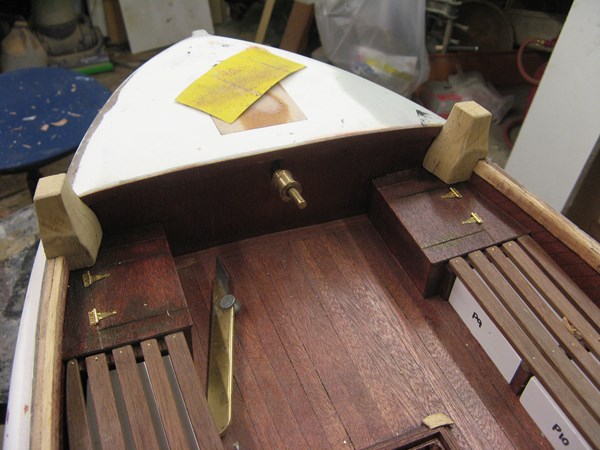 |
|
  | |
Guest
Guest
 | |
  | |
Footski
Master


Posts : 548
Join date : 2011-06-11
Age : 66
Location : Malaga, Spain
 |  Subject: Re: MY NEW PROJECT...or two. Subject: Re: MY NEW PROJECT...or two.  Tue Apr 16, 2013 7:41 am Tue Apr 16, 2013 7:41 am | |
| Marvellous. Nuff said.... | |
|
  | |
Guest
Guest
 |  Subject: Re: MY NEW PROJECT...or two. Subject: Re: MY NEW PROJECT...or two.  Tue Apr 16, 2013 12:37 pm Tue Apr 16, 2013 12:37 pm | |
| cheers barrie.............I'm on a roll now, lol Set the posts into place today using polyester filler ( car body filler)...this is a very good adhesive and also fills the areas that would be done afterwards ......however by using the filler as a glue and then trimming off as the filler goes "rubbery" rather than hard set, you can save an enormous amount of sanding smooth later, and the joints fill well by pressing down and squeezing the filler out of the cracks. 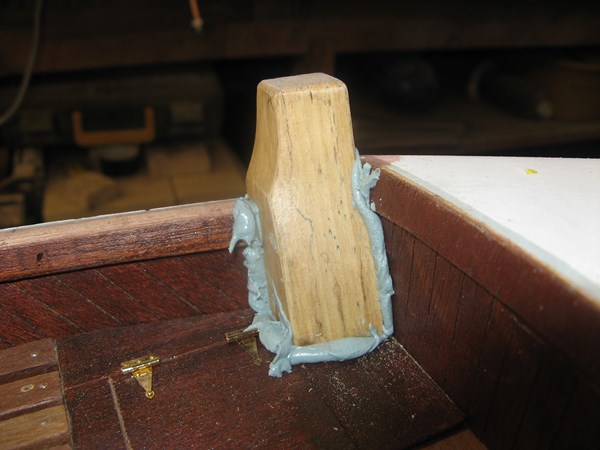 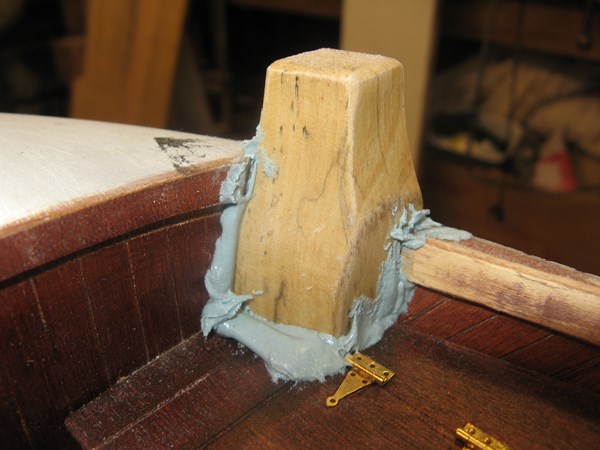 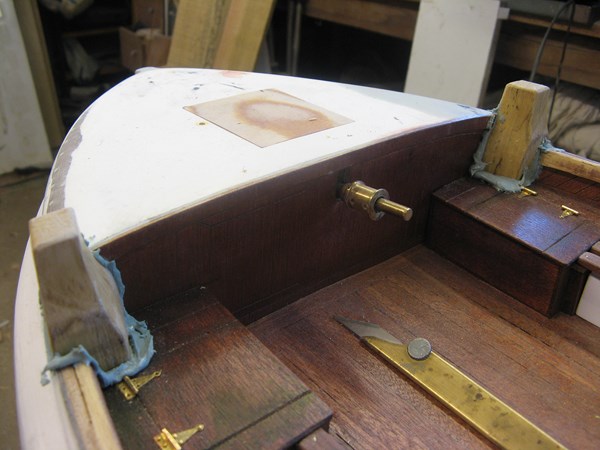 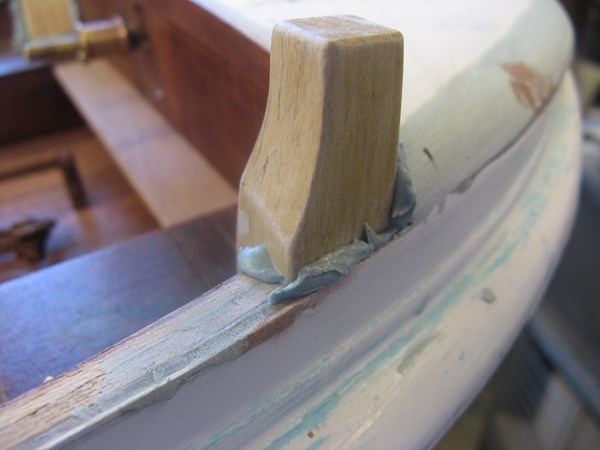 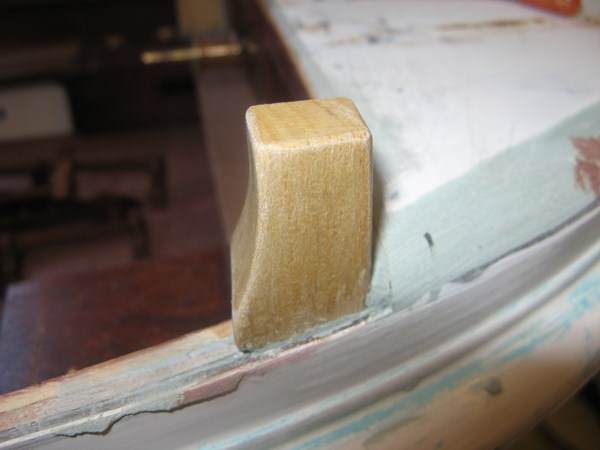 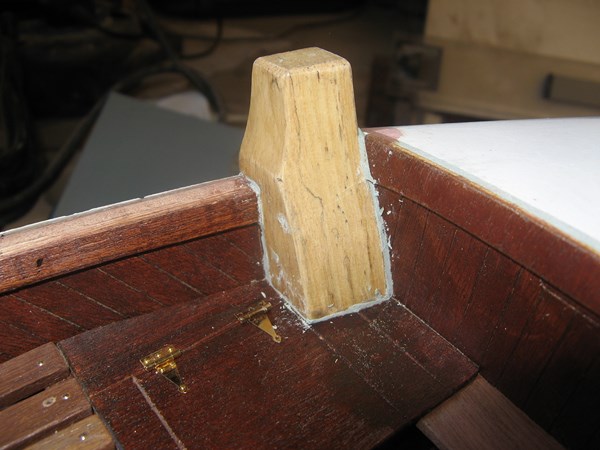 |
|
  | |
Guest
Guest
 |  Subject: Re: MY NEW PROJECT...or two. Subject: Re: MY NEW PROJECT...or two.  Wed Apr 17, 2013 9:37 pm Wed Apr 17, 2013 9:37 pm | |
| working towards putting the front end case tops on I have been detailing the parts that go under the shelter deck which would be hard to access once it is glued in place. hinges, clamps and wing nuts (castings) and the hinges have all been added, and the storage boxes of varying ssizes and shapes have been added and glued in place. Tomorrow it'll be time to venture forth and glue the grp mouldings of the end box tops in place, 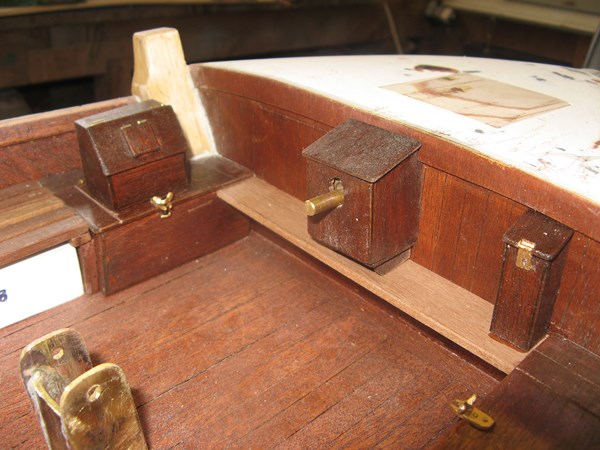 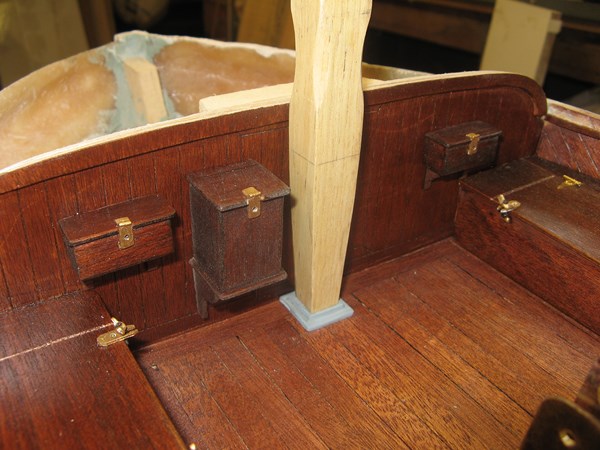 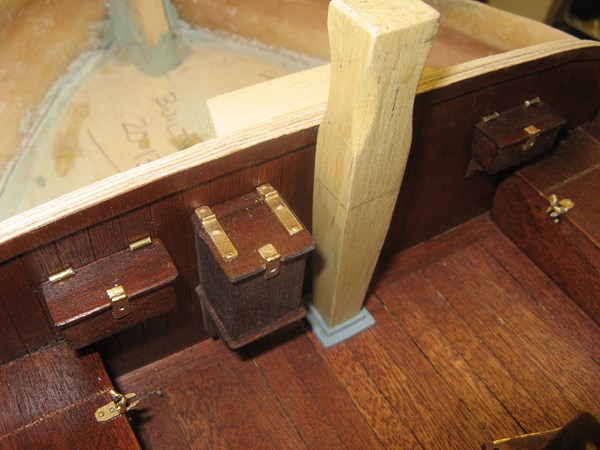 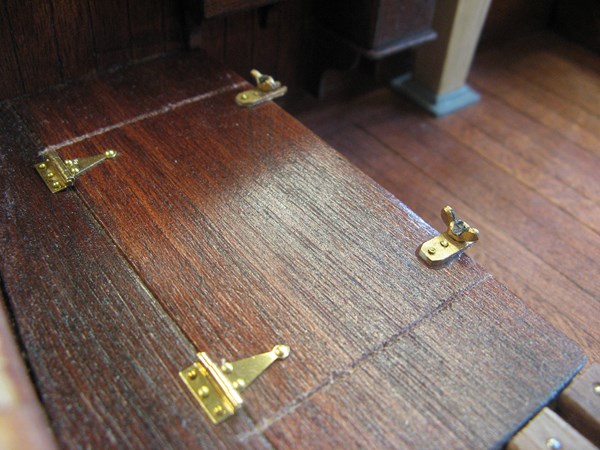   |
|
  | |
Guest
Guest
 |  Subject: Re: MY NEW PROJECT...or two. Subject: Re: MY NEW PROJECT...or two.  Thu Apr 18, 2013 11:07 pm Thu Apr 18, 2013 11:07 pm | |
| Now that the fore bulkhead has been fitted with the main parts that sit under the shelter of the end box top I decided to fit the top. started with masking the area where the adhesive will sit and actually making a trough for the box edges and the resin glue to sit into. next I drilled along the glueing edge of the grp moulding with a 2mm bit so that the holes would act as a surface for the resin and later the filler to use as an anchorage. Mixed the 30 minute setting time 2 part epoxy resin adhesive and smeared it on all surfaces that by touch, glue to the boat.......I also put a good quantity into the masked off trough. I used a wodge of polyester filler to set the most forward part into at the bow, and taped it all down, using old batteries as a weight to help set the end boxes in. I left that to set, and then using polyester filler I faired in the meeting point of the box top and the hull and left all to set till tomorrow. Whilst this was setting I made some heavy duty screw eyes for the rigging bolts at deck/bulwark level from 3mm set screws, a washer as the foot for each, and a ring made from 0.8mm brass wire bent into a loop, and all silver soldered together.......24 of these should be enough for both boats ( haven't counted the rigging shrouds yet, but if I need any more, it was a simple and quick job..........and I have plenty of set screws, lol 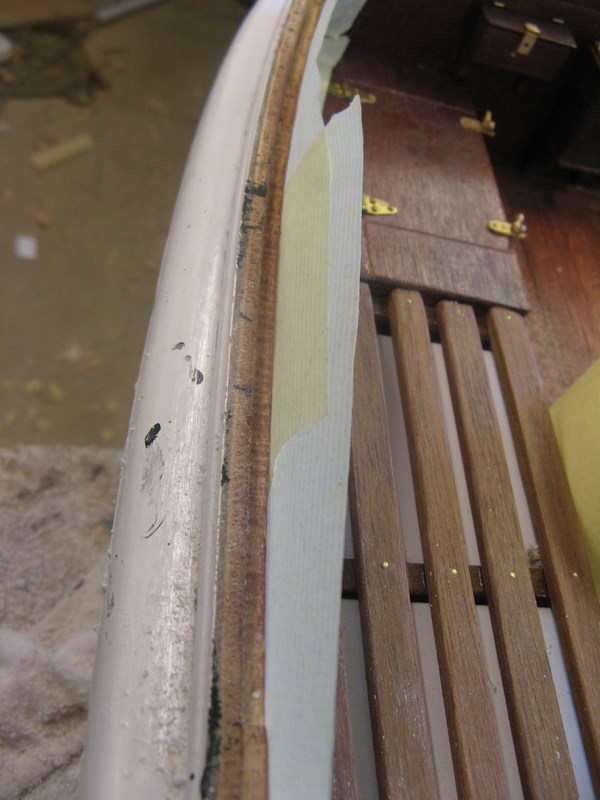 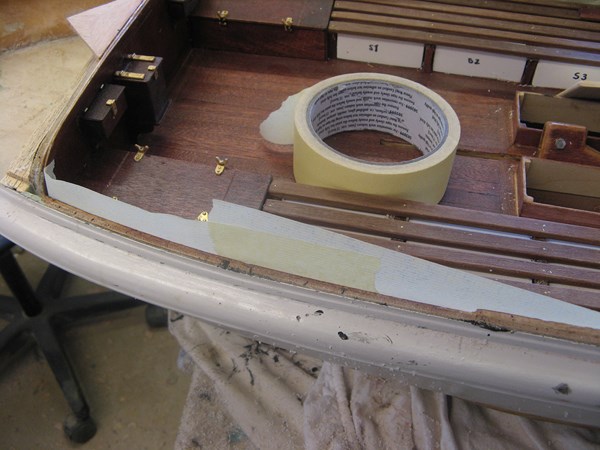 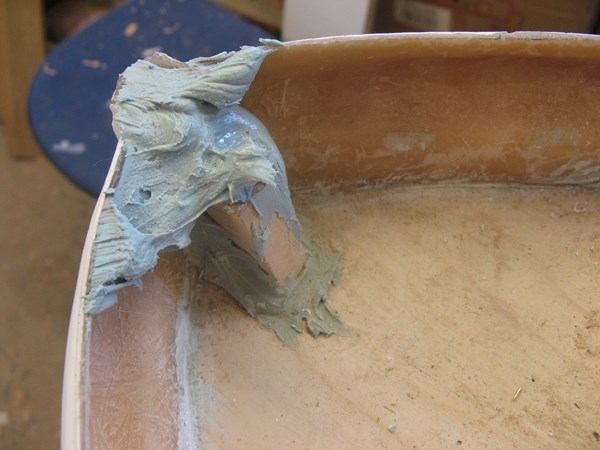 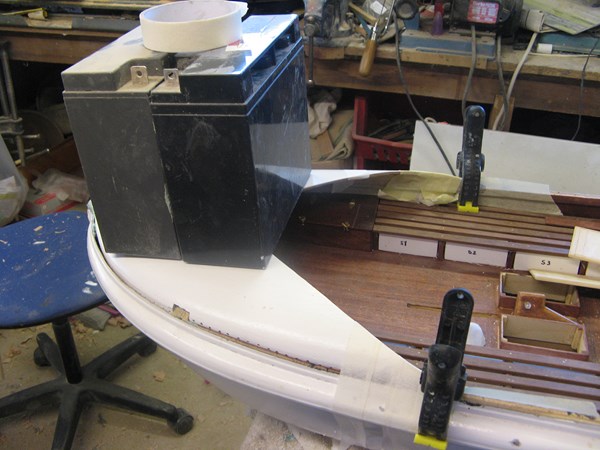 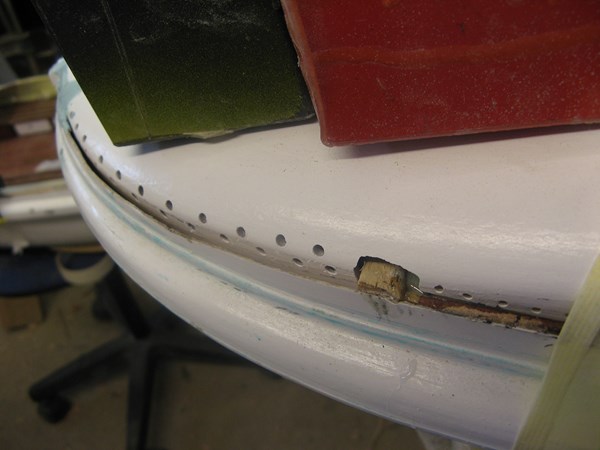 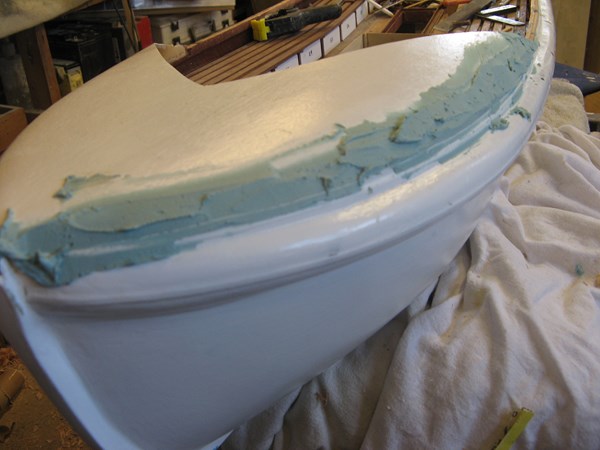 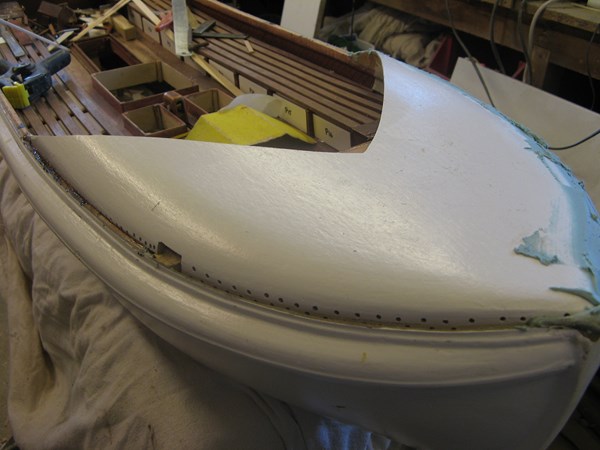 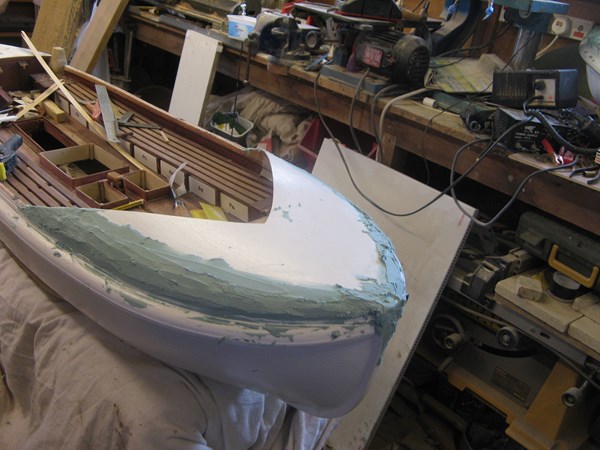 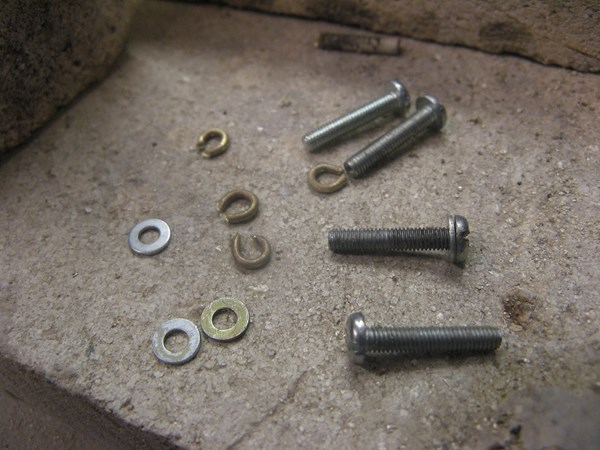 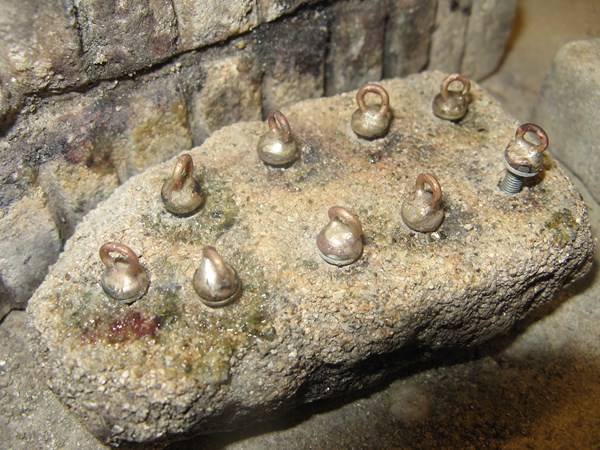 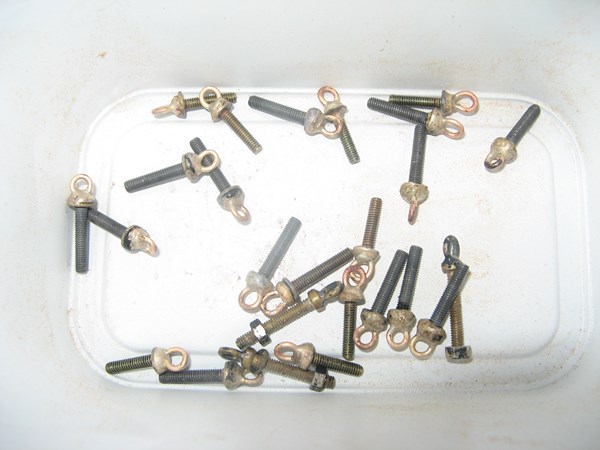 |
|
  | |
Guest
Guest
 |  Subject: Re: MY NEW PROJECT...or two. Subject: Re: MY NEW PROJECT...or two.  Fri Apr 19, 2013 12:30 pm Fri Apr 19, 2013 12:30 pm | |
| half an hour sanding the rough stuff off, they can now be re filled where needed and hand sanded down now..........method in my madness, lol and a couple of quick shots to show the slight differences and the progress in them. 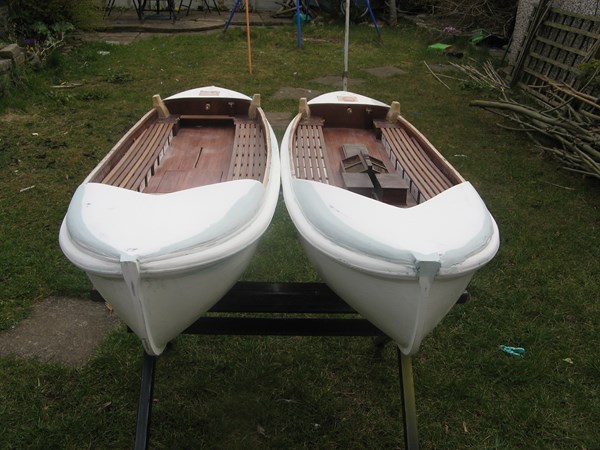 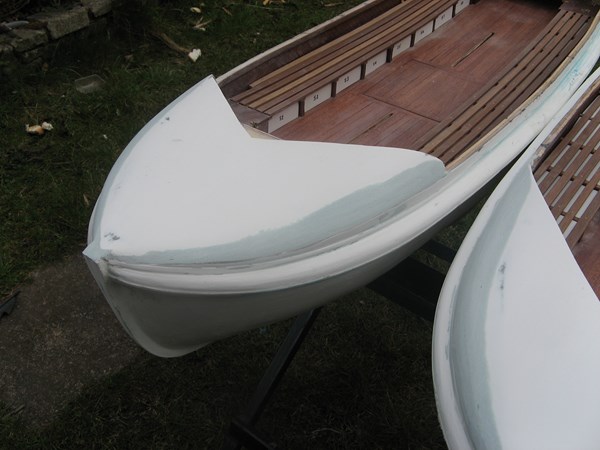  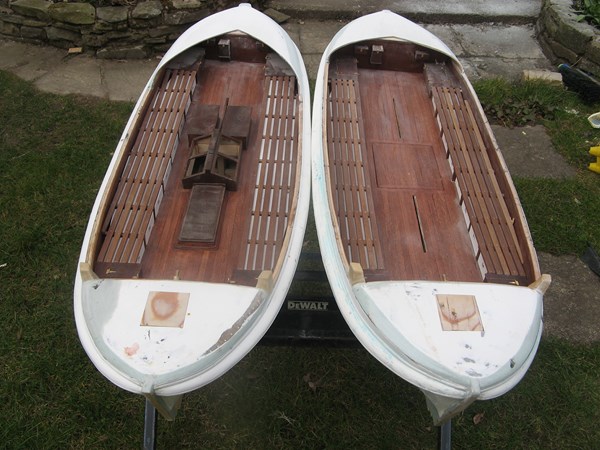 |
|
  | |
Guest
Guest
 |  Subject: Re: MY NEW PROJECT...or two. Subject: Re: MY NEW PROJECT...or two.  Fri Apr 19, 2013 1:44 pm Fri Apr 19, 2013 1:44 pm | |
| |
|
  | |
Guest
Guest
 |  Subject: Re: MY NEW PROJECT...or two. Subject: Re: MY NEW PROJECT...or two.  Sat Apr 20, 2013 10:42 pm Sat Apr 20, 2013 10:42 pm | |
| yesterday I started to make the rudder frames by making the pintle bars from brass sheet and silver soldering to a bar, before bending into shape........ BAD MOVE! The frames wouldn't bend at the correct places because the silver solder had (as expected and desired) run on the sheet. they looked awful so, back to the drawing board, I sweated the frames off the bar, made new frames and bent them first, before soldering them onto the bar in finished shape. This time they worked ok.  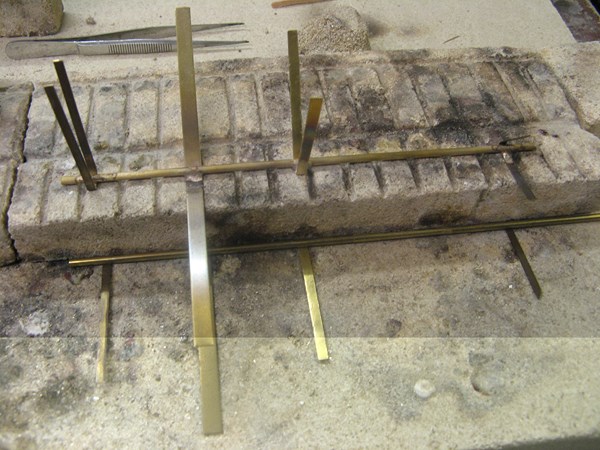  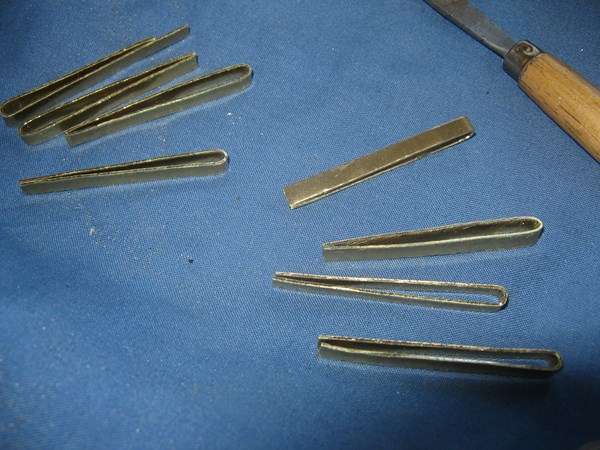 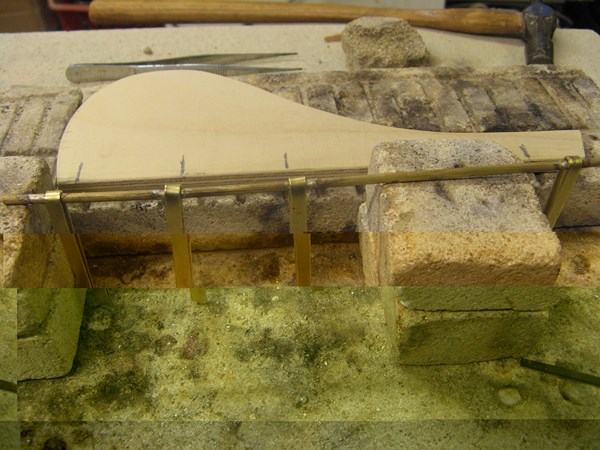  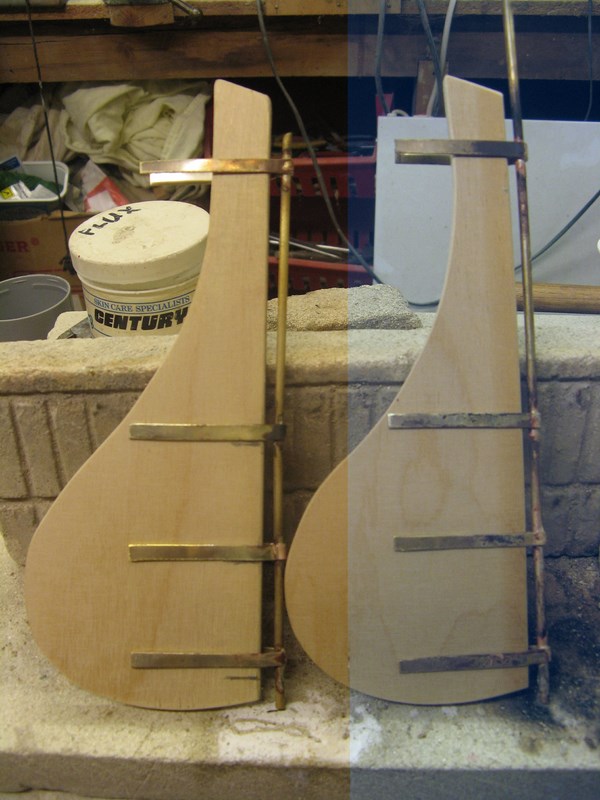 |
|
  | |
Guest
Guest
 |  Subject: Re: MY NEW PROJECT...or two. Subject: Re: MY NEW PROJECT...or two.  Mon Apr 22, 2013 11:26 pm Mon Apr 22, 2013 11:26 pm | |
| had a fidly sort of day today, doing a few little jobs that needed doing before more progrression can be made..............and some didn't go as I had wanted........others did. First I drilled holes in the edge of my brass drop keels to take loops for tying the ropes for uphauling the keels and tying up.............didn't go well.............couldn't get enough localised heat into the large thick brass keels without melting the 1.8mm brass wire...............so in the end gave up on that one and will try something else tomorrow. Next job was to make the blade end of my oars which will be then moulded and cast in resin ready for taking dowelled handles..............that went well...... Marked the rudders which had been made in 4mm ply, for the individual planks of timber that they would have been made from .......went ok. Finally made the frame work for the rudder tiller bars...............only problem was I only made one set............didn't remember until later this evening, so had to go out to the workshop and set up the soldering job again to make a second set for the no.2 boat............couldn't have left it till tomorrow..............would have forgotten them, lol 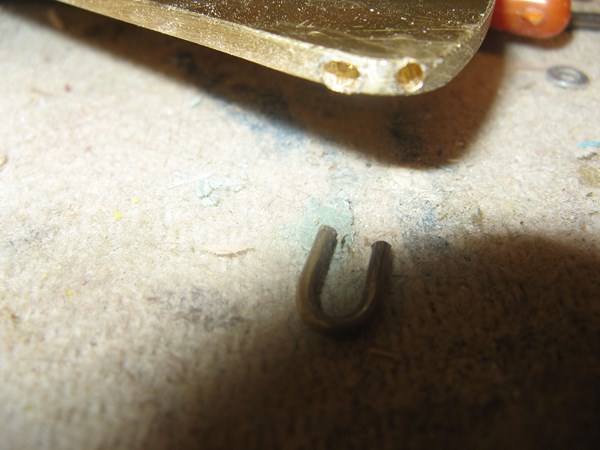 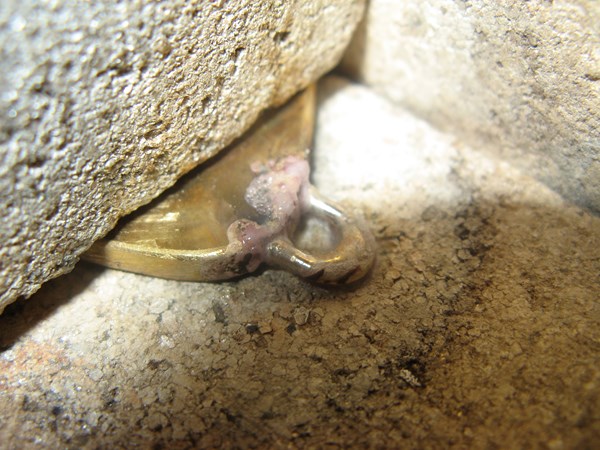 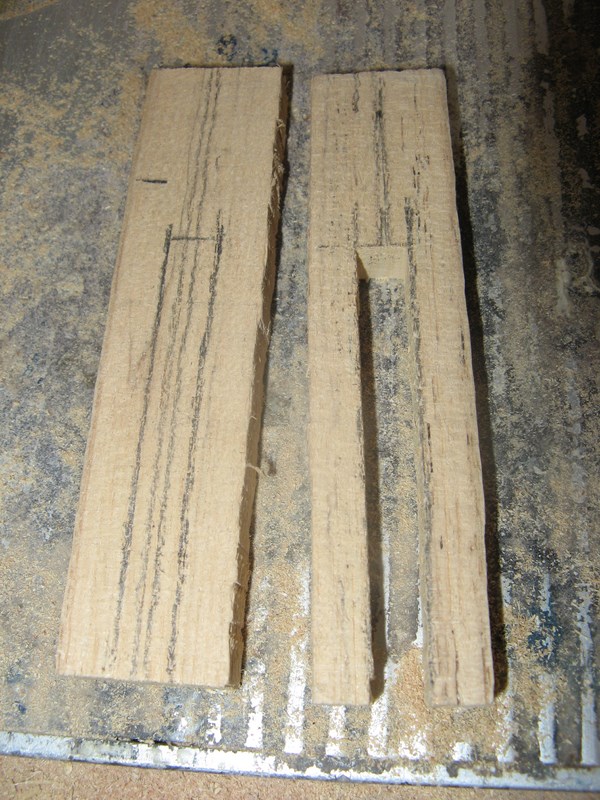 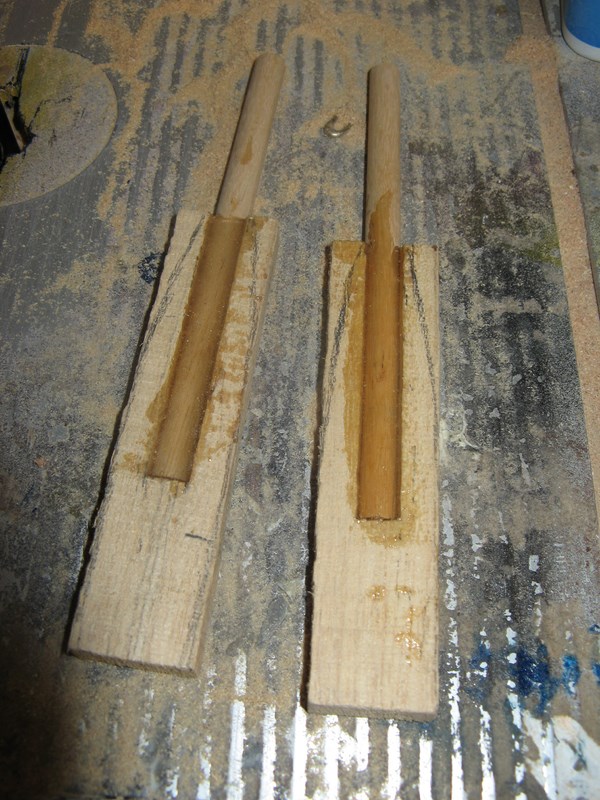 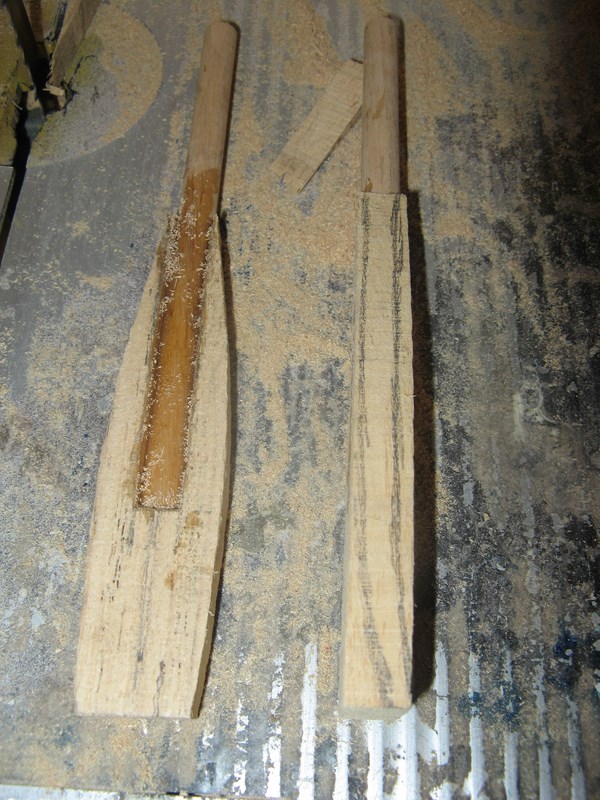   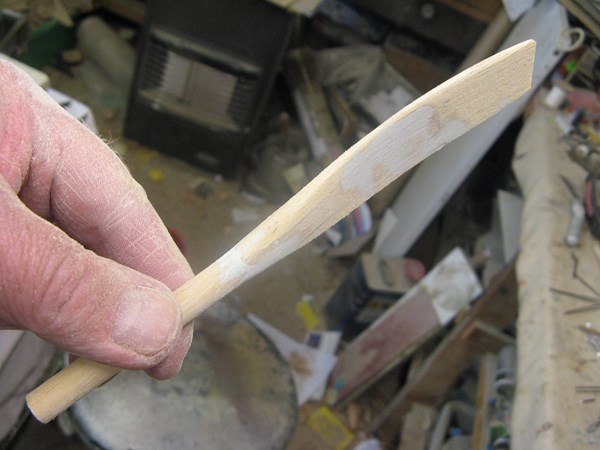  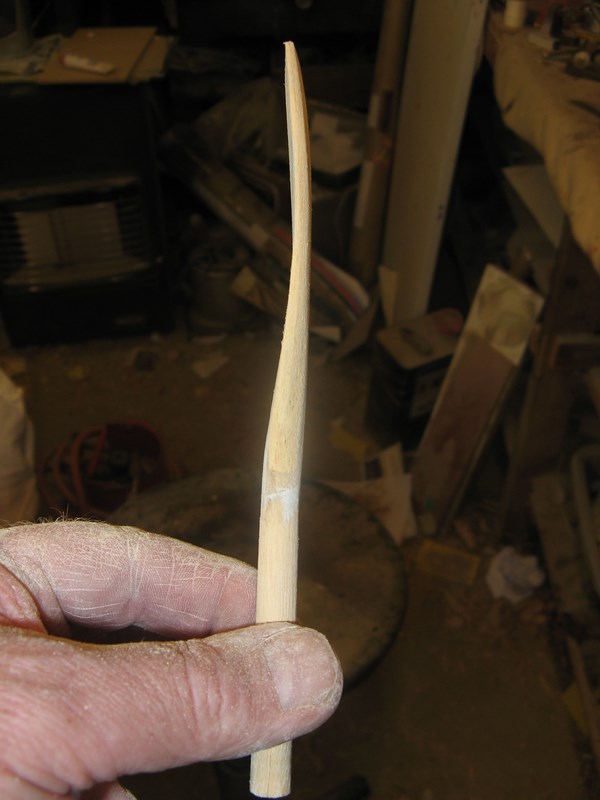 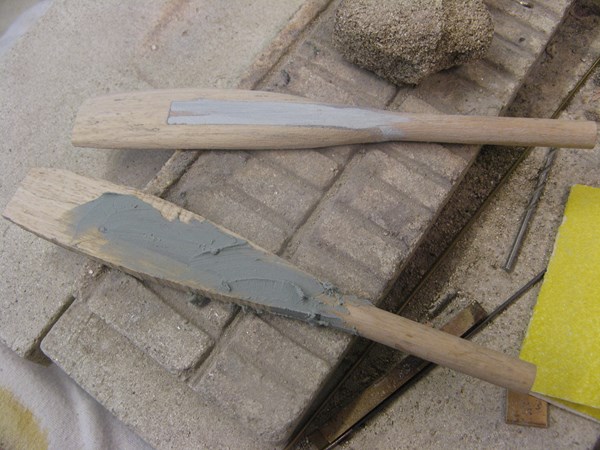 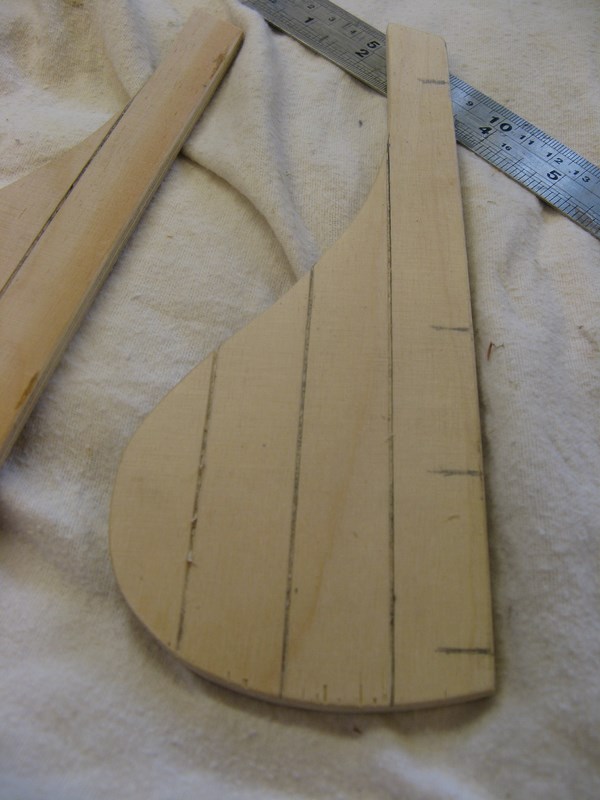  |
|
  | |
Guest
Guest
 |  Subject: Re: MY NEW PROJECT...or two. Subject: Re: MY NEW PROJECT...or two.  Tue Apr 23, 2013 12:59 am Tue Apr 23, 2013 12:59 am | |
| |
|
  | |
Guest
Guest
 |  Subject: Re: MY NEW PROJECT...or two. Subject: Re: MY NEW PROJECT...or two.  Tue Apr 23, 2013 12:19 pm Tue Apr 23, 2013 12:19 pm | |
| cheers damien, and now, the second set of oars..........these had a flat blade as used on the older boats too..........so now I have a choice. compare the flat with the curved blade. neil.   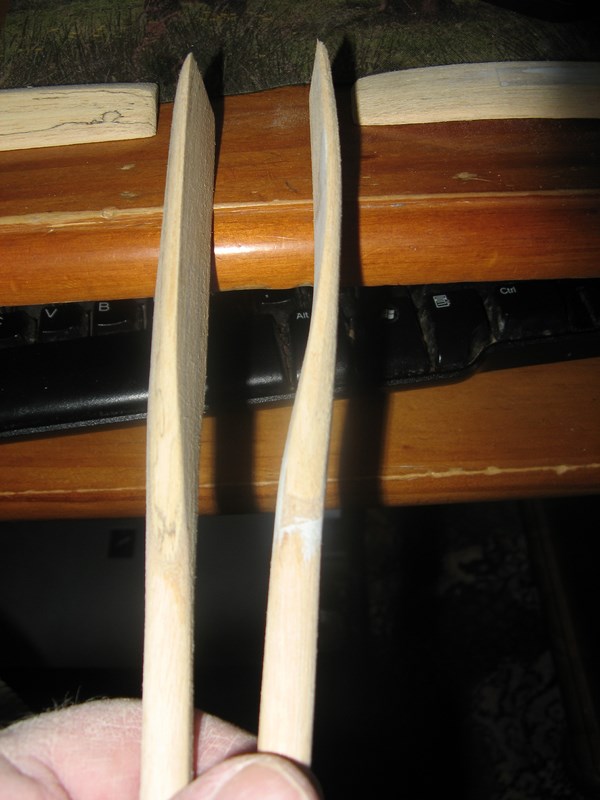  |
|
  | |
Guest
Guest
 |  Subject: Re: MY NEW PROJECT...or two. Subject: Re: MY NEW PROJECT...or two.  Tue Apr 23, 2013 9:37 pm Tue Apr 23, 2013 9:37 pm | |
| |
|
  | |
Guest
Guest
 |  Subject: Re: MY NEW PROJECT...or two. Subject: Re: MY NEW PROJECT...or two.  Wed Apr 24, 2013 8:56 pm Wed Apr 24, 2013 8:56 pm | |
| |
|
  | |
Guest
Guest
 |  Subject: Re: MY NEW PROJECT...or two. Subject: Re: MY NEW PROJECT...or two.  Fri Apr 26, 2013 10:00 pm Fri Apr 26, 2013 10:00 pm | |
| |
|
  | |
Guest
Guest
 |  Subject: Re: MY NEW PROJECT...or two. Subject: Re: MY NEW PROJECT...or two.  Fri Apr 26, 2013 10:11 pm Fri Apr 26, 2013 10:11 pm | |
| |
|
  | |
Guest
Guest
 |  Subject: Re: MY NEW PROJECT...or two. Subject: Re: MY NEW PROJECT...or two.  Sun Apr 28, 2013 6:26 pm Sun Apr 28, 2013 6:26 pm | |
| |
|
  | |
Guest
Guest
 | |
  | |
Guest
Guest
 |  Subject: Re: MY NEW PROJECT...or two. Subject: Re: MY NEW PROJECT...or two.  Tue Apr 30, 2013 12:40 pm Tue Apr 30, 2013 12:40 pm | |
| well..........hope the next set of photos are better........... What I do like about scratch building is/are the problems that you have to overcome. I know the rudder assembly that I had made originally wasn't "scale" but these are to be sailing models and so would take a fair amount of abuse, as I have never "sailed" a model before.....i.e. under full rig, and so wanted something that was reasonably robust. Having seen the original rudder assembly I found that soldering the brackets onto the round rudder stock had weakened the assembly considerably in that the brass was now very pliable after being subjetced to two measures of heat.... So I reverted to the brackets shown in last post and a steel rudder stock which has come nowhere near heat, and so is still as prodced. the new assembly has been put onto the boat, and after the glue has set on the brackets, I'll set them in place with the self tapping brass rivets that Rod has given me......... finally some might say that there is too much of a gap between rudder stock and stern post..........I have no objetcion to this as my opinion is the same.............I might block it in with a strip down the stern post of obeche which will fit inside the brackets once they have been riveted..........then again I might not, And now of course......the rudder will uphaul that inch or so...........luvvly jubbly.       |
|
  | |
Guest
Guest
 | |
  | |
Guest
Guest
 |  Subject: Re: MY NEW PROJECT...or two. Subject: Re: MY NEW PROJECT...or two.  Wed May 01, 2013 10:41 pm Wed May 01, 2013 10:41 pm | |
| |
|
  | |
Guest
Guest
 |  Subject: Re: MY NEW PROJECT...or two. Subject: Re: MY NEW PROJECT...or two.  Thu May 02, 2013 11:47 pm Thu May 02, 2013 11:47 pm | |
| finished the rudder assembly for the motor sailor today...........not much else done.........been rather fed up with other manifestations of beurocratic garbage for a few days, and am a little lethargic to doing anything..........all part of the SAD syndrome I suffer from at this time of year. Made the steel yolk got steering from stainless steel rod, silver soldered together, and then drilled and glued in place with two part epoxy.   |
|
  | |
Guest
Guest
 |  Subject: Re: MY NEW PROJECT...or two. Subject: Re: MY NEW PROJECT...or two.  Fri May 03, 2013 8:11 pm Fri May 03, 2013 8:11 pm | |
| the more fidley bits I do, the nearer the model gets, and these little things made today have been worrying me as to whether they will work.......but now that I have done them I think they will!!. these are the rollers that feed the rope from the rudder yolks to the boss on the steering rod which is attached to the servo set into the stern box. I have just stained the roller supports and tomorrow will glue them in place using epoxy, and then set the rollers into the top of the supports and leave to set. 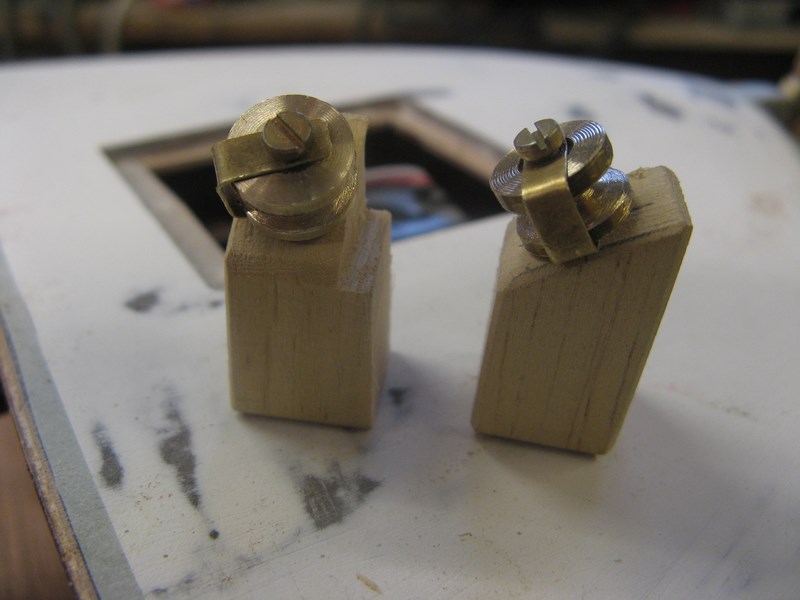 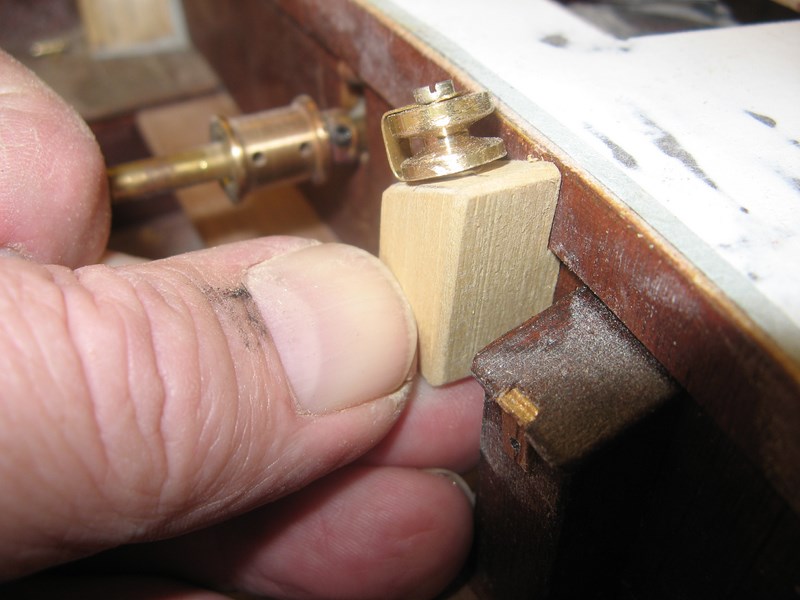 |
|
  | |
Guest
Guest
 |  Subject: Re: MY NEW PROJECT...or two. Subject: Re: MY NEW PROJECT...or two.  Sat May 04, 2013 8:52 pm Sat May 04, 2013 8:52 pm | |
| Today I spent a little time gluing the roller supports to the aft bulkhead and dry fitting the rollers......they seam to have taken the right angle for me to thread them to the rudder yolks from the steering boss for them to work ok...time will tell. And then attention shifted to the engine "Dog Kennel" and it's lift up flaps for engine inspection and running. I did make some, a while ago, but to be honest they were rubbish, and time took it's toll and they warped and twisted over the short period of time that I had left them, so made some more today from 2mm ply......turned out much better. I also had to think about hinges/brackets and these came from my parts bin........generic hinges/brackets from the old Anne Letitia Russell kit......slightly modified to work. I used the hinge ends and drilled with a 0.8mm bit to take some jewelry eye rings that I bought some time ago, and with a little judicial modification and bending fashioned some loops so that the hinge brackets, once also drilled with a 2mm hole ( for the hinge rods) could be attached. here are a few shots of those processes.   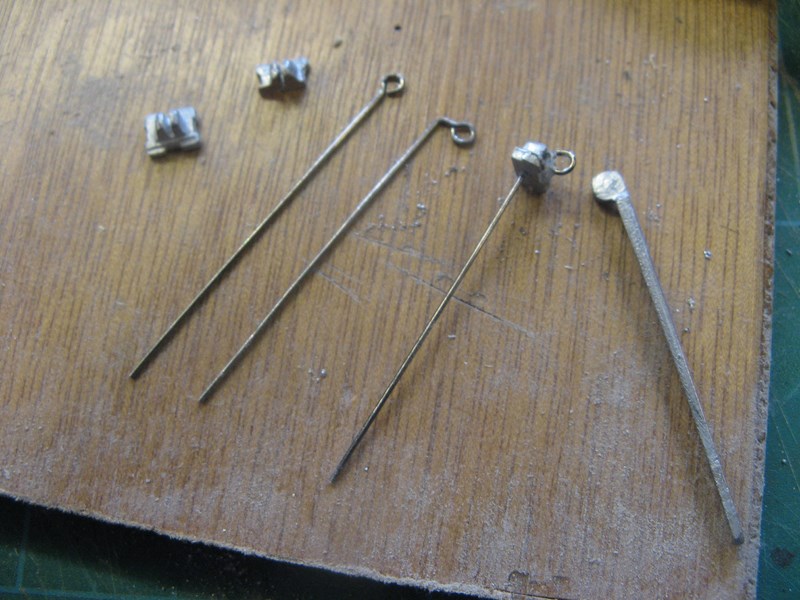  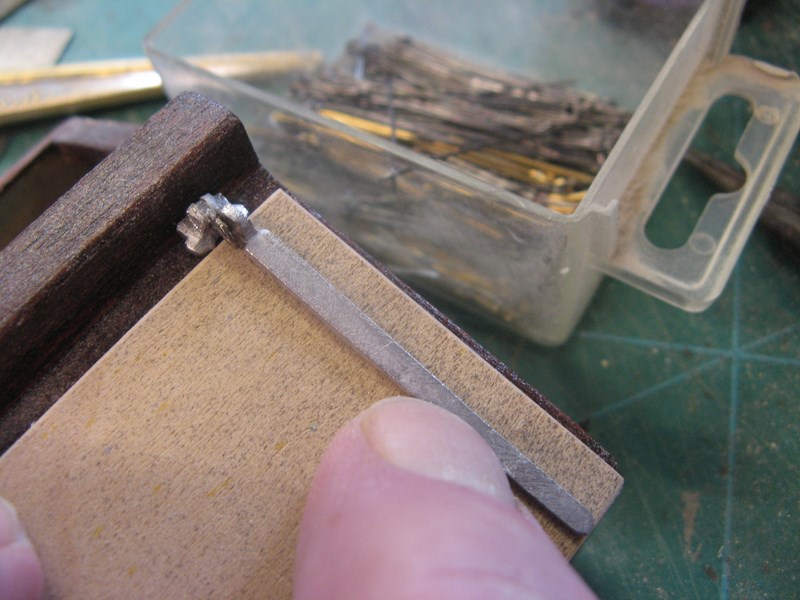  |
|
  | |
Guest
Guest
 | |
  | |
pugwash
Midshipman

Posts : 60
Join date : 2011-06-19
Age : 78
Location : amble Northumberland coast
 |  Subject: Re: MY NEW PROJECT...or two. Subject: Re: MY NEW PROJECT...or two.  Sun May 05, 2013 5:04 am Sun May 05, 2013 5:04 am | |
| Very nice work Neil   Geoff | |
|
  | |
Guest
Guest
 |  Subject: Re: MY NEW PROJECT...or two. Subject: Re: MY NEW PROJECT...or two.  Sun May 05, 2013 4:11 pm Sun May 05, 2013 4:11 pm | |
| cheers geoff..........thought everyone had left the site...........no one been posting anywhere for weeks, lol.
neil. |
|
  | |
Guest
Guest
 |  Subject: Re: MY NEW PROJECT...or two. Subject: Re: MY NEW PROJECT...or two.  Tue May 07, 2013 9:47 pm Tue May 07, 2013 9:47 pm | |
| |
|
  | |
Guest
Guest
 |  Subject: Re: MY NEW PROJECT...or two. Subject: Re: MY NEW PROJECT...or two.  Fri May 10, 2013 7:03 pm Fri May 10, 2013 7:03 pm | |
| |
|
  | |
Guest
Guest
 |  Subject: Re: MY NEW PROJECT...or two. Subject: Re: MY NEW PROJECT...or two.  Sat May 11, 2013 10:01 pm Sat May 11, 2013 10:01 pm | |
| I decided some time ago that I wasn't going to complicate these models by putting sail servos and winches in, and would make the rigging as simple,tough and servicable as possible even if it meant a little none scale ( but old yachting) gear from my ealy youth. As such the fittings I have made, might not be scale and to the purists liking, but it will give me the meatiness I will need for a first set of sailing boats, and that's all I am bothered about. That's not to say though that they won't look the part by the time I have finished, with a little modellers licence. I have made the eye's to tie off the Halyards and shrouds from brass wire bent into a loop and silver soldered onto 3mm cheese head screws that self tapped into the timber of the bulwarks..........no glue used. the frame ( haven't got a clue what to call them) for the main and mizzen sails so that they can swing for port or starboard tack on the use of the rudder were made from brass rod and will be fixed into plaxe using resin for the Maude pickup, and for the William and Laura, because it is affixed to a thwart will be threaded and a nut attached to each leg/ the aft ones for mizzen sail boom will be glued in place with resin....this will mean the the boats will have to be turned upside down once the resin has been poured into the area for it to set around the protruding legs......bit of a fiddle but it will work. 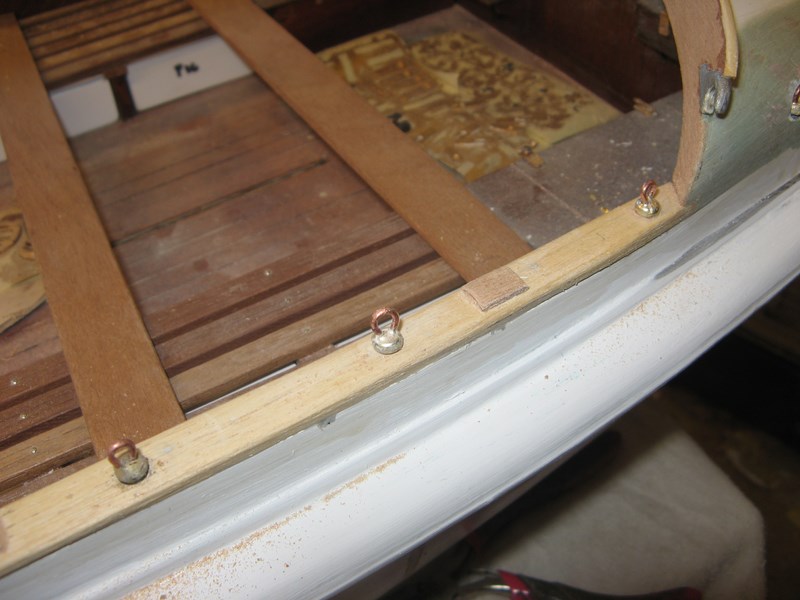  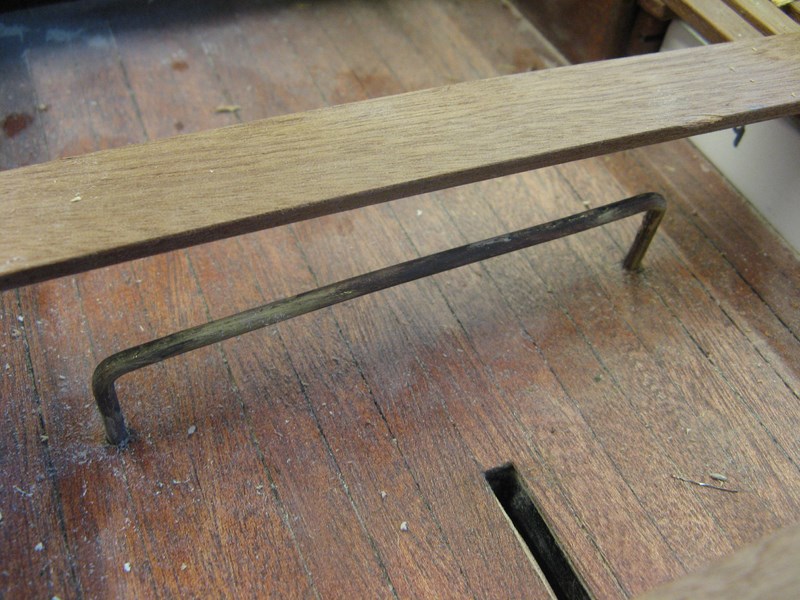   |
|
  | |
Footski
Master


Posts : 548
Join date : 2011-06-11
Age : 66
Location : Malaga, Spain
 |  Subject: Re: MY NEW PROJECT...or two. Subject: Re: MY NEW PROJECT...or two.  Sun May 12, 2013 8:22 am Sun May 12, 2013 8:22 am | |
| Superb, but I wish it would go to page 9. It takes an age to download all those images! | |
|
  | |
Guest
Guest
 |  Subject: Re: MY NEW PROJECT...or two. Subject: Re: MY NEW PROJECT...or two.  Mon May 13, 2013 7:07 pm Mon May 13, 2013 7:07 pm | |
| There has been a couple of items for the morot sailer that I have been putting off, but the time has come to construct these. The reason I have been putting them off is because I have NEVER seen any evidence of them on the lifeboats of type that I am building. In all the photos I have, have seen and have been sent by people and/or looked for on the internet, I have never had a glimpse of the items in question and those are the fore and aft mast crutches for main and mizzen masts. Probably the reason is that once the masts were put up for sailing, the crutches were lowered and stowed. So the only evidence is via the plans, and these are rather vague. However Quinton Nelson of nelson's Boats came to the rescue and described them to me as being as on the plan......a very simple affair of two poled on a pivot at the base and a Y shaped yolk with fasteners at the joint at top with eye brackets for fixing blocks and tackle to hoist ald lower the rig. The aft crutch was made from tube with a hemi circle crutch on top and a joint on the starboard side top which hinges......the crutch legs themselves just fit into brackets attached to the side thwarts supports. So I made the fore crutch from brass and dowel this afternoon. And after making the thing exactly to size, it sure looks a tall structure just to keel the mast from the deck and the crewmen when not raised. the aft crutch will follow tomorrow after a visit to the optician...........my eyes are getting worse with all this concentration...started getting brurred vission last night after a few hours concentration and went to the docs today, only to be told..........OPTICIANS Immediately................yes sir!!!! 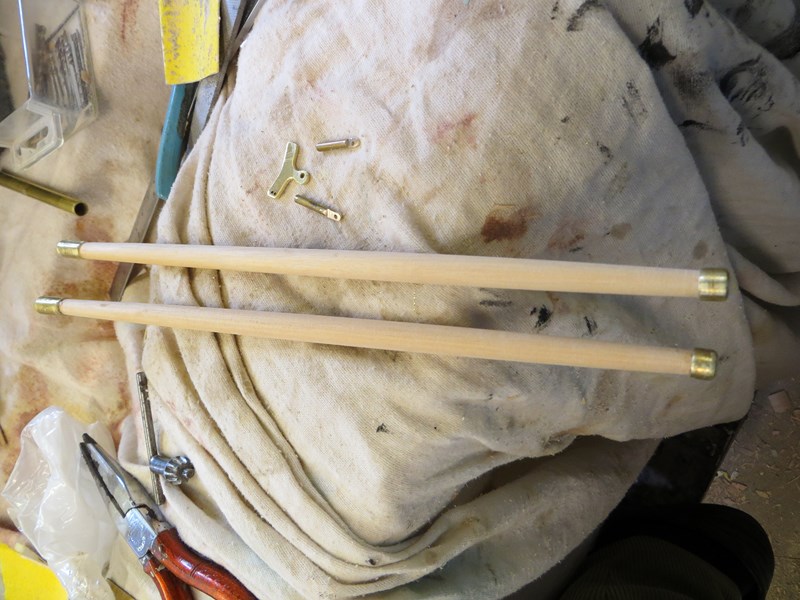 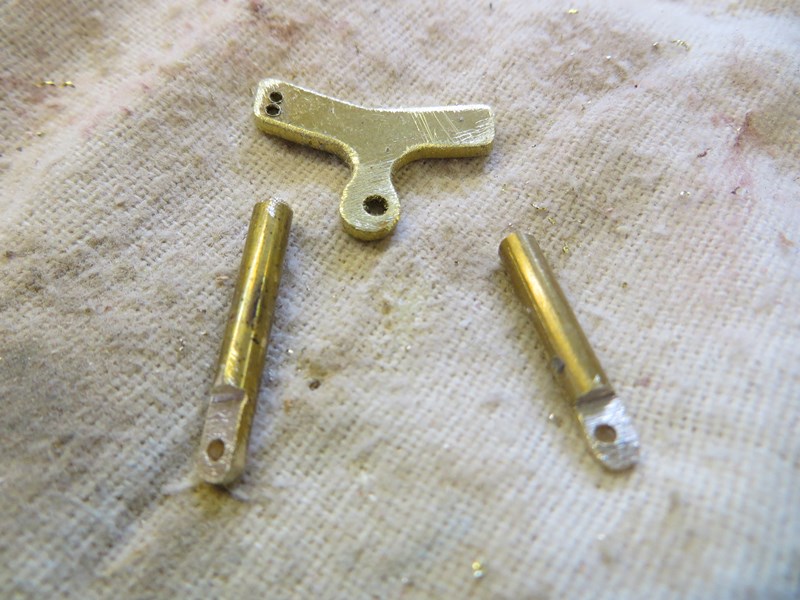 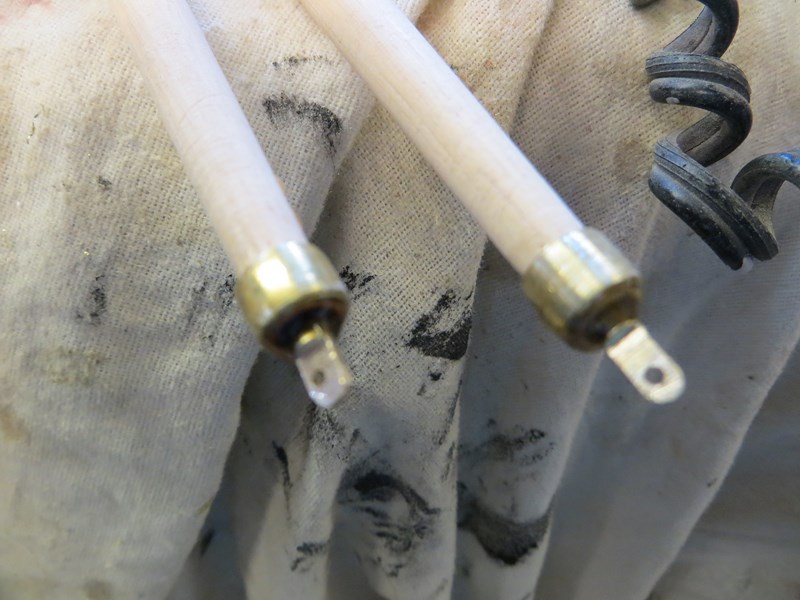 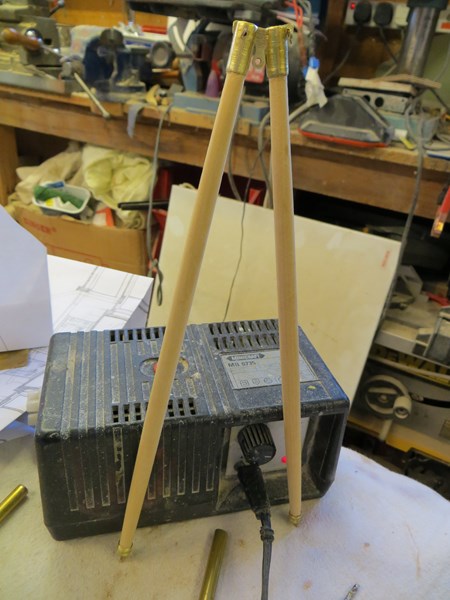  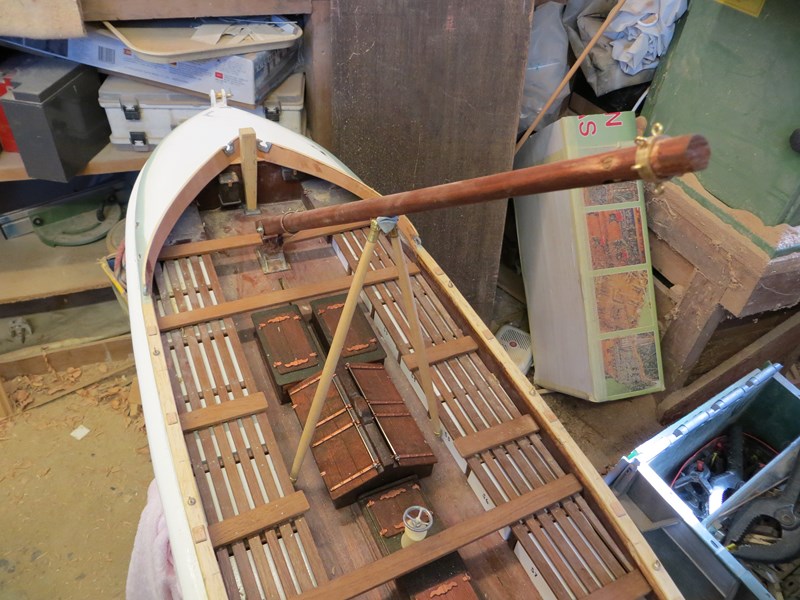    |
|
  | |
Guest
Guest
 |  Subject: Re: MY NEW PROJECT...or two. Subject: Re: MY NEW PROJECT...or two.  Wed May 15, 2013 9:49 pm Wed May 15, 2013 9:49 pm | |
| |
|
  | |
Sponsored content
 |  Subject: Re: MY NEW PROJECT...or two. Subject: Re: MY NEW PROJECT...or two.  | |
| |
|
  | |
| | MY NEW PROJECT...or two. |  |
|
