|
| | A lifeboat build blog...........How a kit is made! |  |
|
+10tattooed Tug--Kenny scalloway41 phil winks pugwash AlanP HS93 intrepid75 Windy Footski 14 posters | |
| Author | Message |
|---|
tattooed
Able Seaman


Posts : 45
Join date : 2011-06-30
Age : 61
Location : Bristol
 |  Subject: Re: A lifeboat build blog...........How a kit is made! Subject: Re: A lifeboat build blog...........How a kit is made!  Sat Feb 25, 2012 8:39 pm Sat Feb 25, 2012 8:39 pm | |
| is there nothing you can't do neil your standard of workmanship is truely outstanding well done mate and keep up the good work as i enjoy reading your updates | |
|   | | Guest
Guest
 |  Subject: Re: A lifeboat build blog...........How a kit is made! Subject: Re: A lifeboat build blog...........How a kit is made!  Sat Feb 25, 2012 9:20 pm Sat Feb 25, 2012 9:20 pm | |
| cheers andy......oh yes matey.there's plenty I can't do, lol..by the way what happened to these things you wanted me to do.......??? |
|   | | Guest
Guest
 |  Subject: Re: A lifeboat build blog...........How a kit is made! Subject: Re: A lifeboat build blog...........How a kit is made!  Sat Feb 25, 2012 11:34 pm Sat Feb 25, 2012 11:34 pm | |
| |
|   | | tattooed
Able Seaman


Posts : 45
Join date : 2011-06-30
Age : 61
Location : Bristol
 |  Subject: Re: A lifeboat build blog...........How a kit is made! Subject: Re: A lifeboat build blog...........How a kit is made!  Sun Feb 26, 2012 1:48 pm Sun Feb 26, 2012 1:48 pm | |
| just getting some bits n bobs together for you then i'll get some drawings done mate of what i need ,can you pm me your address mate as i can't find it anywhere
many thanks and keep up the good work
Andy | |
|   | | Guest
Guest
 |  Subject: Re: A lifeboat build blog...........How a kit is made! Subject: Re: A lifeboat build blog...........How a kit is made!  Sun Feb 26, 2012 10:01 pm Sun Feb 26, 2012 10:01 pm | |
| |
|   | | Guest
Guest
 |  Subject: Re: A lifeboat build blog...........How a kit is made! Subject: Re: A lifeboat build blog...........How a kit is made!  Mon Feb 27, 2012 10:38 am Mon Feb 27, 2012 10:38 am | |
| You must have the patience of Job Neil
Looking real good. |
|   | | Guest
Guest
 |  Subject: Re: A lifeboat build blog...........How a kit is made! Subject: Re: A lifeboat build blog...........How a kit is made!  Mon Feb 27, 2012 12:37 pm Mon Feb 27, 2012 12:37 pm | |
| If you'd have seen me this morning Damien.....I have had 80 stanchion brackets to pilot dril, then drill with a 3mm bit, then sand all the stanchions to a slightly smaller diameter to fit into the brackets......I'm two thirds through that, and then I'll have to glue plastic inserts (2 per stanchion) into the stanchion holes to make them stronger, and then drill each base again with a 1.5mm bit to take a locating pin.....when I've finished all that, I'll have to sand all the moulding flash off them...............then if I haven't thrown them all in the bin in frustration, you can THEN call me patient, lol:lol!:   what did I take on..............just looking forward to the day I can take them all down to the lake.........that's what's spurring me on, lol |
|   | | Guest
Guest
 |  Subject: Re: A lifeboat build blog...........How a kit is made! Subject: Re: A lifeboat build blog...........How a kit is made!  Mon Feb 27, 2012 12:51 pm Mon Feb 27, 2012 12:51 pm | |
| |
|   | | Guest
Guest
 |  Subject: Re: A lifeboat build blog...........How a kit is made! Subject: Re: A lifeboat build blog...........How a kit is made!  Mon Feb 27, 2012 9:59 pm Mon Feb 27, 2012 9:59 pm | |
| Today was predominantly spent putting the stanchions and bracket plates together for the three boats..........over 80 in total plus some spares should I break any lol. Firstly needed to pilot drill the plates with a 1.5mm bit and then enlarge this to 3mm.tricky as the casting is only 4mm in diameter, so no mistakes here...well one ot two went off course and had to be thrown away, but only half a dozen or so.......well I was getting pretty pee'd off with them after 160 holes drilled...each plate being held in snub nosed pliers whilst drilling in a pillar drill. then I had to sand down the shank of each stanchion to fit into the 3mm diameter hole............ once this was done, I glued each stanchion into its mounting plate with cyano. Then, because the holes in the balls of the stanchion leave the generic fitting from the Rother class boat from the Metcalf Mouldnings range a little weak I put pre cut plastic tube inserts into the holes and glued with cyano again. Tomorrow when the cyano has set rock hard, I'll trim the surplus plastic tube from the balls of the stanchions, and then drill through the back of the plates with another 1.5mm drill bit to take a pin for holding the plates and stanchions to the kick boards. Meanwhile, I took two plugs that I had made some years ago for the large and small ventilation cowls for the class of boats, and using my dremel dril with a dentist's drill burr I reamed out the inner part for the vent cowl in order to cast. Lifeboats of the older classic type that carried these vent cowls had inversion valves fitted into the bell mouth of the cowel, so that in heavy weather if the boat took a heavy sea, the cowl would not let water flood down the hole in the bell mouth to the lower boat, and this I represent with a piece of tubing, and some Miliput epoxy putty to form the correct shape of the vent interior.....this will be sanded tomorrow also, and then put into a rubber mould for casting replicas for the models. 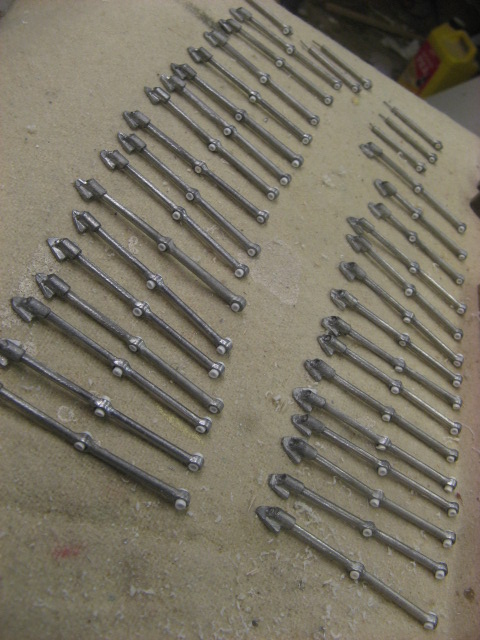 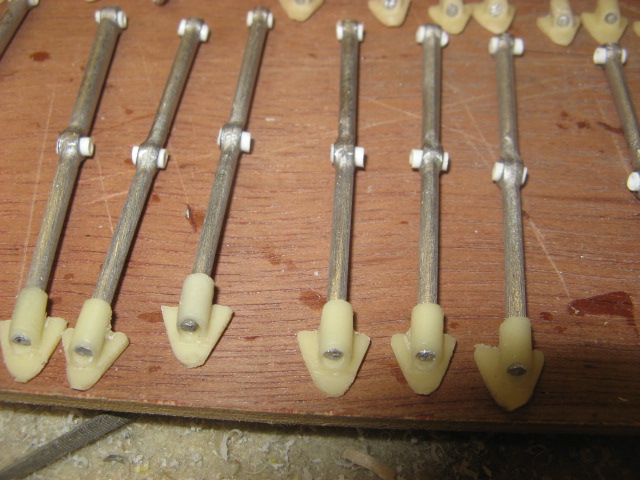 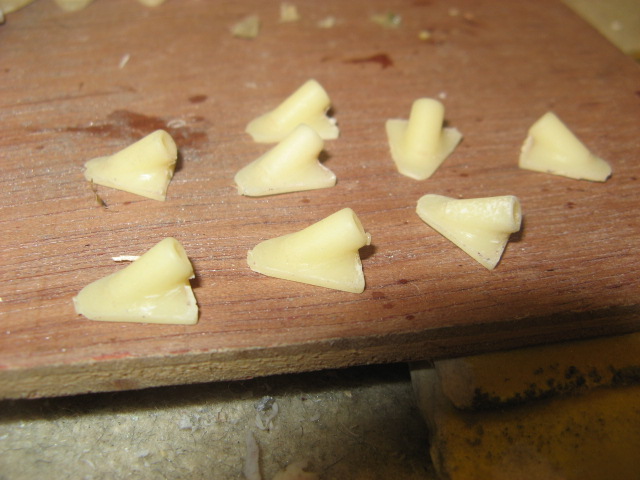   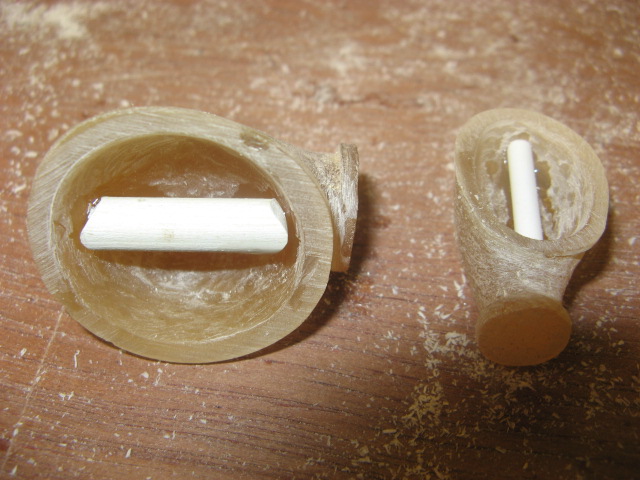 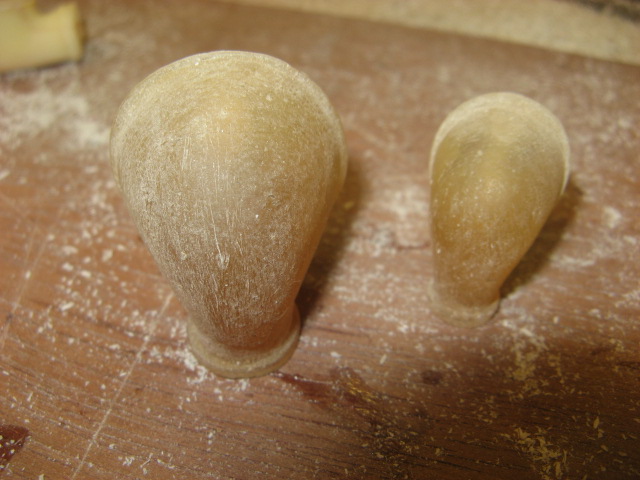 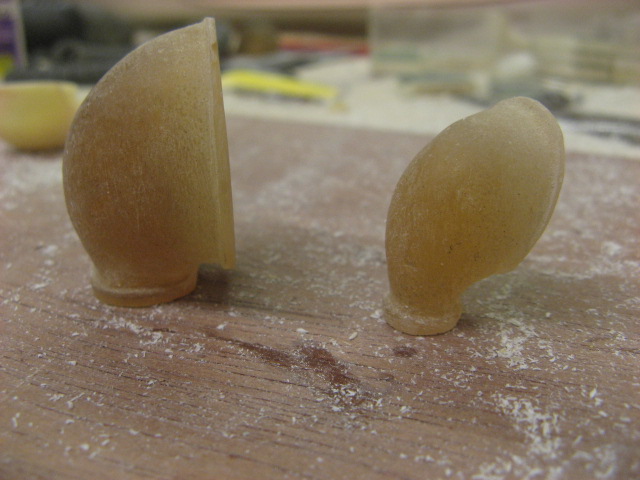 |
|   | | Guest
Guest
 |  Subject: Re: A lifeboat build blog...........How a kit is made! Subject: Re: A lifeboat build blog...........How a kit is made!  Wed Feb 29, 2012 9:29 pm Wed Feb 29, 2012 9:29 pm | |
| |
|   | | Guest
Guest
 |  Subject: Re: A lifeboat build blog...........How a kit is made! Subject: Re: A lifeboat build blog...........How a kit is made!  Thu Mar 01, 2012 8:28 am Thu Mar 01, 2012 8:28 am | |
| |
|   | | Guest
Guest
 |  Subject: Re: A lifeboat build blog...........How a kit is made! Subject: Re: A lifeboat build blog...........How a kit is made!  Thu Mar 01, 2012 10:12 pm Thu Mar 01, 2012 10:12 pm | |
| |
|   | | Guest
Guest
 |  Subject: Re: A lifeboat build blog...........How a kit is made! Subject: Re: A lifeboat build blog...........How a kit is made!  Fri Mar 02, 2012 8:50 am Fri Mar 02, 2012 8:50 am | |
| Anyway, back to the build.................as a little taster here is the next fitting that I did......the main davit and base for the Mary Stanford "fisherman's pattern" anchor carried on her starboard side and used for veering down on a casualty. The four triangular shaped supports should, as with real boat have cut outs, but I feel that this would , on a working model weaken them and as such I have made them solid from polyU castings. also on the model, the davit is ( from memory) filmed on this occasion on the port and not the starboard side.......but it ain't fixed yet anyway, lol funnily............................ the actual white metal davit is cast from a davit I made in brass some years ago to replace the davits on a Mountfleet Models St Nectan steam trawler for a pattern that fitted my modified trawler.................exactly the same diameter, same length, just a little difference on the curve of the top part, and as I cast with a little more lead in my white metal than some ( well no child is going to come along and chew my davits now, are they, LOl),........................... ...................... I was able to bend the davit to the right curvature..... made a lot more sense than making another in brass and then moulding it............... just for the Mary Stanford. 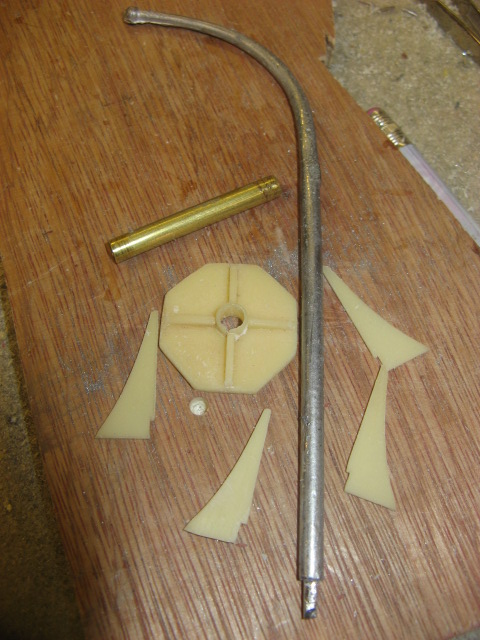   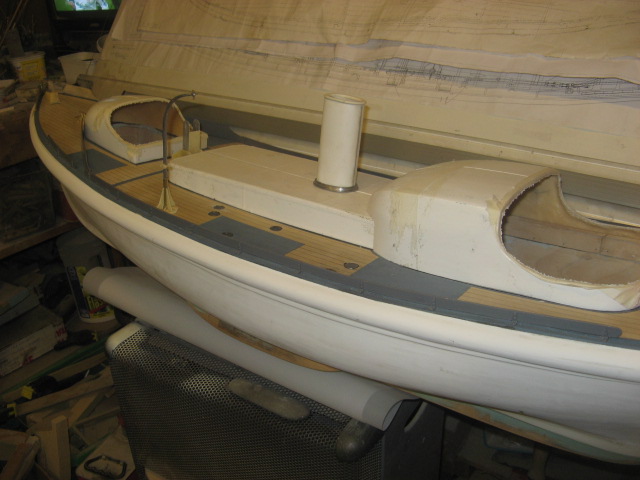 |
|   | | Guest
Guest
 | |   | | Footski
Master


Posts : 548
Join date : 2011-06-11
Age : 66
Location : Malaga, Spain
 |  Subject: Re: A lifeboat build blog...........How a kit is made! Subject: Re: A lifeboat build blog...........How a kit is made!  Fri Mar 02, 2012 11:03 am Fri Mar 02, 2012 11:03 am | |
| Coming along nicely good Sir...  | |
|   | | Guest
Guest
 |  Subject: Re: A lifeboat build blog...........How a kit is made! Subject: Re: A lifeboat build blog...........How a kit is made!  Sat Mar 03, 2012 10:22 pm Sat Mar 03, 2012 10:22 pm | |
| every bit put on to the boats tells a new story, Barry. Yesterday I'd started to cast in polyU resin the cowl vents and the trunks for them. Today was a time to glue them together. I always finf that drilling by eye and finding the centre of a circle ( i.e. the centre of the trunks ) for pinning the two pieces together isn't easy.......so have found in the past that if you drill the holes oversize for the brass pin to be used, you can adjust the position of both parts to get them fitting properly.......I set them together using two part epoxy glue. However, when sorting out the bases for both sizes of cowl vent trunks I found that there were none to the new size which is larger than those used on the Anne Letitia Russell..............so I set about turning two of each size needed on the laithe from brass bar. First, on this process, I centre drilled the brass with a live centre tool, and then drilled the smaller hole with a HSS drill bit to the same size as the trunk. However, the larger trunk needed a hole outside the size I carry, and so I used a cutting tool to cut a hole into the centre of the brass bar as per trunk diameter (after pre drilling a hole to the largest size of drill bit I have). I then cut the bases out using a couple of tools with the laithe, and finally cleaned the fittings up, before parting off with a straight cut parting tool. they are now set into a plastecine and lego mould box ready for casting a 1 piece mould for surface pouring and casting with polyU resin. 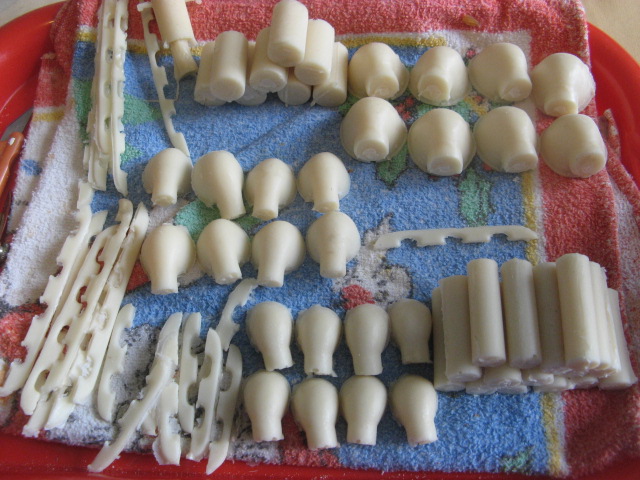 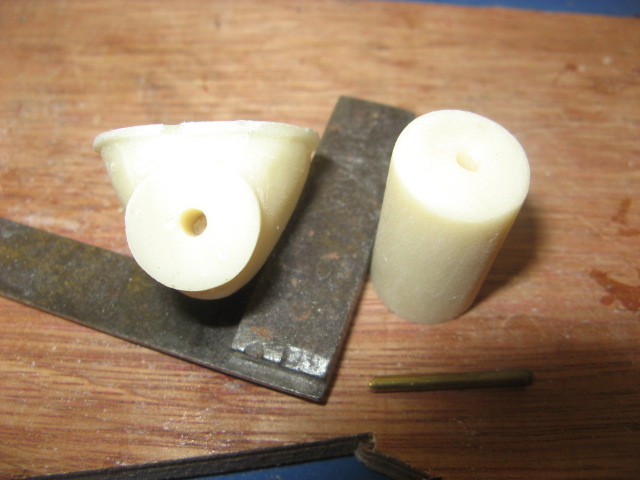 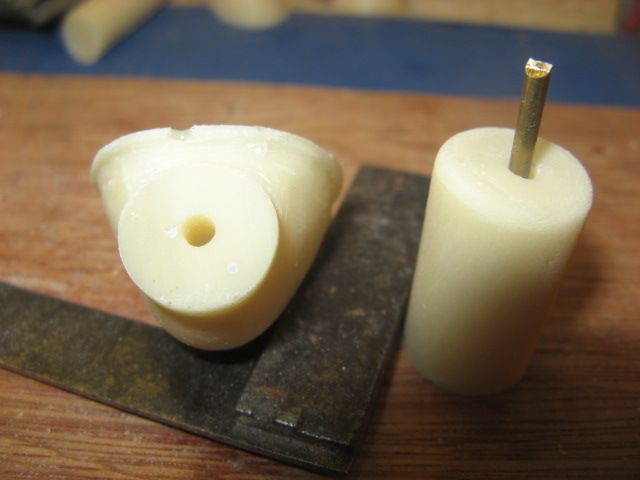 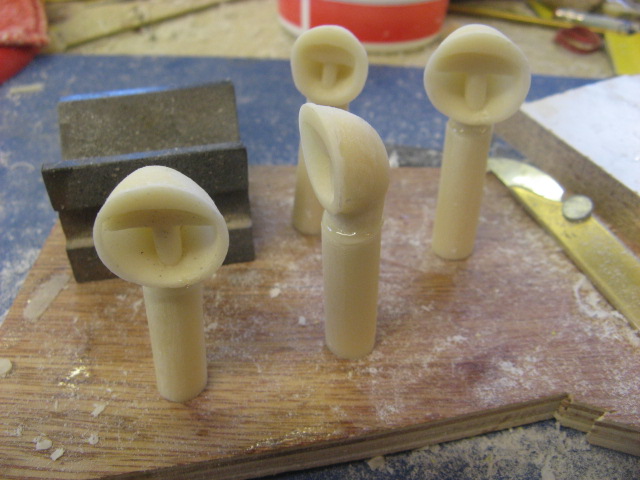  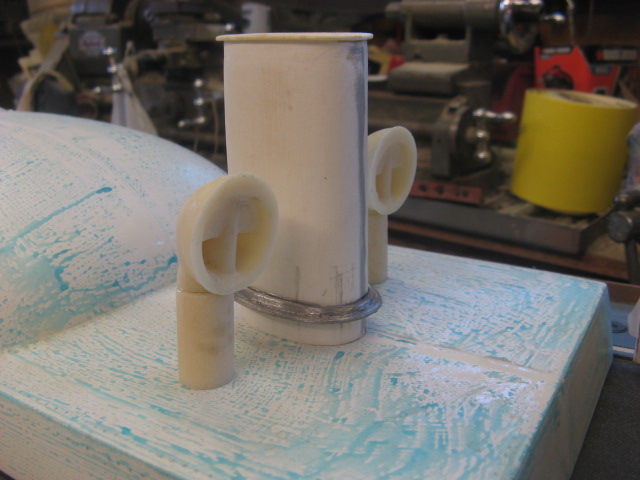 |
|   | | Guest
Guest
 |  Subject: Re: A lifeboat build blog...........How a kit is made! Subject: Re: A lifeboat build blog...........How a kit is made!  Sat Mar 03, 2012 10:26 pm Sat Mar 03, 2012 10:26 pm | |
| |
|   | | Guest
Guest
 |  Subject: Re: A lifeboat build blog...........How a kit is made! Subject: Re: A lifeboat build blog...........How a kit is made!  Sat Mar 03, 2012 10:29 pm Sat Mar 03, 2012 10:29 pm | |
| got up early this morning to mould the rubber and then make a casting.......turned out better that I thought, this is the simplest of methods of casting......open casts, where you only need to cast one side of the master..........not done it in ages, but it has worked out well with the first casting coming out clean and crisp. neil. 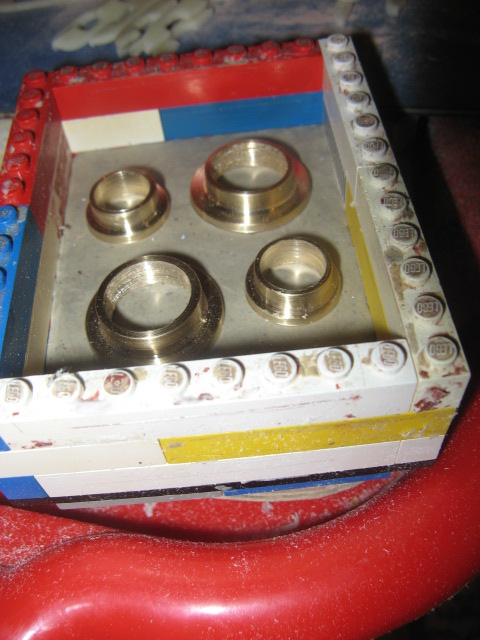 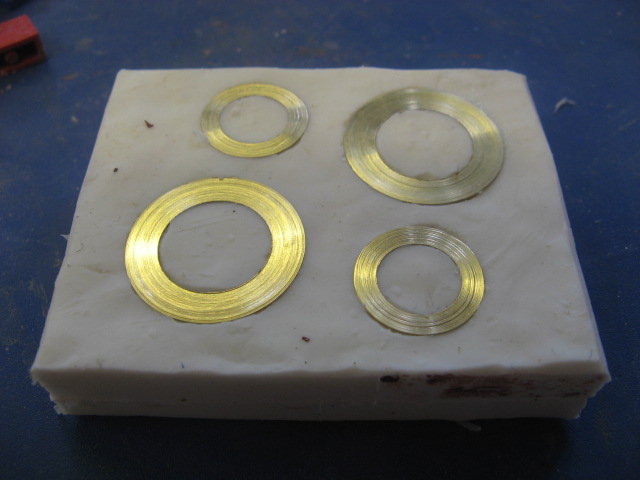 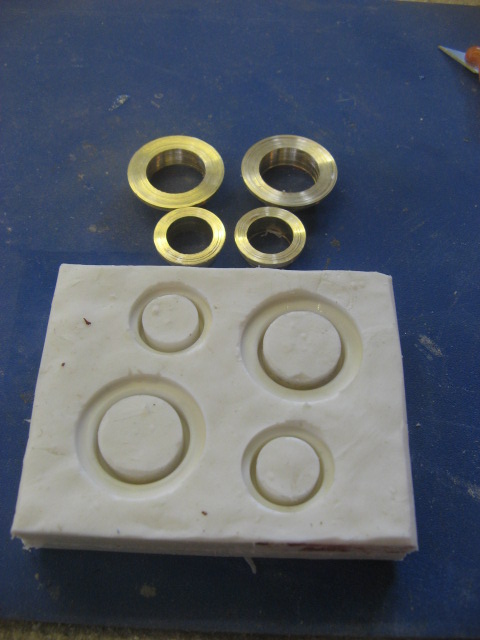 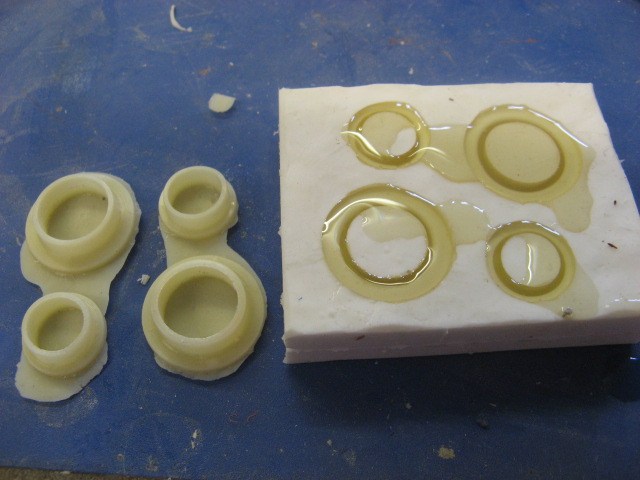 |
|   | | Footski
Master


Posts : 548
Join date : 2011-06-11
Age : 66
Location : Malaga, Spain
 |  Subject: Re: A lifeboat build blog...........How a kit is made! Subject: Re: A lifeboat build blog...........How a kit is made!  Sun Mar 04, 2012 8:00 am Sun Mar 04, 2012 8:00 am | |
| So that is how it is done....Brilliant.. | |
|   | | Guest
Guest
 |  Subject: Re: A lifeboat build blog...........How a kit is made! Subject: Re: A lifeboat build blog...........How a kit is made!  Sun Mar 04, 2012 9:42 pm Sun Mar 04, 2012 9:42 pm | |
| yep, Barry.......it's quite easy, honestly. and now for something completely different, lol well, Been putting this part off far too long. Earlier in the build I pointed to having a removable floor in all the cabin wells.......... After fitting the decks I soon realised that the provision for removing the decks in the fore cabins of both the Mary Stanford and the H F Bailey was an absolute none starter....as the decks could no longer be got out..........it's just lucky that I had put the floors in before I laid the decks or I wouldn't have got them in other than in pieces.............not the best way. Because the fore cabin of the Field Marshal is removable, so is the deck of the fore cabin............but on reflection I don't think this is needed either. However, the rear cabin well decks do need to be removable but in the configuration I had had them, I couldn't get them into the aft well decks because of the rear overhang of the decks, and so re designed them today so that there was more of a perimeter to the removable deck with small supports glued to the under sides of the perimeter deck to hold the removable part. Also this perimeter gives the space to fit the side benches in all the well decks and any other detailing on the well deck floors including gratings, wheel columns and such will come out with the deck. So today, I spent today altering those features. I also made the grating for the steering platform that goes to the aft of the fore cabin of the Field Marshal. 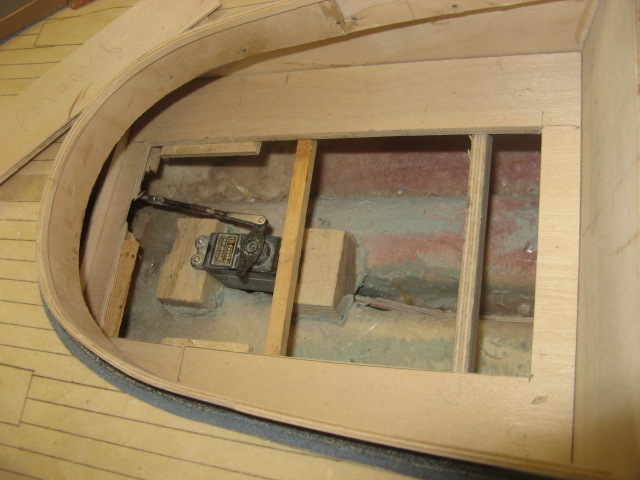 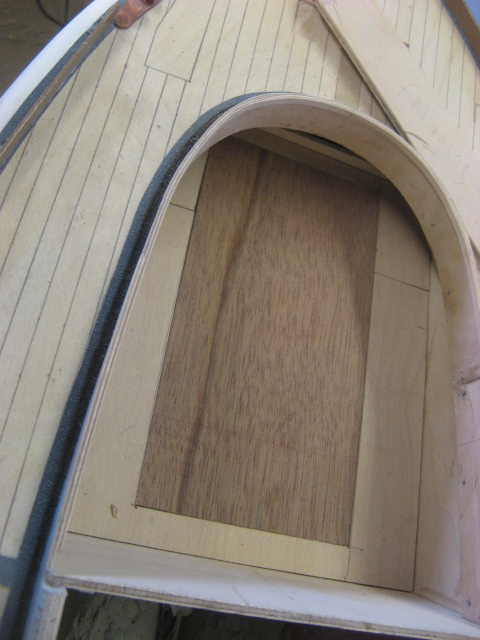 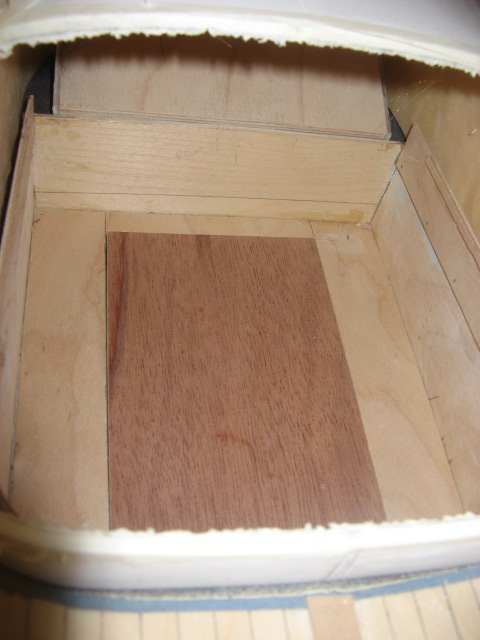   And the grating for the mid steering platform on the Field marshal   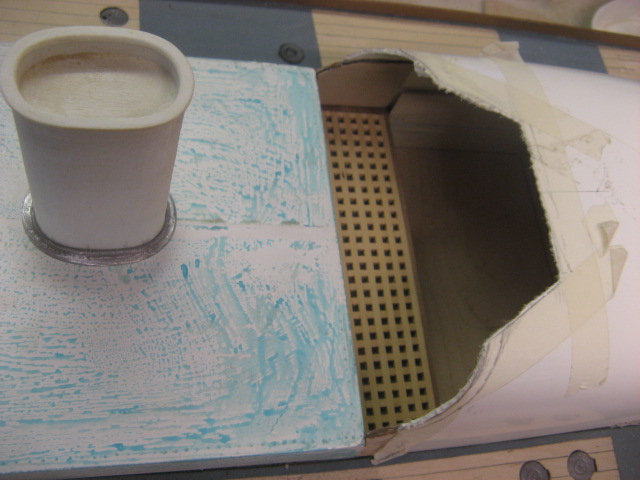 |
|   | | Guest
Guest
 |  Subject: Re: A lifeboat build blog...........How a kit is made! Subject: Re: A lifeboat build blog...........How a kit is made!  Mon Mar 05, 2012 9:18 am Mon Mar 05, 2012 9:18 am | |
| |
|   | | barriew
Captain (moderator)

Posts : 2631
Join date : 2011-11-26
Age : 83
Location : Thaxted, Essex
 |  Subject: Re: A lifeboat build blog...........How a kit is made! Subject: Re: A lifeboat build blog...........How a kit is made!  Mon Mar 05, 2012 11:50 am Mon Mar 05, 2012 11:50 am | |
| Brilliant  Barrie | |
|   | | Guest
Guest
 |  Subject: Re: A lifeboat build blog...........How a kit is made! Subject: Re: A lifeboat build blog...........How a kit is made!  Mon Mar 05, 2012 12:09 pm Mon Mar 05, 2012 12:09 pm | |
| thanks barrie.much appreciated from all you guys.
neil. |
|   | | Guest
Guest
 |  Subject: Re: A lifeboat build blog...........How a kit is made! Subject: Re: A lifeboat build blog...........How a kit is made!  Mon Mar 05, 2012 9:29 pm Mon Mar 05, 2012 9:29 pm | |
| Moving on a pace now, and starting to get the cabins ready for detailing. Today, I have spent the time getting the engine room casing of the mary Stanford to fit, not only to the combings but also into the rear cabin of the Mary Stanford. This meant fitting wooden stops into the inside of the moulding, a stop on the deck, a spacer on the side wall to keep the casing in the correct position on the deck, a small vertical wall to the aft end of the casing and an angled and horizontal facia to the aft end of the casing. These last two peices, made from 1.8mm ply hide any spaces when the cabin and the engine casing meet. Sadly the casing has, over the past six years since I moulded it, sagged in the centre of the top and so I had to skim it today like a plasterer skimming an uneven wall...took about 3mm down the centreof the moulding to get the whole thing flat. you can see the amount from the picture five where the horizontal facia lies well above the centre line of the casing. I felt that the joining of these two grp mouldings would never make a good permenant fixing and so they will be left as two seperate fixtures. photos in order are.... spacer to sides of combings to fix position of casing. 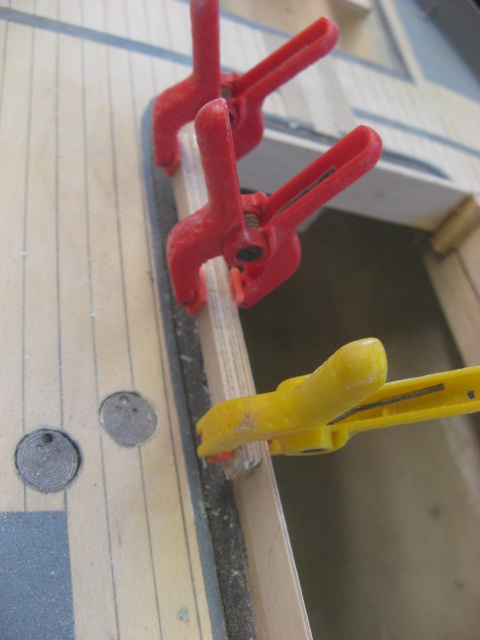 fitting angled facia to casing 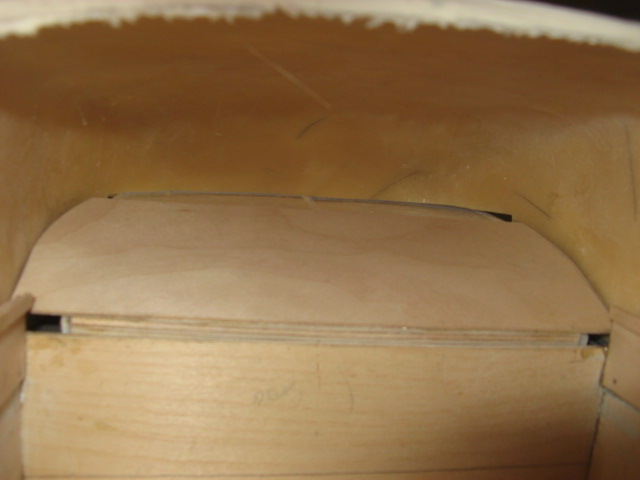 fitting small vertical wall to line up casing to inner foreward bulkhead of well deck 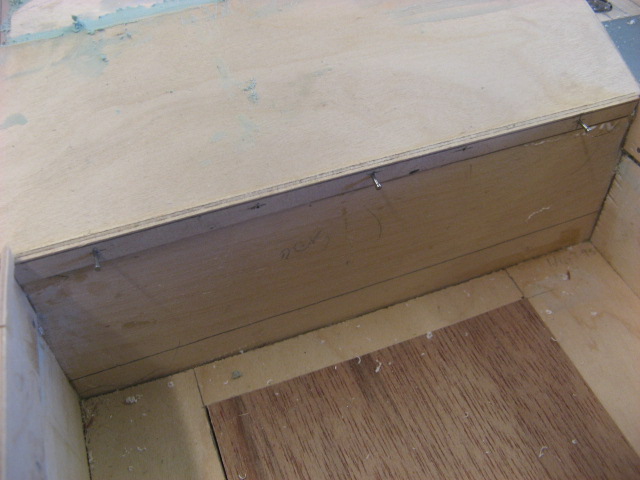 drilling casing to gain a purchase for gluing horezontal facia to casing. 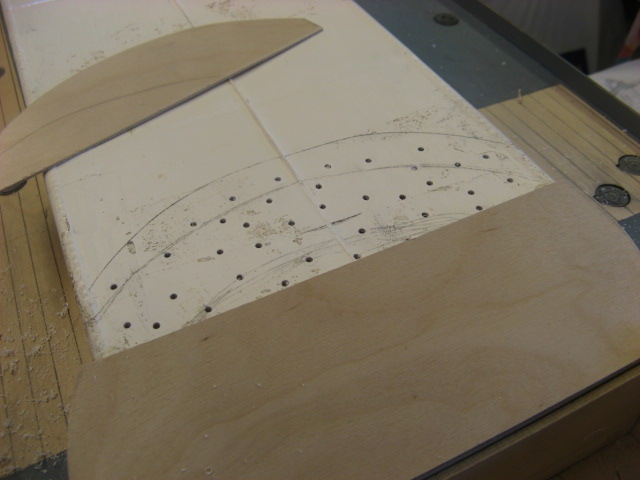 fixing facia with polyester filler 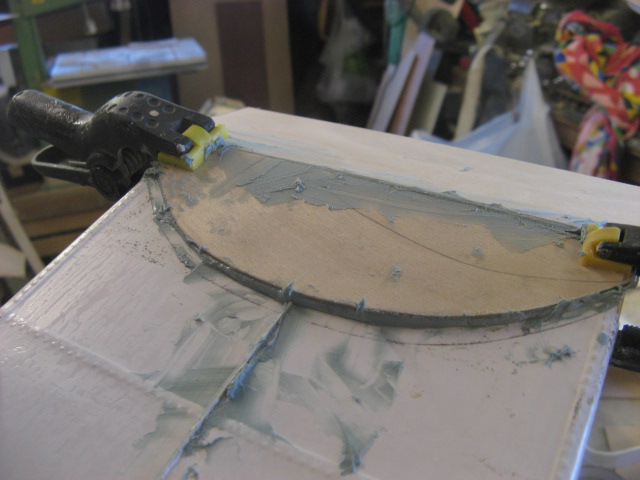 facia in place and sanded down.also top of casing levelled off with polyester filler. 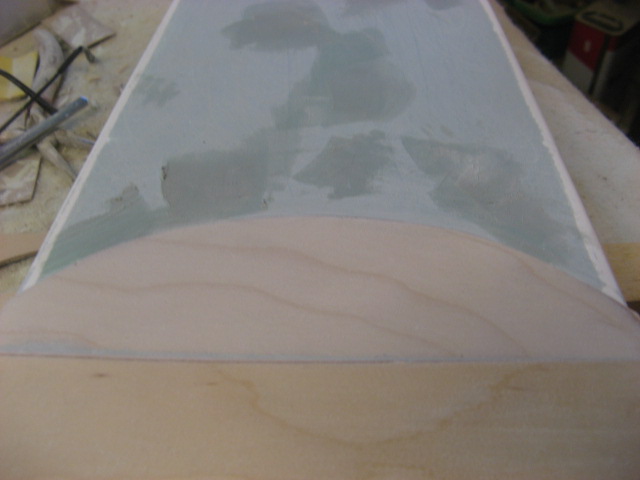 |
|   | | Guest
Guest
 |  Subject: Re: A lifeboat build blog...........How a kit is made! Subject: Re: A lifeboat build blog...........How a kit is made!  Tue Mar 06, 2012 11:08 am Tue Mar 06, 2012 11:08 am | |
| The two pics posted here finish off the rear Bulkhead for the Mary Stanford, and the front well deck with putting in a shelf. this shelf will hold the Oil Tank, subsidiary tank and hand pump, for dispelling oil over the side of the lifeboat to "calm heavy seas" when going in for a rescue..........This dispensing of oil was used to some effect for many years, and most boats carried a tank of some sort, especially in the period that I am building. 1930's - 1949. Any small gaps in side the rear cabin between the bulkhead and the cabin grp moulding will be disguised by the actual framework and bracing of the cabin which will be inserted later as detailing. 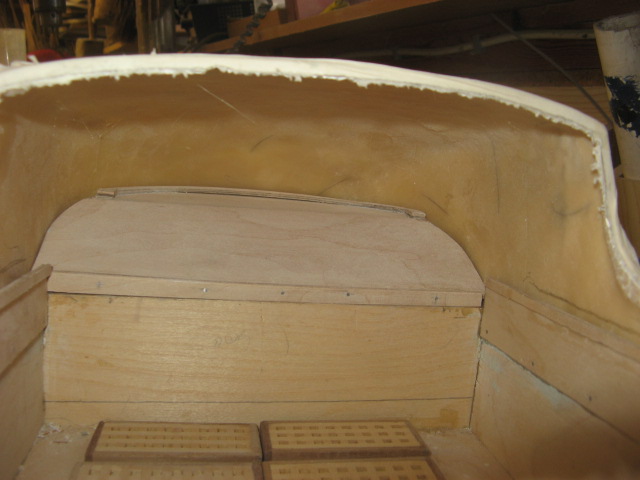 front cabin shelf. 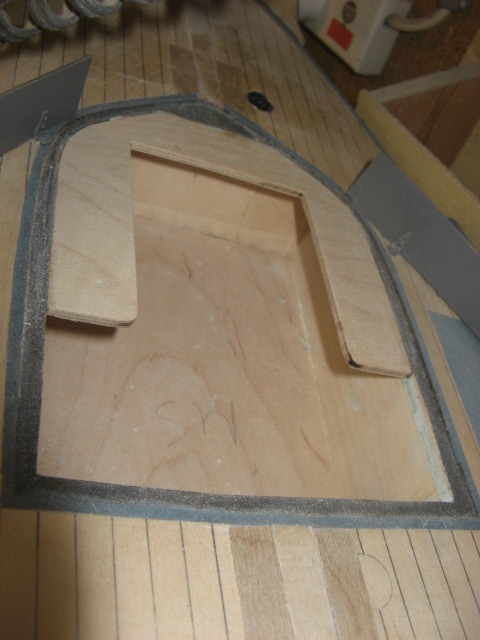 |
|   | | Guest
Guest
 |  Subject: Re: A lifeboat build blog...........How a kit is made! Subject: Re: A lifeboat build blog...........How a kit is made!  Tue Mar 06, 2012 9:44 pm Tue Mar 06, 2012 9:44 pm | |
| |
|   | | Footski
Master


Posts : 548
Join date : 2011-06-11
Age : 66
Location : Malaga, Spain
 |  Subject: Re: A lifeboat build blog...........How a kit is made! Subject: Re: A lifeboat build blog...........How a kit is made!  Wed Mar 07, 2012 7:42 am Wed Mar 07, 2012 7:42 am | |
| love that little pump...  | |
|   | | Guest
Guest
 |  Subject: Re: A lifeboat build blog...........How a kit is made! Subject: Re: A lifeboat build blog...........How a kit is made!  Wed Mar 07, 2012 8:17 am Wed Mar 07, 2012 8:17 am | |
| I keep coming up with little bits from the plans that I've missed Barry, and I'm fast running out of rubber to mould them,lol...they all add to the detail.......
frank Hinchliffe ( of Mountfleet and Caldercraft fame) once told me.cram as much as possible on...."b***s*** baffles brains"...that was his motto.lol |
|   | | Footski
Master


Posts : 548
Join date : 2011-06-11
Age : 66
Location : Malaga, Spain
 |  Subject: Re: A lifeboat build blog...........How a kit is made! Subject: Re: A lifeboat build blog...........How a kit is made!  Wed Mar 07, 2012 1:40 pm Wed Mar 07, 2012 1:40 pm | |
| - nhp651 wrote:
- I keep coming up with little bits from the plans that I've missed Barry, and I'm fast running out of rubber to mould them,lol...they all add to the detail.......
frank Hinchliffe ( of Mountfleet and Caldercraft fame) once told me.cram as much as possible on...."b***s*** baffles brains"...that was his motto.lol I loved that man....Proud to have known him and learned from him. A real gent and still sadly missed..  | |
|   | | Footski
Master


Posts : 548
Join date : 2011-06-11
Age : 66
Location : Malaga, Spain
 |  Subject: Re: A lifeboat build blog...........How a kit is made! Subject: Re: A lifeboat build blog...........How a kit is made!  Thu Mar 08, 2012 7:53 am Thu Mar 08, 2012 7:53 am | |
| | |
|   | | Guest
Guest
 |  Subject: Re: A lifeboat build blog...........How a kit is made! Subject: Re: A lifeboat build blog...........How a kit is made!  Thu Mar 08, 2012 8:30 am Thu Mar 08, 2012 8:30 am | |
| Oh yeh, man.....it was just superb.............the "Australian Pink Floyd" tribute band and they were b***** brilliant....think I was the youngest there, lol |
|   | | Guest
Guest
 |  Subject: Re: A lifeboat build blog...........How a kit is made! Subject: Re: A lifeboat build blog...........How a kit is made!  Thu Mar 08, 2012 10:50 pm Thu Mar 08, 2012 10:50 pm | |
| aven't done much the last couple of days.....still recovering from my aging hippy sojourn to see the tribute Pink floyd gig..........getting too old for those sort of things, lol. then this morning spent most of my time driving around different outlets looking for a light grey enamel paint to paint the inside of all the well decks.......with no success. so all I have done is clean up all the ragged edges of the cabin openings ready for detailing the inside of the cabins.....for this I used a Dremmel roller disc pad to get around the curves and a b*****d toothed file ( the ones with sharp course toothed blades) which went through the grp well, and soon took me down te the masked lines on the mouldings. Tomorrow it's the time to fit the rear cabin for the Mary Stanford so that it is housed on the deck without any movement, and then to sand the inside of each cabin and skim with a filler for a smooth effect before ribbing them all up.  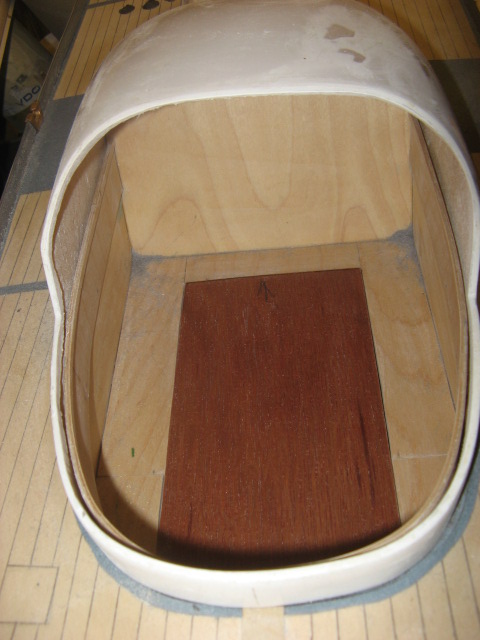 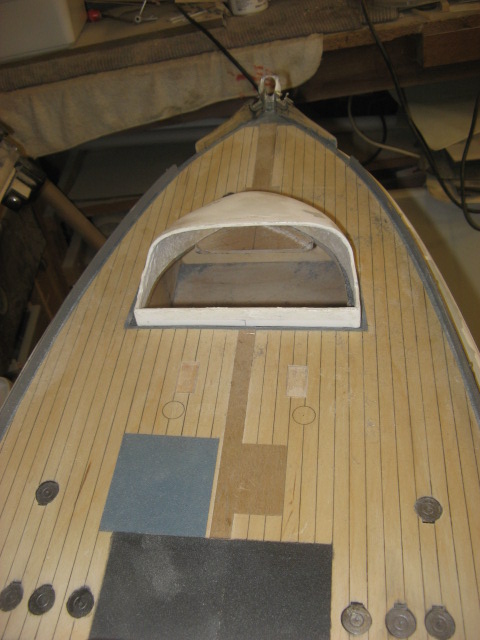  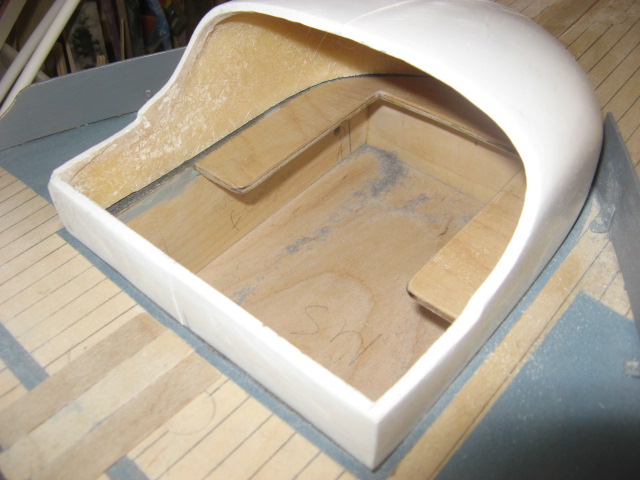 |
|   | | Guest
Guest
 |  Subject: Re: A lifeboat build blog...........How a kit is made! Subject: Re: A lifeboat build blog...........How a kit is made!  Fri Mar 09, 2012 10:14 pm Fri Mar 09, 2012 10:14 pm | |
| There's a great deal of argument about kit build vs scratch build in modelling and sadly I have found in the past that some who scratch build think that they are in an elite e'chelon of modellers, which to me is somewhat sad. I like both kit and scratch build and have always defended those who enjoy their modelling through kits. However I do find that scratch building hones my personal skills and makes me think that little bit more than if I were building from a kit.......and that showed today, more than ever. I was taught my modelling skills by two great men, and I mean great. The first was my grandad who, when I was just 8 and starting to build models, was himself, almost totally blind. He had been, in his own lifetime, a master cabinet maker and pattern maker, and once said to me......"I don't need eyes to see what i am making anymore, my hands are my eyes, and if something feels right, it is right, and you can always adjust how it feels" The second "great" man who taught me another valuable lesson was Frank Hinchliffe......we had many an hour discussing models at his home in Meltham, and he once said to me........, "if you make a cock up on a model, you can always correct it for the public...and you can cover your mistake by making that mistake to look a believable plause on your model", and then he would add....."you know, Bulls*** baffles brains and if you put enough other detailing on your model, those little mistakes will be lost to all but the fanatical modeller....and they won't be buying my kits anyway...they'll be scratch building" So the cockup that I have made on the mary Stanford rear well deck and cabin, comes into that catagory, but I confess, it has been somewhat of a little problem for the past few weeks. When I measured out all the deck beams, decks and overlays and well deck wooden pieces, to co incide with fitting up to my grp cabin mould I made a mistake on the measurements, and although the cabin is to the size shown on the plans, the actual well deck comes in undersize so that some spacers have had to be fitted to the cabin sides, and as such this then left a gap between the cabin aft sides and the well deck....a glaring gap, which I had to do something with, and so, modellers license came into show with a solution to put a shelf around the cabin wall which will cover that gap. Fortunately this can be altered on the screen printed ply parts to overcome that gap, but it would have meant ripping out the whole well deck, decking and sub decking for me to alter it on this boat.....something I wasn't prepared to do, and as such.....it's a case of "it's my boat......and it's staying like that" Luckily the kit models would be modified, and this is what buiulding a prototype is for...to bring out the problems and foibles of a development. the following shots are to show the coverup of a cockup, lol As for the other two models, the HF Bailey and the Field Marshal....I got those measurements bob on, and the cabins fit snug and tight. 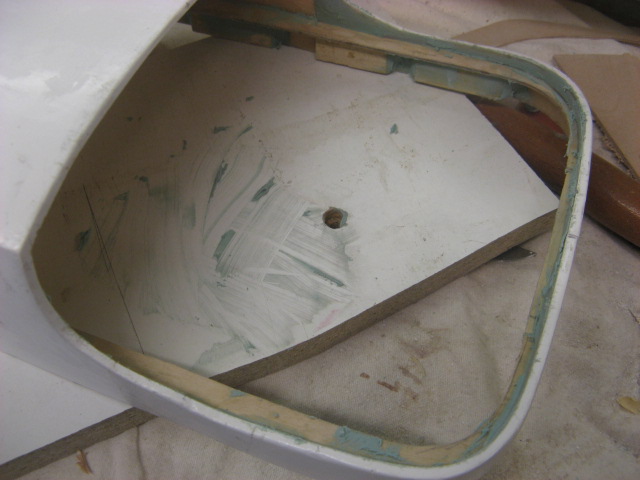  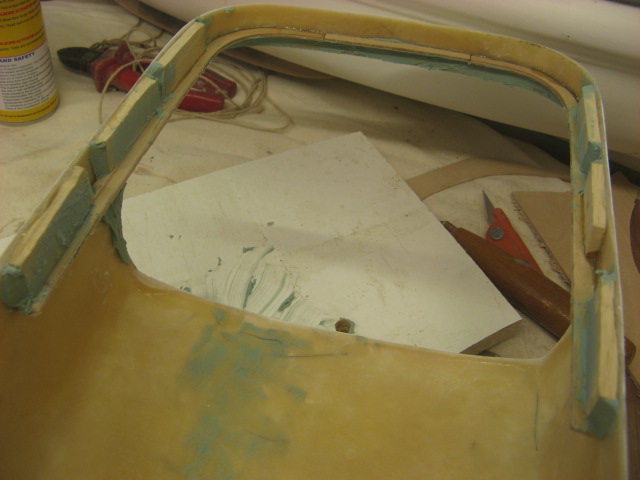  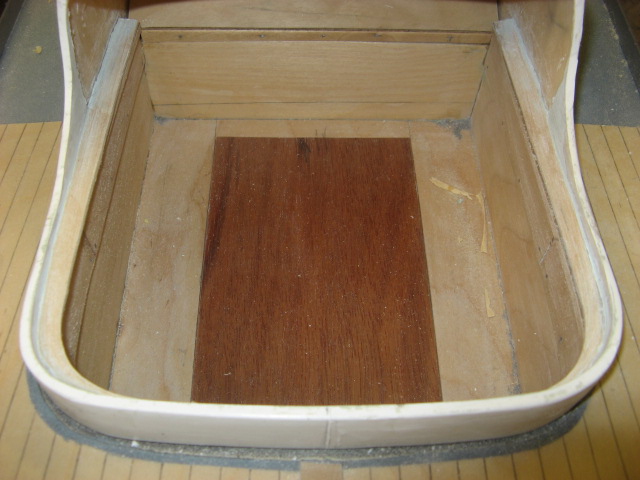 |
|   | | Windy
Gunner

Posts : 132
Join date : 2011-12-11
Age : 58
Location : Always at work...
 |  Subject: Re: A lifeboat build blog...........How a kit is made! Subject: Re: A lifeboat build blog...........How a kit is made!  Fri Mar 09, 2012 10:30 pm Fri Mar 09, 2012 10:30 pm | |
| Looking good Neil, I am following this thread with great interest!!!!
As for kit vs scratch, my take on this is a kit builder will buy a kit and from the box produce a model to the best of their ability, whereas a scratch builder just builds the kit first!!!!
Keep up the good work mate..
W. | |
|   | | Guest
Guest
 |  Subject: Re: A lifeboat build blog...........How a kit is made! Subject: Re: A lifeboat build blog...........How a kit is made!  Fri Mar 09, 2012 10:40 pm Fri Mar 09, 2012 10:40 pm | |
| cheers mate.....nice to hear from you again......how are yo.
neil. |
|   | | Windy
Gunner

Posts : 132
Join date : 2011-12-11
Age : 58
Location : Always at work...
 |  Subject: Re: A lifeboat build blog...........How a kit is made! Subject: Re: A lifeboat build blog...........How a kit is made!  Fri Mar 09, 2012 11:16 pm Fri Mar 09, 2012 11:16 pm | |
| We are all fine here, always busy but looking forward to attending the South west Model Engineering Show the end of this month....
W. | |
|   | | Guest
Guest
 |  Subject: Re: A lifeboat build blog...........How a kit is made! Subject: Re: A lifeboat build blog...........How a kit is made!  Sat Mar 10, 2012 10:07 am Sat Mar 10, 2012 10:07 am | |
| good luck with that one matey...hope you do plenty. n. Might not get chance to post anything for the rest of the day, as it's my daughters 15th birthday today, and I'm the taxi for her and her friends for their Alpaca walking and horse riding trip so will do it now. But between glue setting and sanding, I managed to get the protection bars on the portholes( generic to the Anne Lettitia Russell) glued on using cyano, and also drilled and enlarged the holes in the cabins of all the boats for the portholes to fit.....it's starting to take shape now. I had to cut these into the cabins before I put the inside details in place..that's the next job.   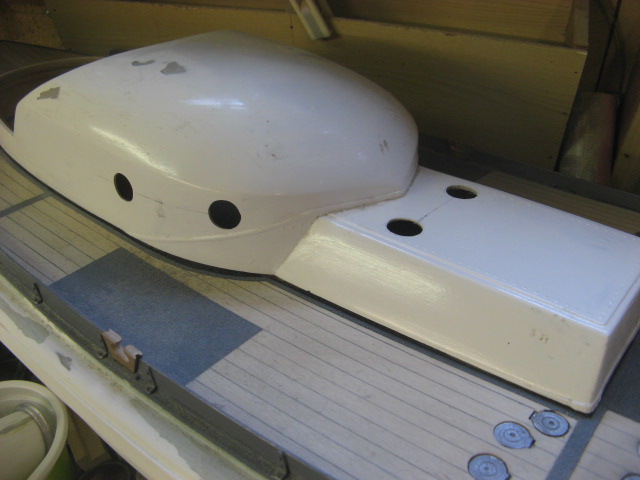 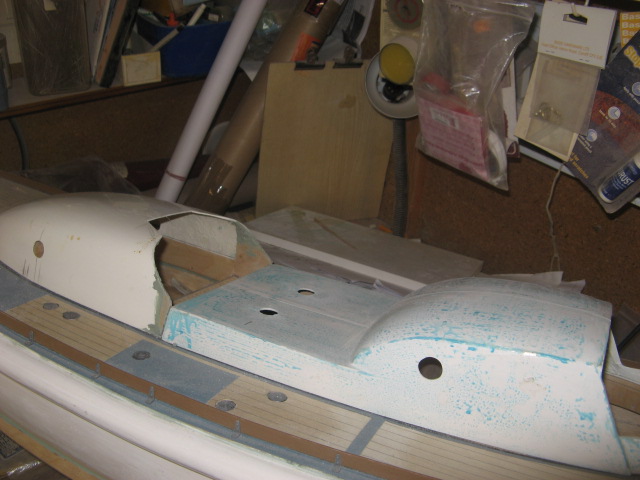  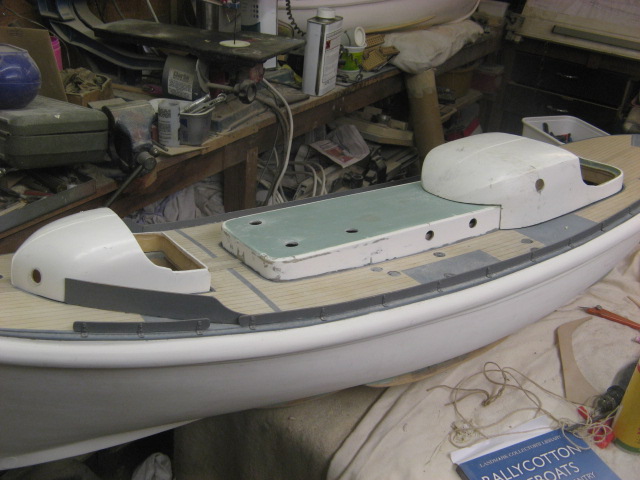 |
|   | | Guest
Guest
 |  Subject: Re: A lifeboat build blog...........How a kit is made! Subject: Re: A lifeboat build blog...........How a kit is made!  Sat Mar 10, 2012 10:33 pm Sat Mar 10, 2012 10:33 pm | |
| Well, I had more time on my hands than I thought I would today, so decided that I couldn't put off the start of detailing the insides of the cockpits any further.....so made a start. Where the inner cockpit can be seen ( on all of the boats there is a little of one or other of the cockpits that is hidden by one of the bulkheads except for the Mary Stanford, where both interiors of the cockpits are totally visible to the viewer) the grp has to be smoothed off and then filled, before sanding "flat". I used a power file to remove any highlights in the grp layup, and then skimmed the whole of the visible areas with stopper putty which just filled the low parts of the mouldings. Once dry and set I sanded off with 40 and 120 grade grit, to give a reasonably smooth finish. Finally for the day, I started laying the ribs to the cockpit frame, using card and aliphatic resin glue....sticks card to grp very well. The card I use is 2mm picture framing card, which I got from a local gallery FOC from the kind owner, who had just framed my beautiful print of the Mary Stanford on her most famous of rescues.     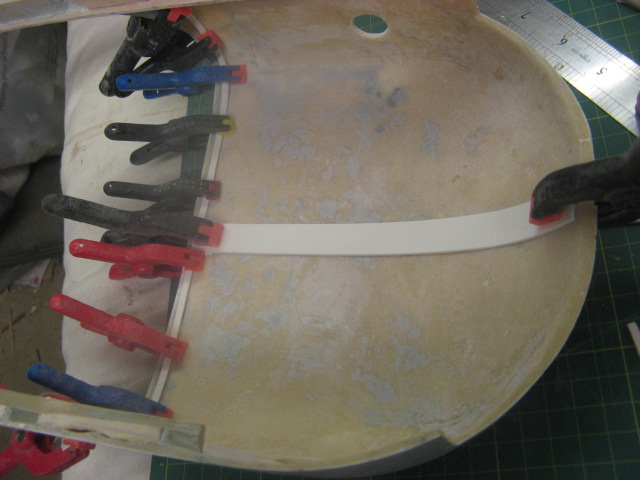 |
|   | | Footski
Master


Posts : 548
Join date : 2011-06-11
Age : 66
Location : Malaga, Spain
 |  Subject: Re: A lifeboat build blog...........How a kit is made! Subject: Re: A lifeboat build blog...........How a kit is made!  Sun Mar 11, 2012 7:48 am Sun Mar 11, 2012 7:48 am | |
| I must pay the framing shop a visit. That card will be ideal for lots of applications...  | |
|   | | Guest
Guest
 |  Subject: Re: A lifeboat build blog...........How a kit is made! Subject: Re: A lifeboat build blog...........How a kit is made!  Sun Mar 11, 2012 10:46 pm Sun Mar 11, 2012 10:46 pm | |
| |
|   | | Guest
Guest
 | |   | | Guest
Guest
 |  Subject: Re: A lifeboat build blog...........How a kit is made! Subject: Re: A lifeboat build blog...........How a kit is made!  Tue Mar 13, 2012 9:32 pm Tue Mar 13, 2012 9:32 pm | |
| Today , in modelling parlance, was a day I liken to the title of one of my favorite films "Bad Day at Black Rock"...........absolutely nothing went right.    Started off by painting the insides of all the cockpits with Humbrol satin teak brown.......I keep a good stock in of that, as my trawlers all had the superstructures painted in that colour.....and it usually goes on nicely even by brushing..............err NO!!!! I had two tins half full and thought I'd use those before opening another brand new tin...first mistake!. Got through the first half tin on 3 cockpits and was painting the fourth when I ran out the first tin, so stirred up the second half tin and used that to finish the 3rd cockpit and the other three left. The stooopid thing was that I didn't paint one whole set from one boat at a time, but painted the fore cabins of all three boats and then went on to the aft cabins.    Result was that the first tin dried matt and the second dried almost a gloss....and the one that I swapped tins halfway through dried a mixture of both..............as can be seen in the picture.........drat and dammit. So just as I was finishing the painting of the last cockpit and before all had dried..they still all looked a satin finish at this time......my mobile rang and I picked it up with my hand that had been holding the cabins.....thus I got paint on the thing ( I am a messy painter sad to say)......and who was on the other end.......a courier from Southampton saying that they were picking the model, that I had built for Guernsey, up from my house at 10.00 hours tomorrow morning.....GAWD!!!....I hadn't even labled ther lifebelts yet, never mind packerd the b***** thing..........rushed in to the house with the carrying box to find that I couldn't get into it to pack the boat because my electric screw driver battery was flat, and didn't have time to unscrew the thing by hand.......................but then I also needed to shred a couple of Argos catalogues for packing.........then the damn shredder kept over heating and stopping after about.a hundred pages........it was slow going with a capital S........well I think I would if I had to shred 2000+ pages of glossy paper, lol. Anyway, finally got the boat packed up, and then went back to modelling. It was then that I found that the paint had dried like garbage>>:-(    ...so decided I couldn't lose much by carrying out an experiment with the "wooden" cladding on the outside of the cabins. Starting with the smallest cabin first..the fore cabin for the H F Bailey, I decided that instead of cladding with simulated wood printed paper as on the old Anne Letitia Russell, I would use wood grain sticky backed plastic. I put a piece through the shredder....fair enough..the planks came out perfect and the exact width I needed......... they laid and stuck OK, but sadly there isn't the "stretch" in it like there is in wet glued paper and on the larger cabin top of the Mary Stanford, I had to peice around the fore port side front of the cabin with smaller pieces......and it just don't look right........so back to paper strips and that cladding will have to come off!!!. so all in all.................a very wasted few hours in time, but not in knowledge.........I won't mix tins of paint again, nor will I use stick on vynil for my planking.......suppose a result, really.  neil 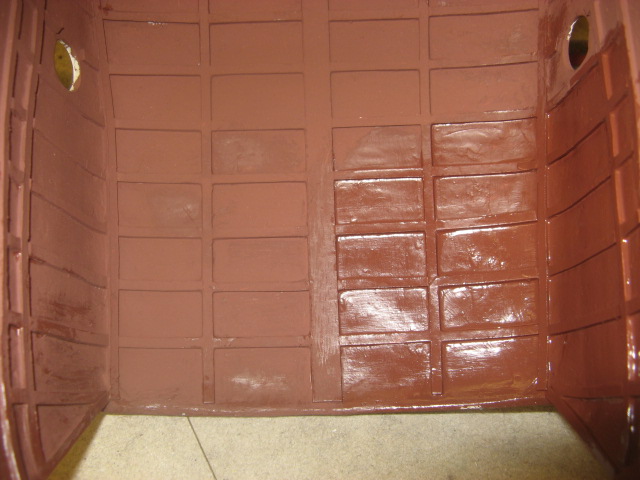 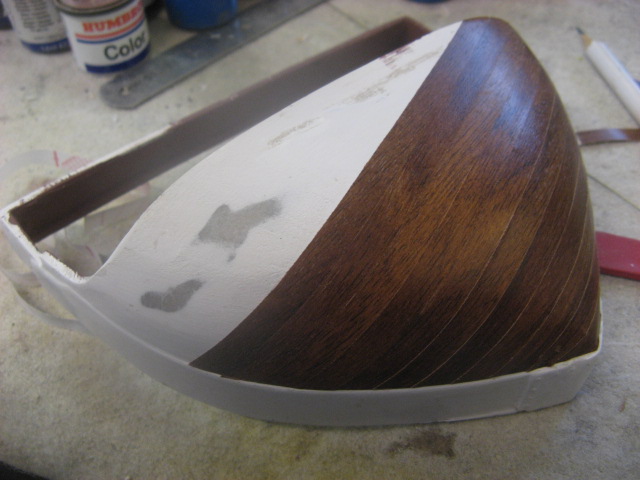 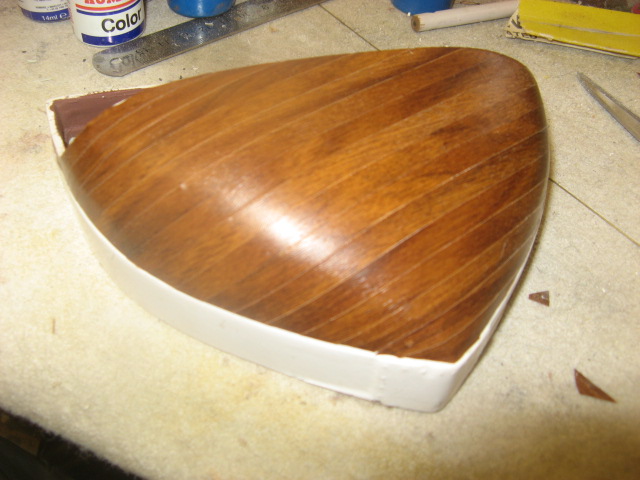 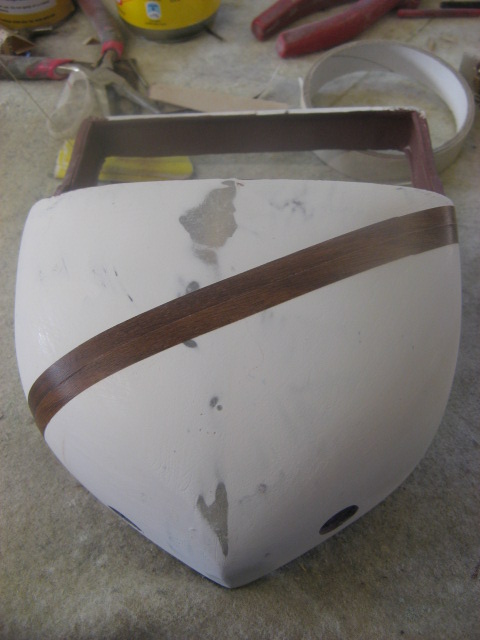 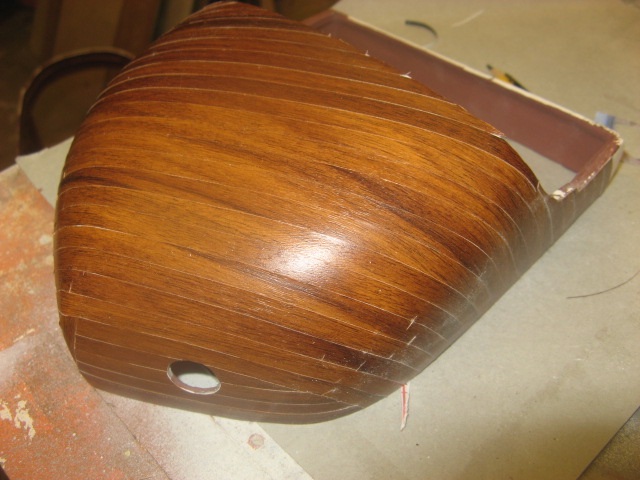  |
|   | | Tug--Kenny
Lost But Never Forgotten R.I.P

Posts : 284
Join date : 2011-06-11
Age : 82
Location : Newport, South Wales,UK
 |  Subject: Re: A lifeboat build blog...........How a kit is made! Subject: Re: A lifeboat build blog...........How a kit is made!  Wed Mar 14, 2012 3:52 pm Wed Mar 14, 2012 3:52 pm | |
| Thanks for sharing. I don't feel so bad now.  At least you got it all in one day. From now on, I shall always check I have enough paint to complete the job. Cheers Ken | |
|   | | Guest
Guest
 |  Subject: Re: A lifeboat build blog...........How a kit is made! Subject: Re: A lifeboat build blog...........How a kit is made!  Wed Mar 14, 2012 5:23 pm Wed Mar 14, 2012 5:23 pm | |
| no probs Ken.what's gone wrong with Mayhem..every one I've spoken too can't get on to it.....there seams to be a glich in the system.
neil. |
|   | | Footski
Master


Posts : 548
Join date : 2011-06-11
Age : 66
Location : Malaga, Spain
 |  Subject: Re: A lifeboat build blog...........How a kit is made! Subject: Re: A lifeboat build blog...........How a kit is made!  Wed Mar 14, 2012 6:03 pm Wed Mar 14, 2012 6:03 pm | |
| | |
|   | | Tug--Kenny
Lost But Never Forgotten R.I.P

Posts : 284
Join date : 2011-06-11
Age : 82
Location : Newport, South Wales,UK
 |  Subject: Re: A lifeboat build blog...........How a kit is made! Subject: Re: A lifeboat build blog...........How a kit is made!  Wed Mar 14, 2012 7:44 pm Wed Mar 14, 2012 7:44 pm | |
| We are all in dark. good news is, there are back ups.
ken | |
|   | | Guest
Guest
 |  Subject: Re: A lifeboat build blog...........How a kit is made! Subject: Re: A lifeboat build blog...........How a kit is made!  Wed Mar 14, 2012 9:04 pm Wed Mar 14, 2012 9:04 pm | |
|
Last edited by nhp651 on Wed Mar 14, 2012 9:32 pm; edited 1 time in total |
|   | | Guest
Guest
 |  Subject: Re: A lifeboat build blog...........How a kit is made! Subject: Re: A lifeboat build blog...........How a kit is made!  Wed Mar 14, 2012 9:31 pm Wed Mar 14, 2012 9:31 pm | |
| forgot to post a pic of the funnell capping.....so here it is. 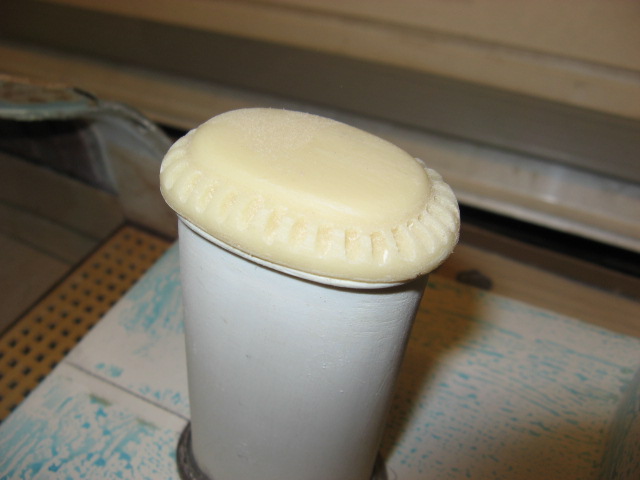 |
|   | | Guest
Guest
 |  Subject: Re: A lifeboat build blog...........How a kit is made! Subject: Re: A lifeboat build blog...........How a kit is made!  Thu Mar 15, 2012 9:26 pm Thu Mar 15, 2012 9:26 pm | |
| |
|   | | Guest
Guest
 | |   | | Sponsored content
 |  Subject: Re: A lifeboat build blog...........How a kit is made! Subject: Re: A lifeboat build blog...........How a kit is made!  | |
| |
|   | | | | A lifeboat build blog...........How a kit is made! |  |
|
Similar topics |  |
|
| | Permissions in this forum: | You cannot reply to topics in this forum
| |
| |
| |
