| | A lifeboat build blog...........How a kit is made! |  |
|
+10tattooed Tug--Kenny scalloway41 phil winks pugwash AlanP HS93 intrepid75 Windy Footski 14 posters |
|
| Author | Message |
|---|
Guest
Guest
 | |
  | |
Guest
Guest
 |  Subject: Re: A lifeboat build blog...........How a kit is made! Subject: Re: A lifeboat build blog...........How a kit is made!  Sat Mar 17, 2012 9:53 pm Sat Mar 17, 2012 9:53 pm | |
| |
|
  | |
Guest
Guest
 |  Subject: Re: A lifeboat build blog...........How a kit is made! Subject: Re: A lifeboat build blog...........How a kit is made!  Sun Mar 18, 2012 11:30 pm Sun Mar 18, 2012 11:30 pm | |
| |
|
  | |
pugwash
Midshipman

Posts : 60
Join date : 2011-06-19
Age : 78
Location : amble Northumberland coast
 |  Subject: Re: A lifeboat build blog...........How a kit is made! Subject: Re: A lifeboat build blog...........How a kit is made!  Mon Mar 19, 2012 10:46 am Mon Mar 19, 2012 10:46 am | |
| Smashing work Neil - I have really enjoyed this build post
Geoff | |
|
  | |
Guest
Guest
 |  Subject: Re: A lifeboat build blog...........How a kit is made! Subject: Re: A lifeboat build blog...........How a kit is made!  Mon Mar 19, 2012 10:07 pm Mon Mar 19, 2012 10:07 pm | |
| cheers geoff....it's been a real pleasure to build for myself for a change.
neil. |
|
  | |
Guest
Guest
 |  Subject: Re: A lifeboat build blog...........How a kit is made! Subject: Re: A lifeboat build blog...........How a kit is made!  Mon Mar 19, 2012 10:20 pm Mon Mar 19, 2012 10:20 pm | |
| Hey Neil, what's with the little coloured hearts? Are theY to remind you whilst cursing when things go wrong that you really do love modelling?
Last edited by Damien on Mon Mar 19, 2012 10:33 pm; edited 1 time in total |
|
  | |
Guest
Guest
 |  Subject: Re: A lifeboat build blog...........How a kit is made! Subject: Re: A lifeboat build blog...........How a kit is made!  Mon Mar 19, 2012 10:25 pm Mon Mar 19, 2012 10:25 pm | |
| I hadn't picked up on those matey.............lol...
My young daughter came into the workshop the other day to make a small wooden picture frame for her mum for mothers day, and had used a little punch she has for making hearts to adorn the frame and a card she had got for her.....musst have left some on my very tidy workspace....that's why I didn't notice them, lol |
|
  | |
Guest
Guest
 |  Subject: Re: A lifeboat build blog...........How a kit is made! Subject: Re: A lifeboat build blog...........How a kit is made!  Mon Mar 19, 2012 10:40 pm Mon Mar 19, 2012 10:40 pm | |
| Yikes a man's worst nightmare Female invasion of workshop space. |
|
  | |
Guest
Guest
 |  Subject: Re: A lifeboat build blog...........How a kit is made! Subject: Re: A lifeboat build blog...........How a kit is made!  Mon Mar 19, 2012 11:34 pm Mon Mar 19, 2012 11:34 pm | |
| oh she's fine mate...she builds model boats........a chip off the ol' block.....she's building a Caldercraft Ryhope at the moment!! |
|
  | |
Guest
Guest
 |  Subject: Re: A lifeboat build blog...........How a kit is made! Subject: Re: A lifeboat build blog...........How a kit is made!  Tue Mar 20, 2012 12:16 am Tue Mar 20, 2012 12:16 am | |
| That's great My missus has been told to yell WARNING, WARNING as she approaches the shed so I don't get injured when she sneaks up behind me while I'm using power tools. If Jo needs tools for anything I do the job for her she thinks a screwdriver is the end of a knife and a chisel is for opening paint tins. I thought women were supposed to be able to multi task  |
|
  | |
Guest
Guest
 |  Subject: Re: A lifeboat build blog...........How a kit is made! Subject: Re: A lifeboat build blog...........How a kit is made!  Wed Mar 21, 2012 7:57 am Wed Mar 21, 2012 7:57 am | |
| |
|
  | |
Guest
Guest
 |  Subject: Re: A lifeboat build blog...........How a kit is made! Subject: Re: A lifeboat build blog...........How a kit is made!  Wed Mar 21, 2012 11:46 pm Wed Mar 21, 2012 11:46 pm | |
| |
|
  | |
Footski
Master


Posts : 548
Join date : 2011-06-11
Age : 66
Location : Malaga, Spain
 |  Subject: Re: A lifeboat build blog...........How a kit is made! Subject: Re: A lifeboat build blog...........How a kit is made!  Thu Mar 22, 2012 7:24 am Thu Mar 22, 2012 7:24 am | |
| Beautiful Neil. Love your shredder idea... | |
|
  | |
Tug--Kenny
Lost But Never Forgotten R.I.P

Posts : 284
Join date : 2011-06-11
Age : 82
Location : Newport, South Wales,UK
 |  Subject: Re: A lifeboat build blog...........How a kit is made! Subject: Re: A lifeboat build blog...........How a kit is made!  Thu Mar 22, 2012 10:43 am Thu Mar 22, 2012 10:43 am | |
| Smashing Neil. What pleasur on the eyes. Good job you haven't got a Cross Shredder.  ken | |
|
  | |
Guest
Guest
 | |
  | |
Footski
Master


Posts : 548
Join date : 2011-06-11
Age : 66
Location : Malaga, Spain
 | |
  | |
Guest
Guest
 |  Subject: Re: A lifeboat build blog...........How a kit is made! Subject: Re: A lifeboat build blog...........How a kit is made!  Thu Mar 22, 2012 9:01 pm Thu Mar 22, 2012 9:01 pm | |
| it does that.......i've now given it 3 coats and the sheen is superb...........beautiful gloss on it.
will take a photo tomorrow.
neil. |
|
  | |
peewee
Deck Hand


Posts : 7
Join date : 2012-03-21
Age : 51
Location : Peterborough UK
 |  Subject: Re: A lifeboat build blog...........How a kit is made! Subject: Re: A lifeboat build blog...........How a kit is made!  Thu Mar 22, 2012 10:06 pm Thu Mar 22, 2012 10:06 pm | |
| I have finally finished reading this build thread from start to finish. It was a gripping read of a wonderfull set of models taking shape, all i can say is you have some great skills. | |
|
  | |
Guest
Guest
 |  Subject: Re: A lifeboat build blog...........How a kit is made! Subject: Re: A lifeboat build blog...........How a kit is made!  Thu Mar 22, 2012 10:11 pm Thu Mar 22, 2012 10:11 pm | |
| thanks peewee.
I try my best.
neil. |
|
  | |
Guest
Guest
 |  Subject: Re: A lifeboat build blog...........How a kit is made! Subject: Re: A lifeboat build blog...........How a kit is made!  Thu Mar 22, 2012 11:52 pm Thu Mar 22, 2012 11:52 pm | |
| I think you must also have the patience of Job Neil |
|
  | |
Guest
Guest
 |  Subject: Re: A lifeboat build blog...........How a kit is made! Subject: Re: A lifeboat build blog...........How a kit is made!  Fri Mar 23, 2012 12:52 pm Fri Mar 23, 2012 12:52 pm | |
| nah, damien....just dogged determination, lol, first picture for today.... This is the finish on the paper strip planks that have cladded the six cockpits of the three boats. It says on the can that after two/three coats to rub down with fine sandpaper and give another coat, but don't think I'll bother.....it's shiney enough. This, by the way, is H F Bailey's aft cockpit.......and I believe from records that the RNLI hold was the ONLY lifeboat during wartime service to have the words LIFE-BOAT painted on her cockpit to try avoiding being straffed again by German bombers/fighters during WW2.........looks quite the part. Apparently Henry Blogg took it upon himself,to have the words painted on her after being straffed twice by enemy aircraft.......  |
|
  | |
Guest
Guest
 |  Subject: Re: A lifeboat build blog...........How a kit is made! Subject: Re: A lifeboat build blog...........How a kit is made!  Sun Mar 25, 2012 10:52 pm Sun Mar 25, 2012 10:52 pm | |
| |
|
  | |
Guest
Guest
 |  Subject: Re: A lifeboat build blog...........How a kit is made! Subject: Re: A lifeboat build blog...........How a kit is made!  Mon Mar 26, 2012 8:33 am Mon Mar 26, 2012 8:33 am | |
| Forgot to say about the masts.......they were made in two halves.....the mast itself was spun on the laithe as previously shown, and then the trunk of it which fixes into the tabernacle was cut from Obeche' to the same "square section" timber as the outside diameter of the dowel used for the mast. the two pieces were drilled with a 3mm hole centrally and then a 2.8mm pin was glued into them and the whole thing joined up using 2 part epoxy (the excess glue can be then cut off when dry and the area of overlay on the glue will not be affected when sanding smooth and will take varnish without leaving a whitish area.)
Once set and hardened the mast can be reverse inserted into the laithe and the edge of the trunk adjoining the mast can be faired into the mast using abrasive paper.
I used water based wood stain to "mahoganyise" the masts (and although they were NOT made from mahogany on the actual lifeboats) the three that I am building seam to have that hue of colour about them...........and it looks quite nice to see some stained timber around.............my choice, my preference, and my modellers lisence, lol |
|
  | |
Guest
Guest
 |  Subject: Re: A lifeboat build blog...........How a kit is made! Subject: Re: A lifeboat build blog...........How a kit is made!  Tue Mar 27, 2012 10:09 pm Tue Mar 27, 2012 10:09 pm | |
| |
|
  | |
Footski
Master


Posts : 548
Join date : 2011-06-11
Age : 66
Location : Malaga, Spain
 |  Subject: Re: A lifeboat build blog...........How a kit is made! Subject: Re: A lifeboat build blog...........How a kit is made!  Wed Mar 28, 2012 7:25 am Wed Mar 28, 2012 7:25 am | |
| | |
|
  | |
Guest
Guest
 |  Subject: Re: A lifeboat build blog...........How a kit is made! Subject: Re: A lifeboat build blog...........How a kit is made!  Wed Mar 28, 2012 6:52 pm Wed Mar 28, 2012 6:52 pm | |
| |
|
  | |
Guest
Guest
 |  Subject: Re: A lifeboat build blog...........How a kit is made! Subject: Re: A lifeboat build blog...........How a kit is made!  Sun Apr 08, 2012 8:25 pm Sun Apr 08, 2012 8:25 pm | |
| A few days before I went away on holiday I decided to give the Mary Stanford and the H F Bailey a coat of paint on the engine casings and fore cabins. Because I had painted the "wood effect" cabins with a varnish I decided not to spray an undercoat using cellulose, so decided to give two coats with Humbrol acrylic No. 127, and brush paint on with my new expensive ( and I mean expensive) camel hair brushes................what a b***** mess.........the acrylic paint ( i used it because I couldn't find the corresponding number in enamel humbrol locally) and which I have never used before went on smeery, it grabbed on the "last" brush full, and plucked off the paint of the last stroke, and left such an uneven coat that I decided to wait till holiday time and try locating some enamel "down south". But it niggled me to leave such an uneven mess on my model so decided to wet and dry it smooth................even using 800 grade wet and dry, with fairy liquid in the warm water, it just plucked at the paint, and in the end took off more, in patches than what was left on the casings.............so just to satisfy myself that I wouldn't come back to a mess and think about it all whilst on holls, I took it all off except for minor areas which I'll do before repainting with brush enamels that I obtained from a hobby and toy shop in Rochester, Kent. So in the next day or so will finall take off all remaining acrylic and repaint with the stuff I'm used to. They say these things are sent to try us, and that we learn by our mistakes...............I do!!.......will never use acrylics again.......don't like it, full stop!! 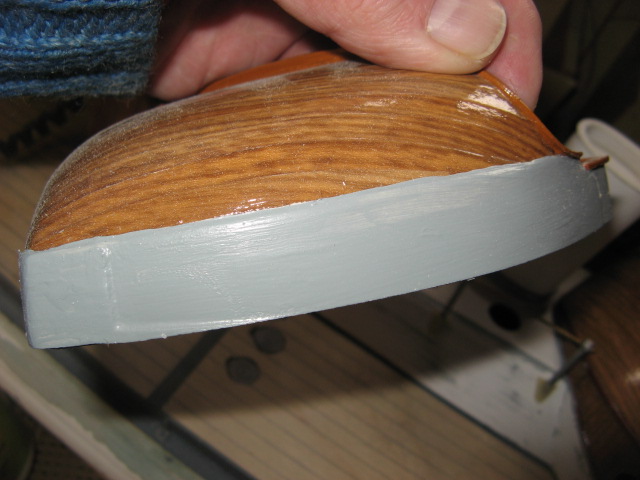 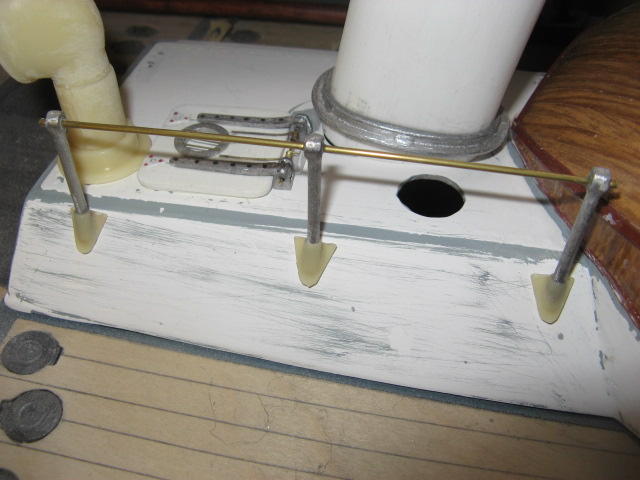 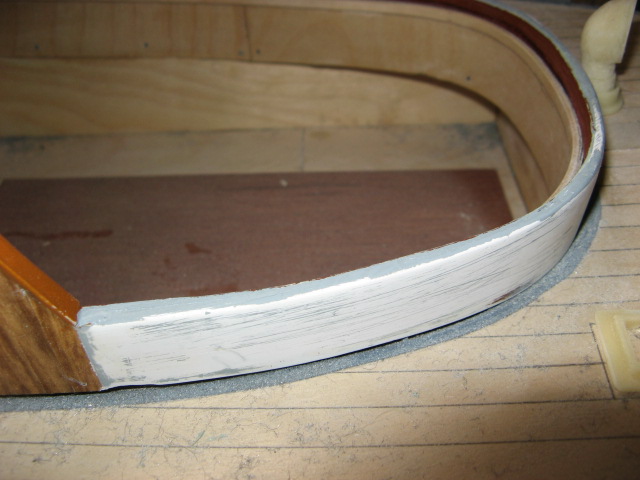 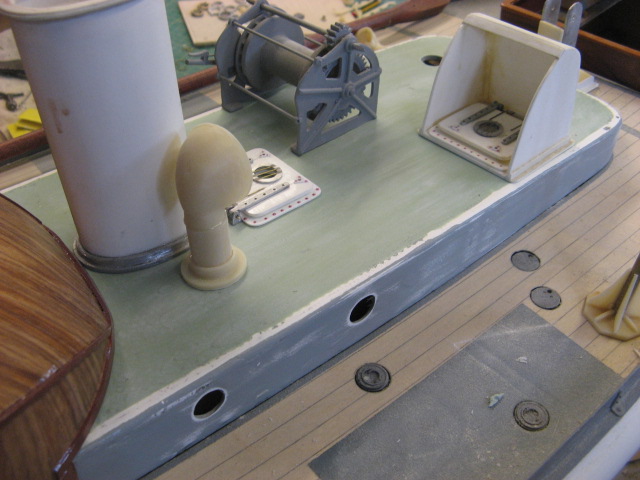 |
|
  | |
Footski
Master


Posts : 548
Join date : 2011-06-11
Age : 66
Location : Malaga, Spain
 |  Subject: Re: A lifeboat build blog...........How a kit is made! Subject: Re: A lifeboat build blog...........How a kit is made!  Sun Apr 08, 2012 9:08 pm Sun Apr 08, 2012 9:08 pm | |
| Neil,
Having just had a nightmare with getting my freshly sprayed hull wet with rain I sympathise with your little disaster.....Keep going amigo and welcome back....You have been missed.. | |
|
  | |
Guest
Guest
 | |
  | |
Guest
Guest
 |  Subject: Re: A lifeboat build blog...........How a kit is made! Subject: Re: A lifeboat build blog...........How a kit is made!  Mon Apr 09, 2012 8:55 pm Mon Apr 09, 2012 8:55 pm | |
| I decided to give repainting a miss for a little while whilst I pluck up courage to do it again......so decided to add the scupper freeing ports inside the well decks of the Mary Stanford. I am using port holes with two bars from the Metcalf Mouldings Rother class lifeboat for these as they are very similar to the valve covers, and saves making new covers, then moulding and then casting them...call it modellers licence. first I needed to get hold of an 18mm forstner bit to cut the recessed round holes ( not cut all the way through the timber deck, but I needed them to sit flush to the deck floor. The port holes were two thick in profile so needed to sand off the basic thickness from under......and I needed something to hold them with whilst sanding on my disc sander, ( as sanding by hand would have taken an eternity.) Some years ago I picked up a wire stripper in the middle of the road, but it had broken "teath" and wouldn't work as a wire stripper......but I knew, (even all those years ago, and it must have been 15 years ago that I found it) than one day it would come in usefull for something.......today it did......I sanded and modified the teath and hey presto......great for holding portholes with reinforcing bars whilst sanding. Next job was to set the forstner bit to cut no lower than I needed, and so masked off most of the bit with a masking tape stopper to allow the port holes to sit just flush with the deck........then it was down to marking off the positions in both fore and aft well decks and drill. The results are shown below. 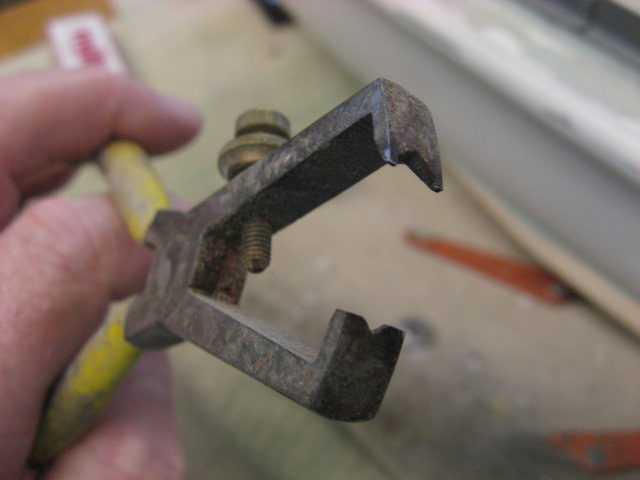 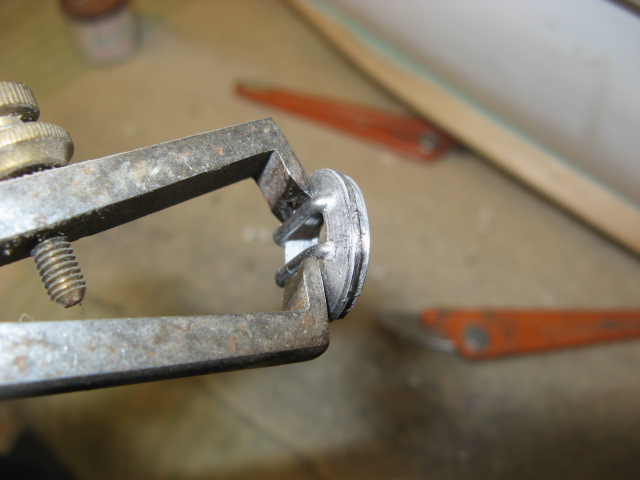  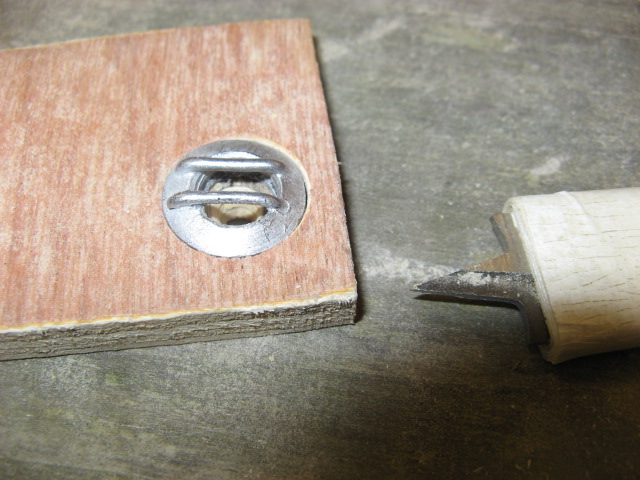    |
|
  | |
Guest
Guest
 |  Subject: Re: A lifeboat build blog...........How a kit is made! Subject: Re: A lifeboat build blog...........How a kit is made!  Tue Apr 10, 2012 9:29 pm Tue Apr 10, 2012 9:29 pm | |
| I seam to be doing a lot of flitting around from one part of the build to another at the moment and not simply getting down to one particular task in particular, and it all seams a little hotch potch........I have more fittings littering my benches than I can shake a stick at......but they have all been cleaned up, the parts are being dry fitted before painting and once the final parts of the jigsaw have been made, they hopefully in one mamoth painting and gluing session will manifest themselves into three models in one final finished amalgamation. So today ( well last night to be more accurate) I mixed a couple of packs of Milliput together and made the three fenders which will be moulded. There is one bow fender for the Mary Stanford and a bow and stern fender for the two Watson class boats. The blanks were made and moulded to fit into the support brackets and then left to go hard. Today, they were sanded and then templates in card were made for the knitted covers for the fenders. my good lady wife, who is a champion knitter and can knit virtually any garment from anything, now has the unenvious tast of knitting the three fender covers from the thread I have supplied iin stocking stitch on 2mm steel pins.........not for the faint hearted. Once they have been knitted, they'll be fitted, bandings put onto the fenders as with the real things, and then they will be moulded in rubber, so that on these boats, the task of knitting fender covers is no longer needed, as they will be shown on the mouldings. the start of the fenders shown below......the knitting is now in the hands of SWMBO who will knit the shapes of the fender covers to the cardboard patterns. 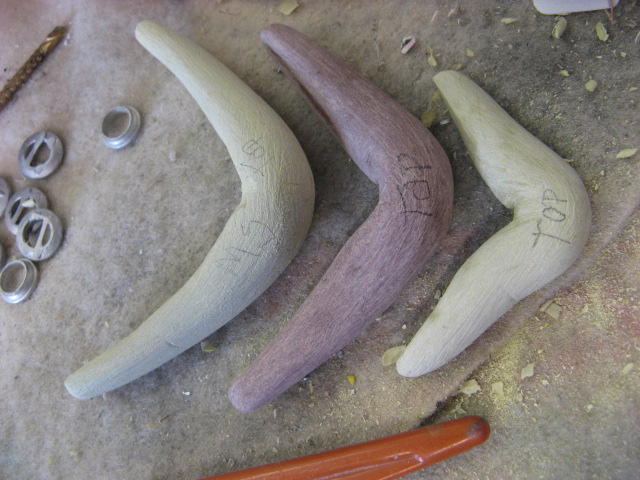 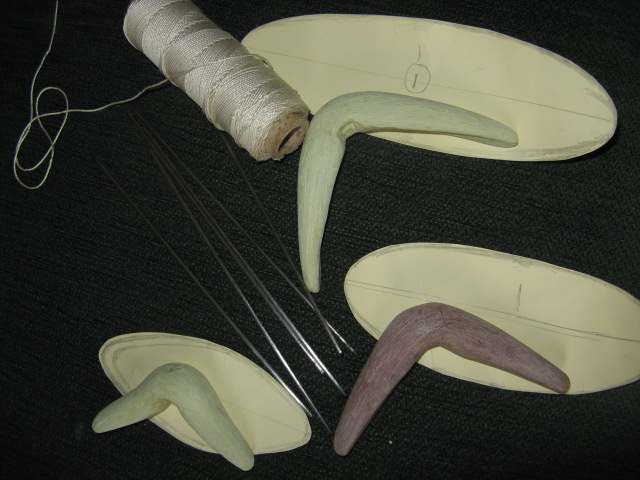 |
|
  | |
James_H
Midshipman

Posts : 62
Join date : 2012-04-01
Age : 52
Location : Amsterdam
 |  Subject: Re: A lifeboat build blog...........How a kit is made! Subject: Re: A lifeboat build blog...........How a kit is made!  Wed Apr 11, 2012 12:56 pm Wed Apr 11, 2012 12:56 pm | |
| Gob-smacking build Neil. A real eye-opener as to how much work making a kit really is. Wow! And I thought building one boat at a time was bad enough!  Looks like they're going to be very attractive kits of really nice subjects. I'd better get started saving up. | |
|
  | |
Guest
Guest
 |  Subject: Re: A lifeboat build blog...........How a kit is made! Subject: Re: A lifeboat build blog...........How a kit is made!  Wed Apr 11, 2012 11:22 pm Wed Apr 11, 2012 11:22 pm | |
| cheers for the comments James. And now for today's exploits! The knitting is coming along well but not allowed photographs of the items until all three are done %% %% %% However, spent today doing another job that needs attention before all things come together , and those were the bench seats for all the aft cabin well decks............I planned to use generic gratings from the Anne letitia Russell kit, edged with some rebated timber that I made years ago, but ran out with two boats so the third one ( the benches for the Mary Stanford) were made from the last pieces I have left of the timber grating that I and a mate produced , again, years ago. The edges of the white metal gratings were sanded to produce a "V" shape that would fit into the grove of the rebated timber and all was glued with cyano. next, the legs of the benches ( made from 2mm stainless steel rod ) were bent around a jig to make sure all legs were uniform, and cut to approximate length.....glued into more pieces of rebated timber and then four of them were glued onto the benches......they will eventually have white metal feet glued to them and set into the sides of the cockpits, after some more detailing is done to the insides of the well decks.. the legs were glued to the timber gratings with aliphatic resin, but those being glued to the white metal gratings will be fixed in place using cyano   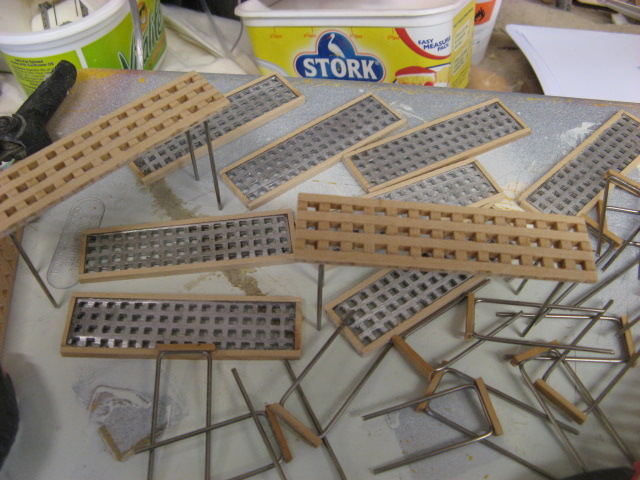 |
|
  | |
Guest
Guest
 |  Subject: Re: A lifeboat build blog...........How a kit is made! Subject: Re: A lifeboat build blog...........How a kit is made!  Thu Apr 12, 2012 9:58 pm Thu Apr 12, 2012 9:58 pm | |
| |
|
  | |
Footski
Master


Posts : 548
Join date : 2011-06-11
Age : 66
Location : Malaga, Spain
 |  Subject: Re: A lifeboat build blog...........How a kit is made! Subject: Re: A lifeboat build blog...........How a kit is made!  Fri Apr 13, 2012 8:22 am Fri Apr 13, 2012 8:22 am | |
| Wonderful progress.....must be great fun at this stage.  | |
|
  | |
Guest
Guest
 |  Subject: Re: A lifeboat build blog...........How a kit is made! Subject: Re: A lifeboat build blog...........How a kit is made!  Fri Apr 13, 2012 11:42 pm Fri Apr 13, 2012 11:42 pm | |
| Thanks Barry..........done a little more to them today, and so has my wife........and her input has been invaluable.............something I am totally incapable of doing.......knitting.........but that's for tomorrow, lol. Today Been doing a little more digressing and flitting from one area to another yet again today.......firstly I set up the "dummy" steering rod linkeage from the steering wheel in the aft cockpit of the Mary Stanford to the steering block on the aft sternpost. The Mary Stanford is the only boat of the trio to have this external rod linkeage to the steering.........the other two boats have internal universal couplings to steer the rudder with and so none of this is needed or shown. The second area of work was to the exhaust systems linked to the funnels of the boats. The centrally steered boat...the Field Marshall and Mrs Smuts had extended pipes, (made of flexible tubing so that the boat would fit into the boathouse without having to chop the funnel down, whereas the H F Bailey had chopped down funnel and ( as shown in one pic that I have seen) also the extended pipes ....the pipes were to take the exhaust fumes over the heads of the crewmen in the aft cabins. The funnel of the Mary Stanford will have just the stubbs of the pipes extruding from the base fixings which go into the top plate of the funnel. The base fittings were resin fittings made for the Clyde class lifeboat I built last year, and although as built they were bases for High tension Radio whip areals..........they were slightly modified to use as the bases for the exhaust tubes........modellers licence. 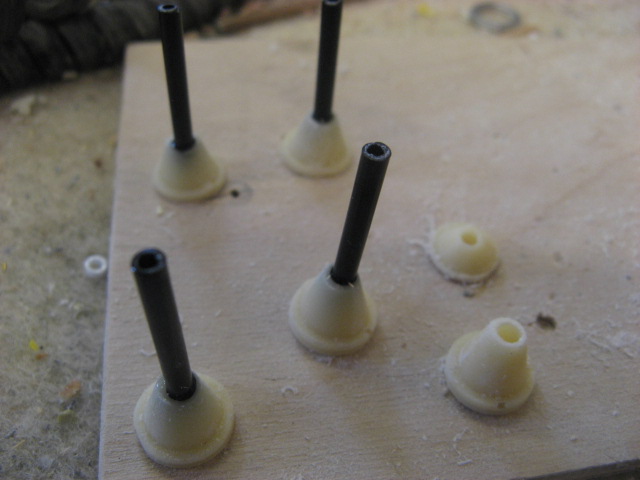 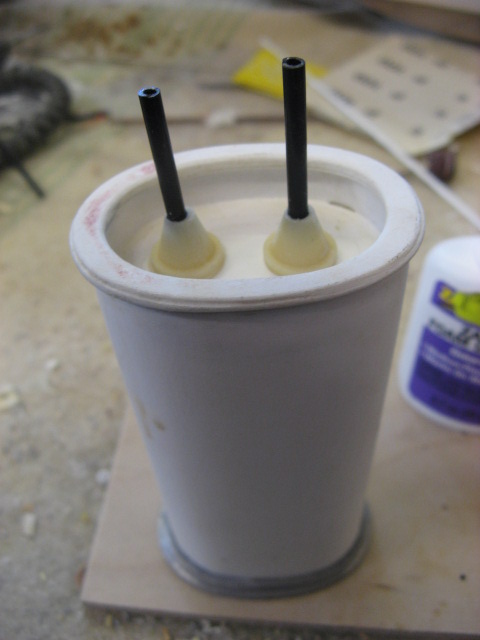 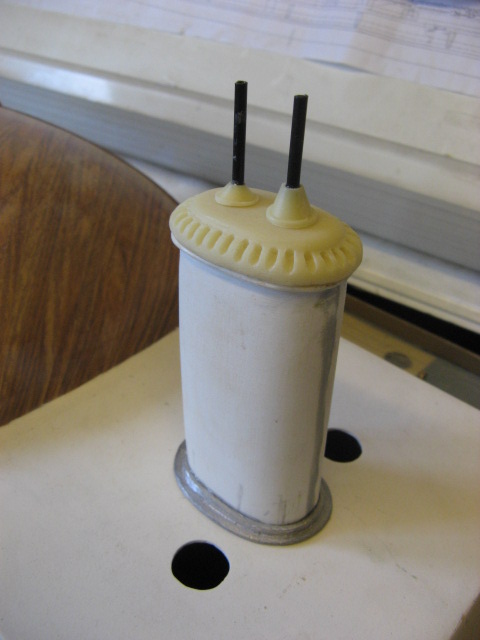 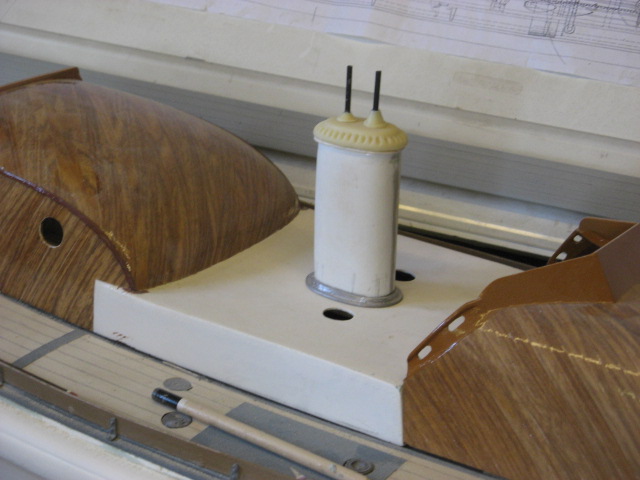 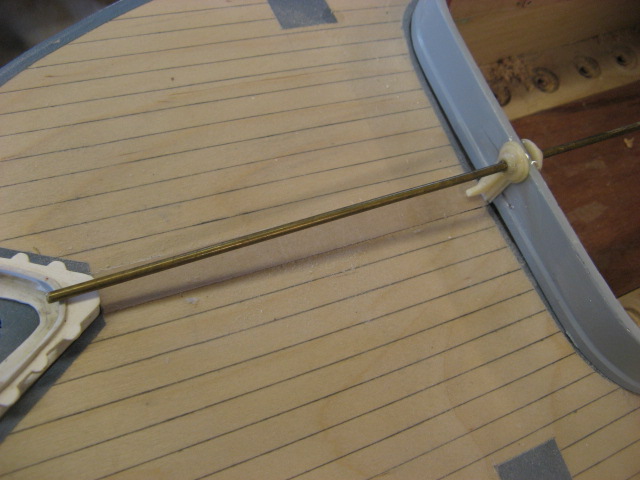 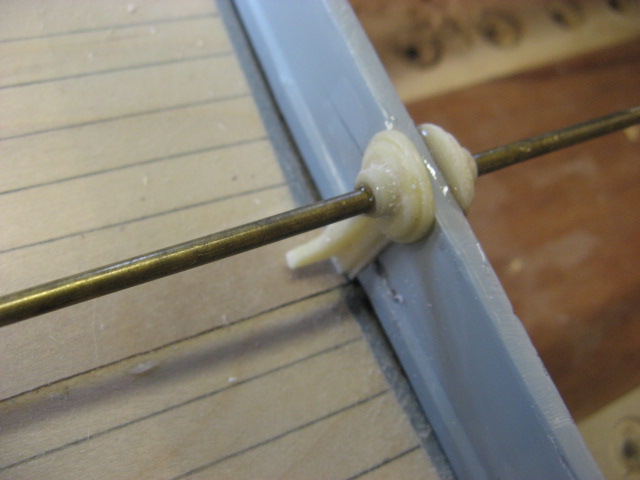   |
|
  | |
Guest
Guest
 |  Subject: Re: A lifeboat build blog...........How a kit is made! Subject: Re: A lifeboat build blog...........How a kit is made!  Sun Apr 15, 2012 12:31 am Sun Apr 15, 2012 12:31 am | |
| just got back from watching Titanic 3D at the cinema..............chap next to me must have been really frightened.....kept f*****ng and making foul smells.............poor sod............ anyway, before I went I got chance to do a few more fiddley bits. First off was to make a more convincing hand cranked pump for pumping oil on troubled waters............this will be moulded when I get round to moulding the fenders, which are being soaked in cellulose sanding sealer at the mo before waxing up. Second was to make the base and capstain for the "Smuts". The capstain was turned from brass and put into a mould some months ago (the brass master can be seen at the mo on the Mary Stanford)..the base was a modified piece from a moulding of the base for the cable stopper for the Mary Stanford. And finally the capstain and base for the Mary Stanford. The base is actually a bulge onto the outside of the engine casing of the M. S. and is made from Milliput moulded onto the side, from which I have taken a cast for reproduction of others in resin, and the capstain will be a moulding of the same capstain as used on the "Smuts"   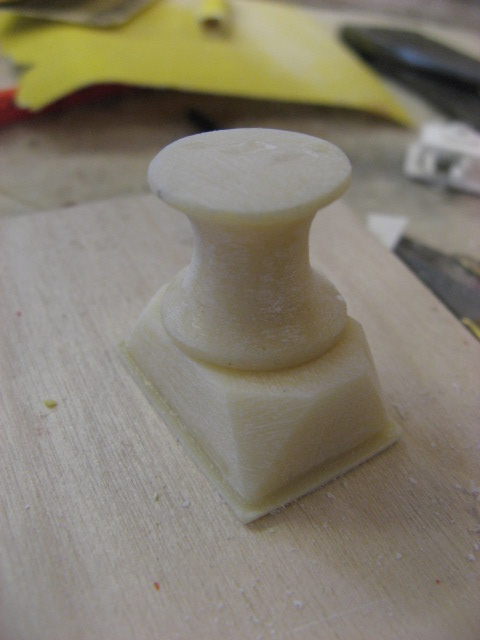     |
|
  | |
James_H
Midshipman

Posts : 62
Join date : 2012-04-01
Age : 52
Location : Amsterdam
 |  Subject: Re: A lifeboat build blog...........How a kit is made! Subject: Re: A lifeboat build blog...........How a kit is made!  Sun Apr 15, 2012 8:06 am Sun Apr 15, 2012 8:06 am | |
| Some top quality miliput sculpting skills you've got there Neil.
You have what I like to refer to as "an eye like a stinking whelk". You make it look so easy. | |
|
  | |
Guest
Guest
 |  Subject: Re: A lifeboat build blog...........How a kit is made! Subject: Re: A lifeboat build blog...........How a kit is made!  Sun Apr 15, 2012 9:17 am Sun Apr 15, 2012 9:17 am | |
| A stinkin' welk.aye...........lovely discription, lol...............I make it look easy, james, because it is.....honestly.......my grandad who taught me the basics of carving when I was a young 8 year old ( and I have the physical scars to prove the mistakes, lol) told me never to make things hard for myself when there's an easy way to do it...............and all the little bits I make on here are the easy options.lol |
|
  | |
Guest
Guest
 |  Subject: Re: A lifeboat build blog...........How a kit is made! Subject: Re: A lifeboat build blog...........How a kit is made!  Sun Apr 15, 2012 1:02 pm Sun Apr 15, 2012 1:02 pm | |
| forgot to post this last night............ Oh yes, and finally got to the bottom of what the black piping is that runs up the foremast of the "Smuts". Have been in touch withan ex crewman of the particular boat called Glyn and he has told me that the pipe is in fact electrical conduit feeding the mast lamps, as a member on here proposed earlier, and that it was finally changed for a glass electrical insulater later in it's life. He also tells me that the aft cabin fore engine casing was also planked and varnished, but have just checked with Cromer museum who had the same class of boat,RNLB Henry Blogg which I am checking at the mo, and the curator has checked that the engine casing was painted grey and not planked and varnished so a little research goes a long way. This is the photo of the "Smuts" with the glass insulater rather than the black piping running up the mast....might be tempted to go this way rather than the piping. 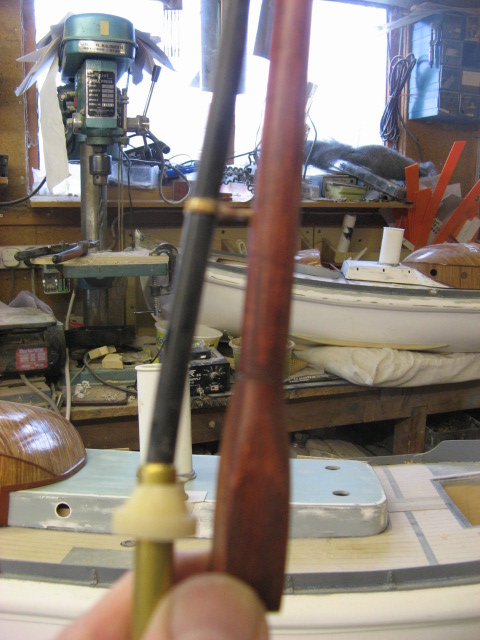  |
|
  | |
Guest
Guest
 |  Subject: Re: A lifeboat build blog...........How a kit is made! Subject: Re: A lifeboat build blog...........How a kit is made!  Mon Apr 16, 2012 8:30 am Mon Apr 16, 2012 8:30 am | |
| |
|
  | |
Guest
Guest
 |  Subject: Re: A lifeboat build blog...........How a kit is made! Subject: Re: A lifeboat build blog...........How a kit is made!  Tue Apr 17, 2012 9:26 pm Tue Apr 17, 2012 9:26 pm | |
| Over the last two days, I have been drilling holes for the "Ruffle holes" in the Keelson and rear deadwood of my three lifeboats. Ruffle holes are put into all keels of the older (and some modern ) lifeboats, and are basically the anchoring points for slipway launched boats. I say all older classic boats, with some exceptions ( not many) but as lifeboats were all supposed to be interchangeable for cover and researve fleets, they could possible all at some time in their life either end up on a slipway or on a carriage, and because of this, needed holes in the keels for rope, chain and shackles to pas through to hold them to either slipway or carriage..........and it was the ruffle holes in both bow and stern that are part of the makeup of the lifeboats hull. Because of the build of the models, and the fact that at the bow, especially I needed to first pour some liquid polyester resin into the area to be drilled, or the hole through the keel would inevitably cut through space and allow an ingress of water, and pretty quickly at that, so a reservoir of resin was poured in and allowed to set. The holes were marked, drilled and then a brass washer to cap the hole off was added and secured with cyano. then it was a case of adding the water coolers, intakes outlets, filters and the scupper flaps to the two watsons......the Barnett doesn't have any scupper flaps visible on the outside of the boat. All these fittings are generic with other boats and so they were readily available from stock. 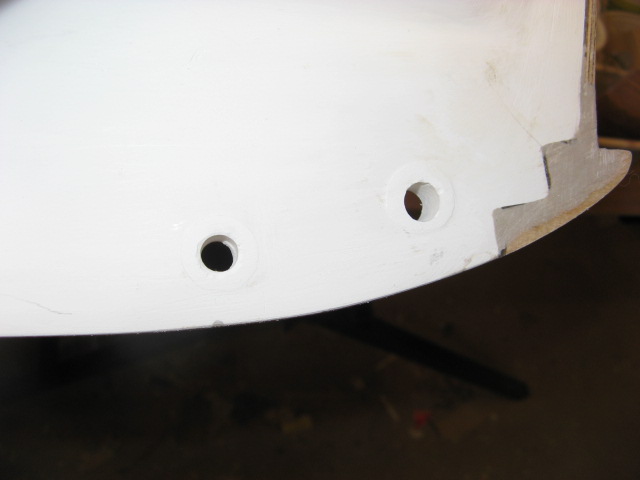 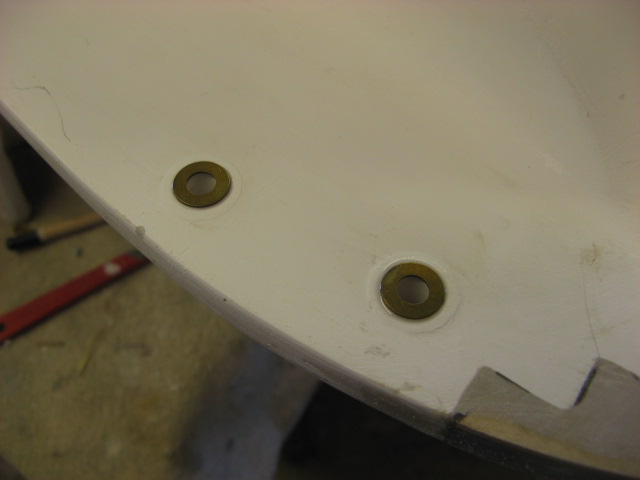 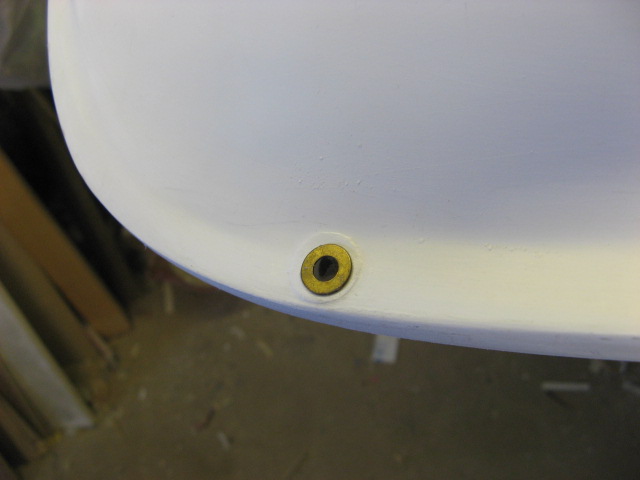 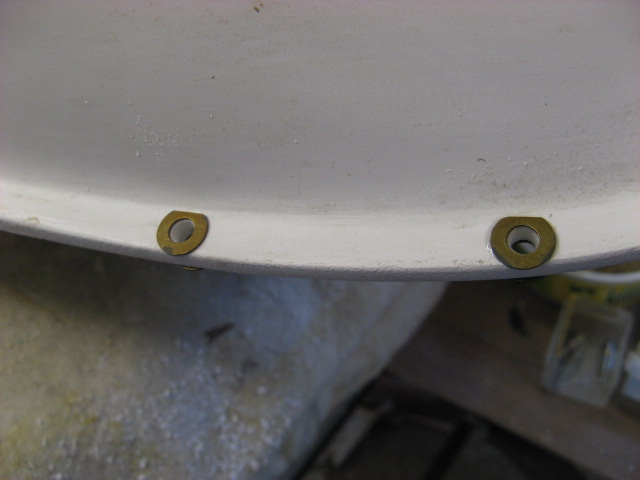 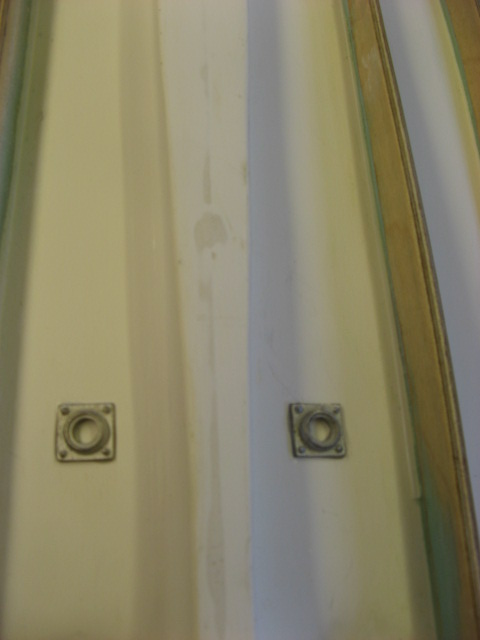  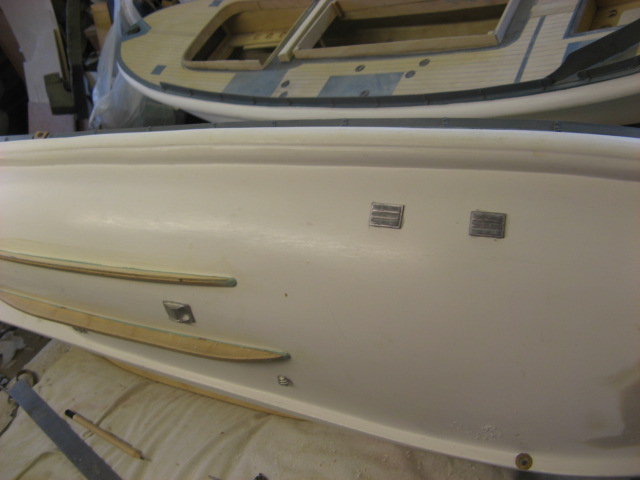   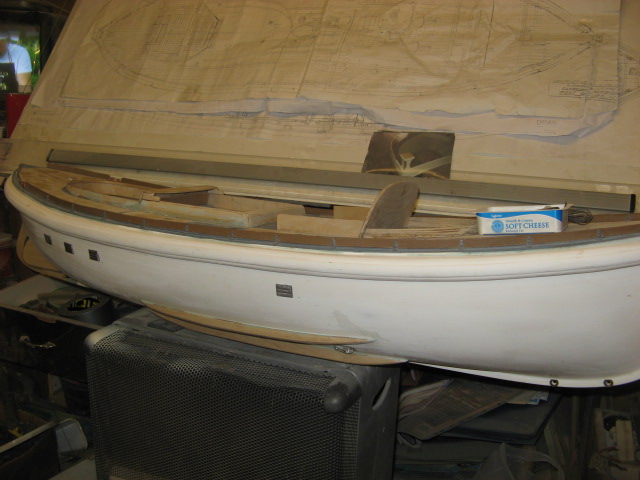 |
|
  | |
Guest
Guest
 |  Subject: Re: A lifeboat build blog...........How a kit is made! Subject: Re: A lifeboat build blog...........How a kit is made!  Fri Apr 20, 2012 10:27 pm Fri Apr 20, 2012 10:27 pm | |
| Life's been a bit busy this week with one thing or another and have got little building done on my lifeboats....but what I have doen is ( with the help of my lovely wife) finished and moulded the fenders for my boats. The Mary Stanford required just the one fender at the bow, because she has a rudder steering box at the stern, but the two Watsons, because of their rudders built into the deadwood of the stern keel, have exposed stern posts and as such have rear fenders to guard from accidental damage to the stern. The majority of knitted/crochet'd fenders that I have seen for sail, (and this is in the eyes of my wife who is a professional knitter) have used pins(knitting needles) thaty are too large in diameter and use cord that is too thick to give a scale apperance. When I built the Anne Lettitia Russel those many years ago my wife actually experimented for a few days with different size needles and different cords and thicknesses until with the help of photo's of the real fenders, we came to the conclusion that she would knit the fender covers in "reverse stocking stitch" using 2mm "pins" and a guage of thread that gave a cordage of approximately 0.8 - 1.0 mm diameter, and this gave the best results for a scale looking fender. Any smaller pins and the thread wouldn't be possible to knit, and any thinner thread,, and the desired effect of the nobbled surface just wouldn't show. So we stuck to it and have knitted the fenders to that pattern ever since, and were always knitted around a blank made from polyester resin. However, and sadly that polyester is brittle and on one or two occassions on customer's boats, this has snapped when the boat hit the bank leaving the fender mis shaped. So this time I was determined to improve on that, and decided to make the moulds (blanks) for the fenders from polyurethane resin that doesn't split or crack. My first task was to mount the fender brackets on the two Watsons (as I had done it earlier to the Barnett) and then mould the bow and stern fenders for ONE Watson only, as both Watsons would use the same blank, being built on the same hull I made the blanks from Milliput placing them in position on the boat set into the brackets, and when cured and hardened I then sanded them down to a nice even surface.  I would now have put these blanks into a mould for re producing them in numbers for kits but had then come up with the notion that as my wife was busy with some jumpers for the family it would be unfair of her to knit more than was needed, so I decided to curtail the moulding of the blanks until the fender covers had been knitted and put onto the blanks, and then I could mould them as one, thus eleviating the need for wives and sweethearts to have to knit them for their men folk. So the next stage was to make a pattern for each blank out of card so that my wife could knit the cover to thast size. And this is what I and she did. 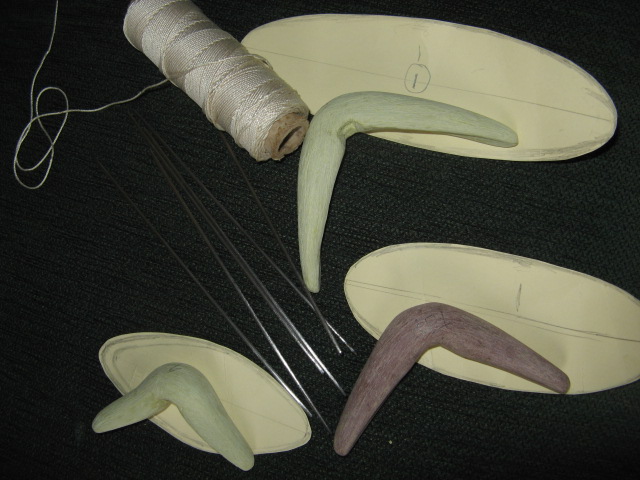   |
|
  | |
Guest
Guest
 |  Subject: Re: A lifeboat build blog...........How a kit is made! Subject: Re: A lifeboat build blog...........How a kit is made!  Fri Apr 20, 2012 10:39 pm Fri Apr 20, 2012 10:39 pm | |
| |
|
  | |
Guest
Guest
 | |
  | |
Guest
Guest
 |  Subject: Re: A lifeboat build blog...........How a kit is made! Subject: Re: A lifeboat build blog...........How a kit is made!  Fri Apr 20, 2012 10:50 pm Fri Apr 20, 2012 10:50 pm | |
| Now the fenders were ready for setting into moulds, and for this I used my usual plastecine and lego blocks for making a box before moulding them in two halves. whilst I was doing the mould I found I had a little space to spare so filled it with the two hand pumps and the aft mast bracket.......no space wasted.........rubber's too expensive, lol ooops, that one shows the set of binoculars..........I hadn't put the mast bracket in yet,   After making the rubber moulds, it was time to cast a few in polyurethane resin............they came out far better and just as detailed as I had hoped, and will save a few hours of frustration and knitting for the unhappy wives, lol. When it comes to fitting to the boats, they will just need a little trimming n the inside of the "V" to fit snuggly against the hull and then drilled for eye rings to tie to the brackets placed above and below the belting of the hulls of the boats, and painted in a humbrol mat tan paint before fitting to the boat............I thought that this would simplify the build somewhat. And the choice is always there for the hardened enthusiast to still sand the fenders smooth and add their own knitted fenders should they so wish to. 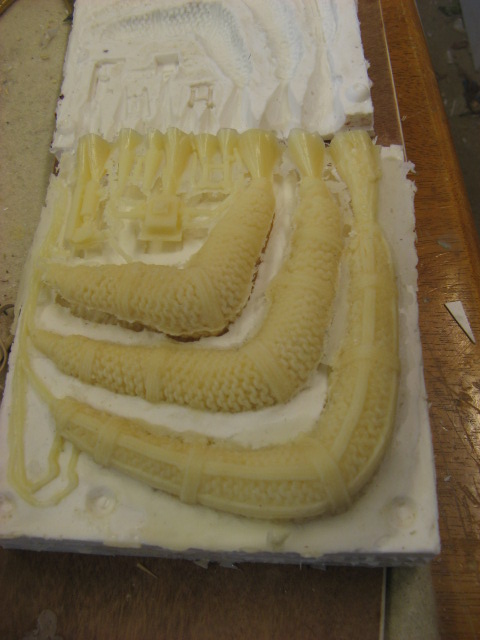 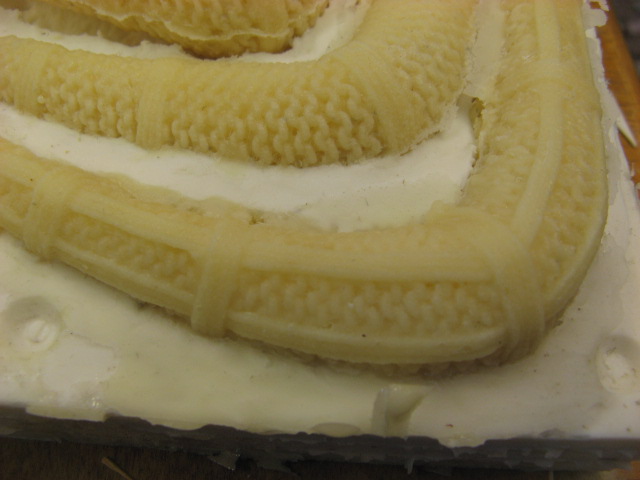 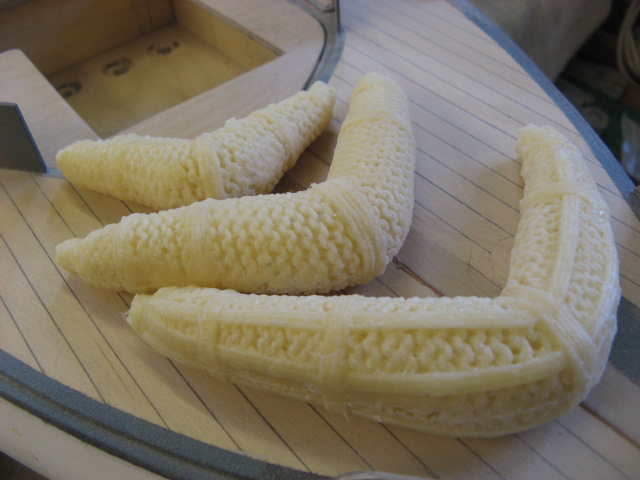 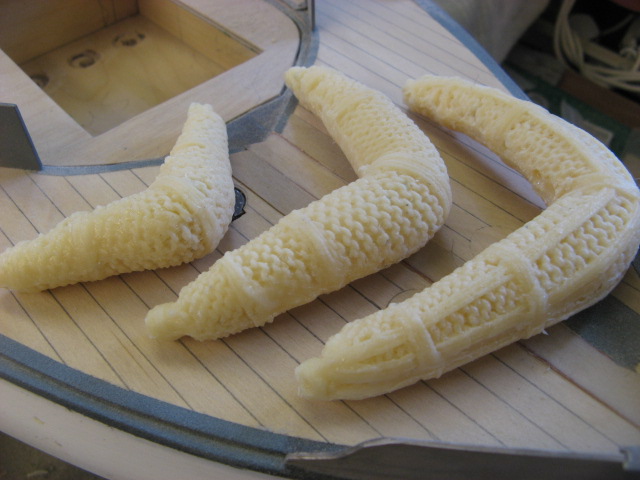 |
|
  | |
Footski
Master


Posts : 548
Join date : 2011-06-11
Age : 66
Location : Malaga, Spain
 |  Subject: Re: A lifeboat build blog...........How a kit is made! Subject: Re: A lifeboat build blog...........How a kit is made!  Sat Apr 21, 2012 7:26 am Sat Apr 21, 2012 7:26 am | |
| Brilliant Neil. You make this casting lark seem so easy..  | |
|
  | |
Guest
Guest
 |  Subject: Re: A lifeboat build blog...........How a kit is made! Subject: Re: A lifeboat build blog...........How a kit is made!  Sat Apr 21, 2012 8:52 am Sat Apr 21, 2012 8:52 am | |
| It is, Barry, it really is that easy......honestly.
neil. |
|
  | |
Guest
Guest
 |  Subject: Re: A lifeboat build blog...........How a kit is made! Subject: Re: A lifeboat build blog...........How a kit is made!  Sat Apr 21, 2012 5:51 pm Sat Apr 21, 2012 5:51 pm | |
| |
|
  | |
pugwash
Midshipman

Posts : 60
Join date : 2011-06-19
Age : 78
Location : amble Northumberland coast
 |  Subject: Re: A lifeboat build blog...........How a kit is made! Subject: Re: A lifeboat build blog...........How a kit is made!  Sun Apr 22, 2012 5:54 pm Sun Apr 22, 2012 5:54 pm | |
| Neil there has been some seriously good work going on whilst I was loafing around
in bed - Think the fenders are ace ( my good lady is very good at stitching people up
but no good with a knitting needle)
I have really enjoyed these joint builds
Geoff | |
|
  | |
Sponsored content
 |  Subject: Re: A lifeboat build blog...........How a kit is made! Subject: Re: A lifeboat build blog...........How a kit is made!  | |
| |
|
  | |
| | A lifeboat build blog...........How a kit is made! |  |
|
